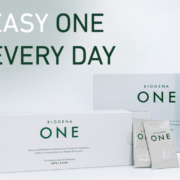
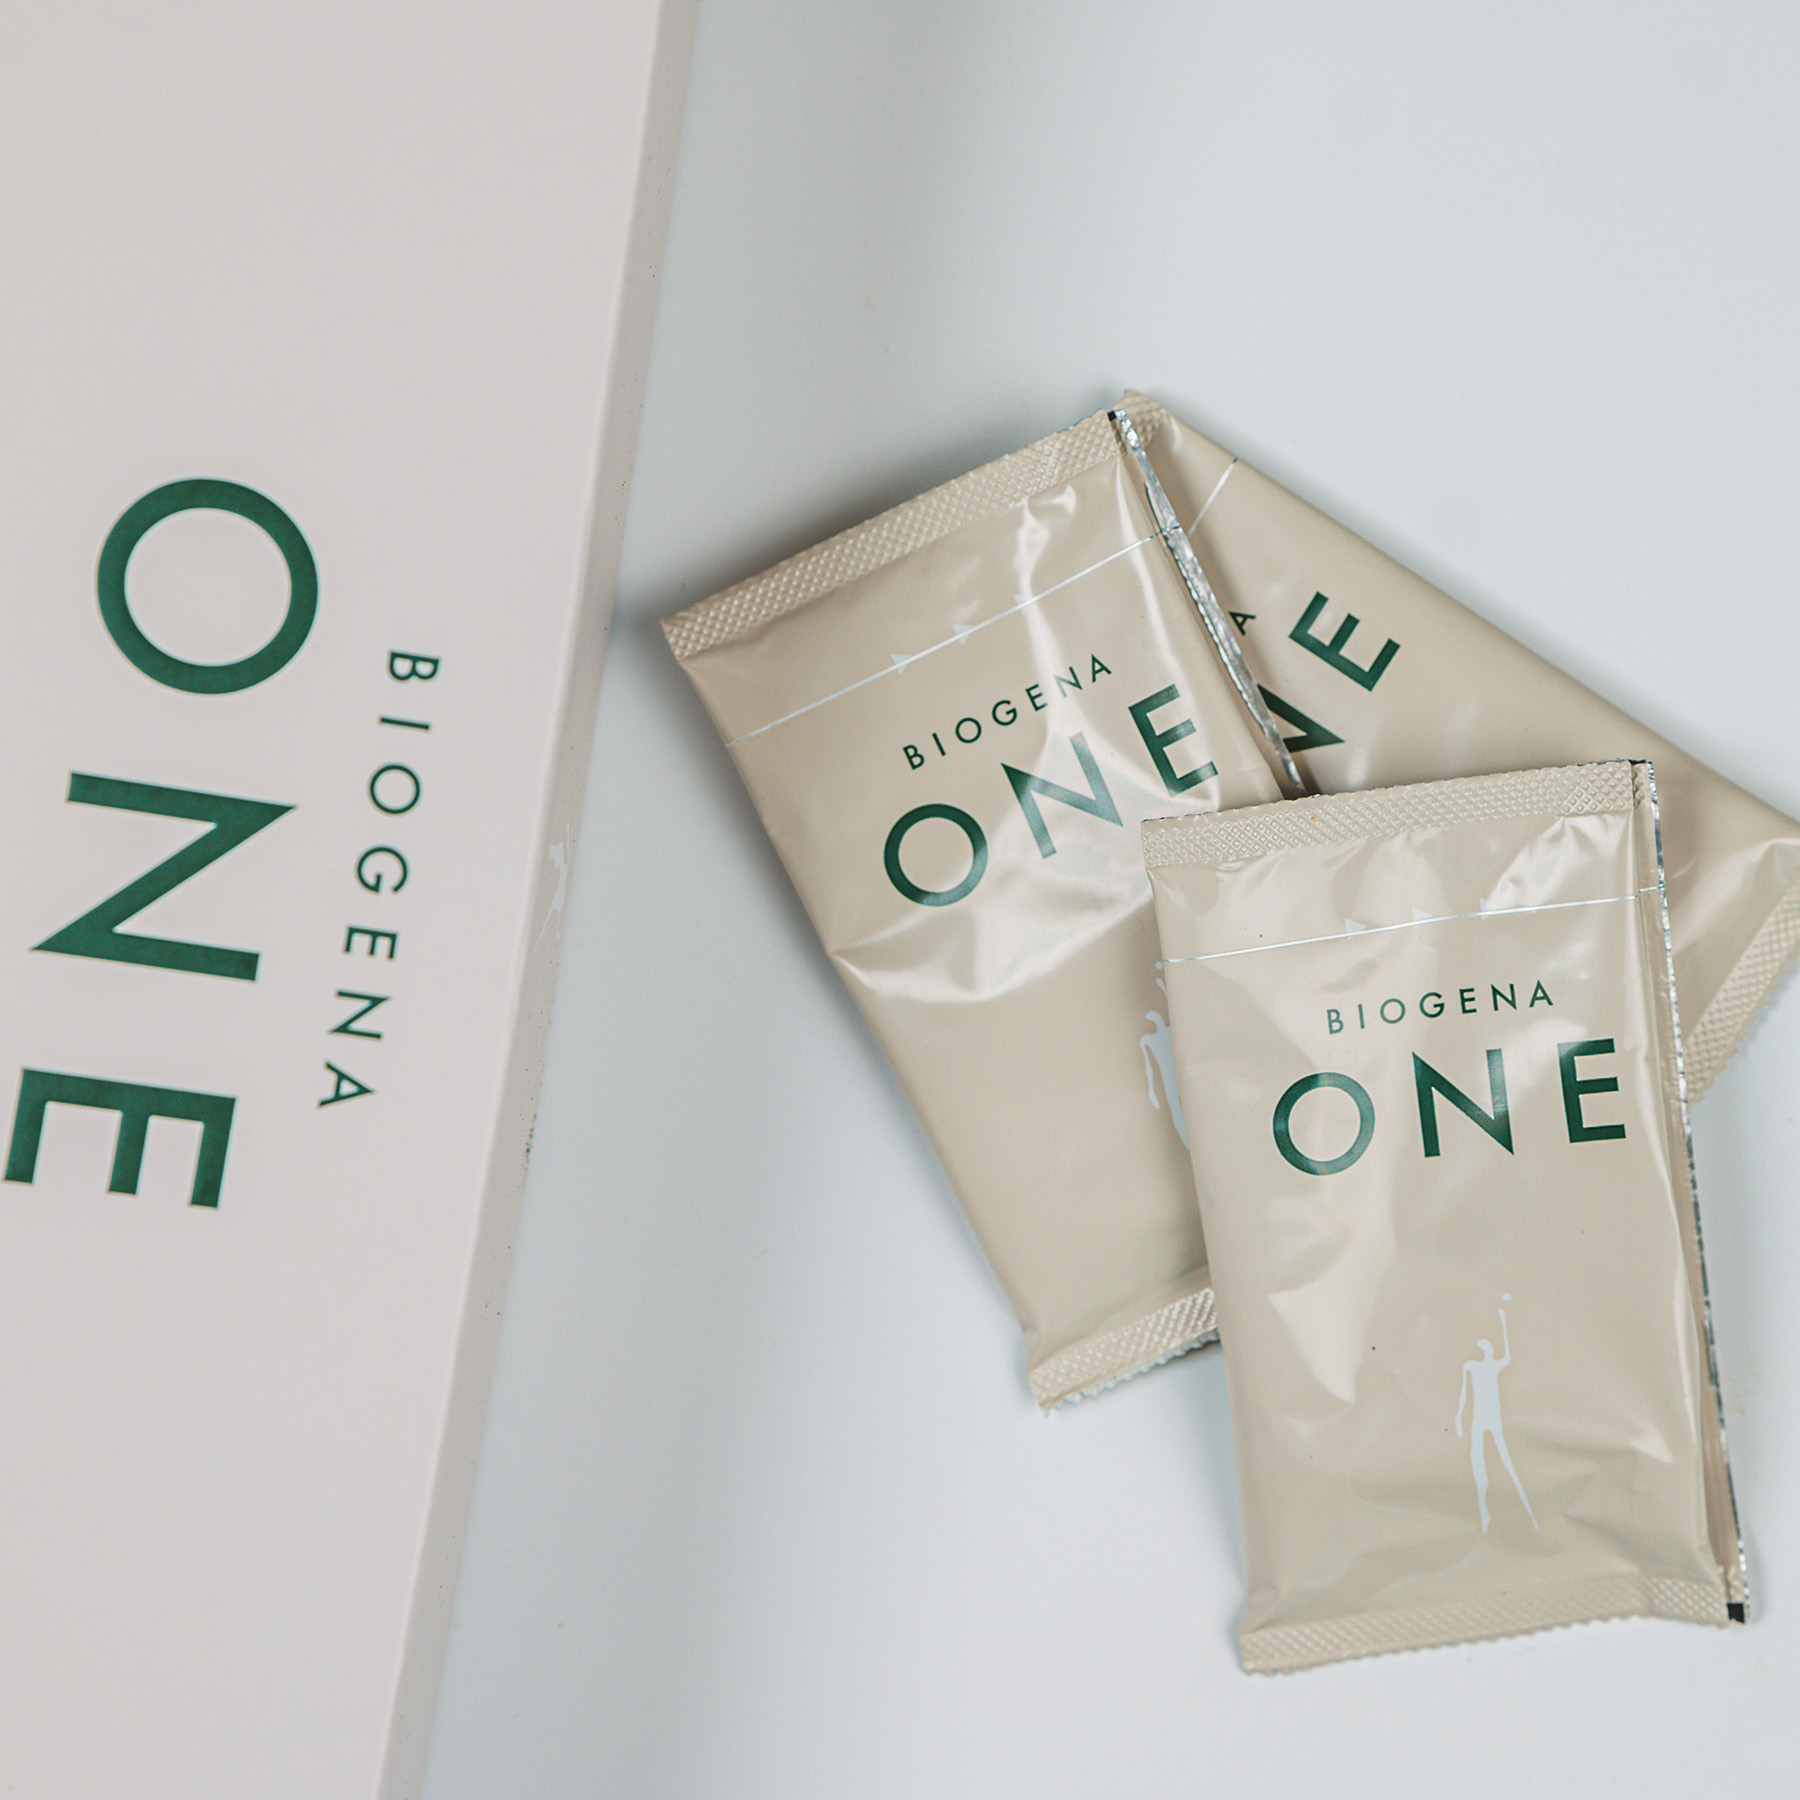
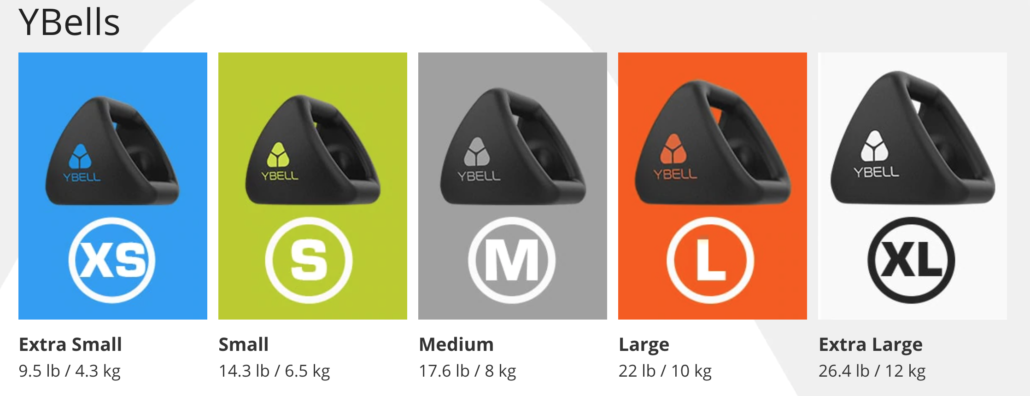
Biogena ONE offers 99 high-quality ingredients that help to establish an efficient, easy (morning) routine. To all those who initially only want to change one thing in order to start into a healthier future, but do not know how and with what because of the sheer confusion of information, I recommend this, proverbial “egg-laying jack-of-all-trades” or “Eierlegende Wollmilchsau”, as we say in German. By drinking Biogena ONE you can establish a new routine, increase hydration by drinking more water and support health with a cornucopia of flavorful ingredients. Whether at home or on the go, the ingredients are pre-portioned in individual sachets (which are very useful, especially in terms of probiotic shelf life) and can be easily mixed anywhere (using the shaker you’ll get with your first order). Please keep in mind that a routine is only as good as the one that can be implemented permanently, easily and quickly! The so-called “Green Drink Powder” by Biogena ONE is vegan and combines 13 vitamins, 11 minerals and trace elements, three amino acids, 10 lacto- and bifidobacteria strains, four carotenoids, two medicinal mushrooms, two algae, 49 selected “botanicals” and five other “power substances”. In a direct comparison of competitor products, i.e. such as AG1® or “Primal Greens” from primalharvest, Biogena ONE fortunately does not contain any extra soy, but it does contain vitamin D3! Therefore, for less than three EUR/day, you’ll get something that comes very close to the “egg-laying jack-of-all-trades” (“Eierlegende Wollmilchsau”)!

Using my affiliate-code “BERND5” you’ll continuously receive –> 5% discount <– , as well on a one-time only delivery as on the subscription!

Enjoy reading!

—> This article is also available in German! <—

Biogena One – The “egg-laying jack-of-all trades” (“Eierlegende Wollmilchsau”)

When people decide to do something for their health, it’s the first step towards a better direction. But as soon as you made this decision, you quickly feel lost again, because you don’t know where to go and certainly not how to get there at all…

This is not only the case metaphorically, but in the truest sense of the word! Because, let’s be honest, you already know that you’re carrying one or two kilos (or more) of body weight too much, no one needs to tell you, you’re aware of that yourself!

But what to do about it? You might want to intervene, but how? Caustic comments from “coaches” can be found everywhere, sometimes more and sometimes less substantial.

The journals and glossy magazines with athletes on the covers can be found ubiquitously, not only in the form of the ever-decreasing print editions, but also in digital form.

These methods are usually just as helpful as the duration of New Year’s motivation. Both burn brightly like a very dry straw fire, but the calorific value is low and therefore short-lived.

Thus, with the supply of information for a meaningful start to a healthier life, it seems to be indirectly proportional to the actual outcome.

In other words, the more information being available/accessible, the less easily any of it can (and is) usually implemented.

We are familiar with this phenomenon from online streaming services. Usually, a consumer has a subscription with two, three or more providers, which offer you a veritable flood of movies, series and other stuff.

But it’s not uncommon to waste more precious lifetime choosing a movie instead of actually watching one. Well, did I catch you here?

The same applies to the selection of ice cream, for example. If the offer were limited, let’s say to strawberry, chocolate, vanilla, and lemon, then the choice would be easy (easier) for you.

But if you have e.g. 35 different varieties, then you will spend more time looking at all the varieties, then thinking about which ones you want to lick, and finally being dissatisfied with your choice, no matter which flavor.

That’s exactly how “Joe Average” feels when he decides to eat healthier at the beginning of the year.

He is, quite simply, overwhelmed by sheer abundance. And instead of just starting somewhere and somehow, he doesn’t do it at all and resigns!

There is just too much of everything these days and you just don’t want to waste time (of which you supposedly always have too little) reading up on every dietary supplement, every “medicinal mushroom”, every tonic and other things.

Just because there are studies on everything today and as we all know, “numbers don’t lie”. But liars often work with numbers, and for every study, there is often, if not always, a counter-study!

As you can see, you are always pushed into a “neutral” corner because you don’t believe anything or anyone anymore, only to end up in the imaginary corner and become a “corner stander” who continues to shine only with laziness and listlessness.

So how, where and with what can you start sensibly? I’m not going to recite a litany to you, dear reader, about why Biogena ONE is the “Messiah of dietary supplements” and everything else would be tantamount to worshipping idols!

But this section raises the question of whether Biogena ONE is the much-cited “egg-laying jack-of-all-trades” (“Eierlegende Wollmilchsau”) or not.

If you don’t know what to do with the term, it means something that basically only offers advantages and is suitable for all eventualities.

In German we have a word called “Eierlegende Wollmilchsau” which, literally translated means “egg-laying wool milk sow”. It’s an imaginary (non-exiting), metaphorically being used to describe something that only offers positives things and the absence of negative side-effects.

Is this the case with Biogena ONE? To answer this, let’s put this question into context, which I will do in the following sections.

In the end, after (my) conclusion, I leave it to you, dear reader, to act or to remain in the “neutral corner” until something else comes around. Cause, as the saying goes, “what comes around, goes around”.

Biogena ONE – The reality of a routine

Before we get into the ingredients and look at competing products, I would like to dig a little deeper into the aspects described above.

After all, the “best” product will only ever be the one you consume regularly. Likewise, the “best” exercise is the one you do!

Well, “regular” is a term to be defined, after all, once a year could also be a certain regularity.

But in reality, it seems that only what you continuously implement will have a significant effect on your life.

Only when you stop thinking about IF to do something, but simply do it because it has become your (daily) routine. When it has passed into “flesh and blood”, as we say in German.

Think about it, do you think ABOUT brushing your teeth every day or do you rather THINK TO DO it?

Do you think ABOUT taking a shower or do you simply take a shower? It doesn’t need a “Tadaa”, but an Aha!

Of course, you could also put together and consume all the ingredients of a product on your own, but that would not be easy and what is not easy to implement into the daily rhythm (or should I say daily routine?) is, according to experience, not implemented long enough to achieve significant results in the foreseeable future, right?

In the beginning, nothing is easy (cause it’s new) therefore it should be simple to use a new product.

The “trick” is to integrate something that is so simple that it doesn’t cause too much effort in daily implementation, but still achieves tangible results as quickly as possible.

As you can see, and as you have probably already experienced yourself, it is the well-known thin red line on which you move.

A balancing act on razors edge, so to speak. You start something hoping that it will finally bring benefits, only to skip it soon.

However, hope is not a strategy either! Have you ever wondered why fitness equipment from Teleshop can always be folded up and easily be stored in the closet or under the bed?

To not make you feel guilty when you see them standing around, not being used (anymore), but still having to pay them off for a long time. Because, as we say in German. “out of the sight, out of the mind.”

Biogena ONE – The Minimum effective dosage?

Forgive me, dear reader, at this point (if you have made it this far), the somewhat longer introduction to the topic.

But instead of the pomp of a product presentation, I would rather share my thoughts with the suggestion that you could benefit not only from the nutritional values of the product, but also from a real added value for your life!

This lies exactly in the so-called “minimum, effective dose”, the “Pareto principle” or, if you are more of a fan of numbers, the 80-20 rule.

Especially, but not exclusively, for newcomers, newbies and those who are looking for the proverbial “egg-laying jack-of-all-trades” (“Eierlegende Wollmilchsau”), there is an approach that aims to generate 80% return at 20% input.

In life, basically everything is simple, after all, grass does not try to grow, but it simply grows.

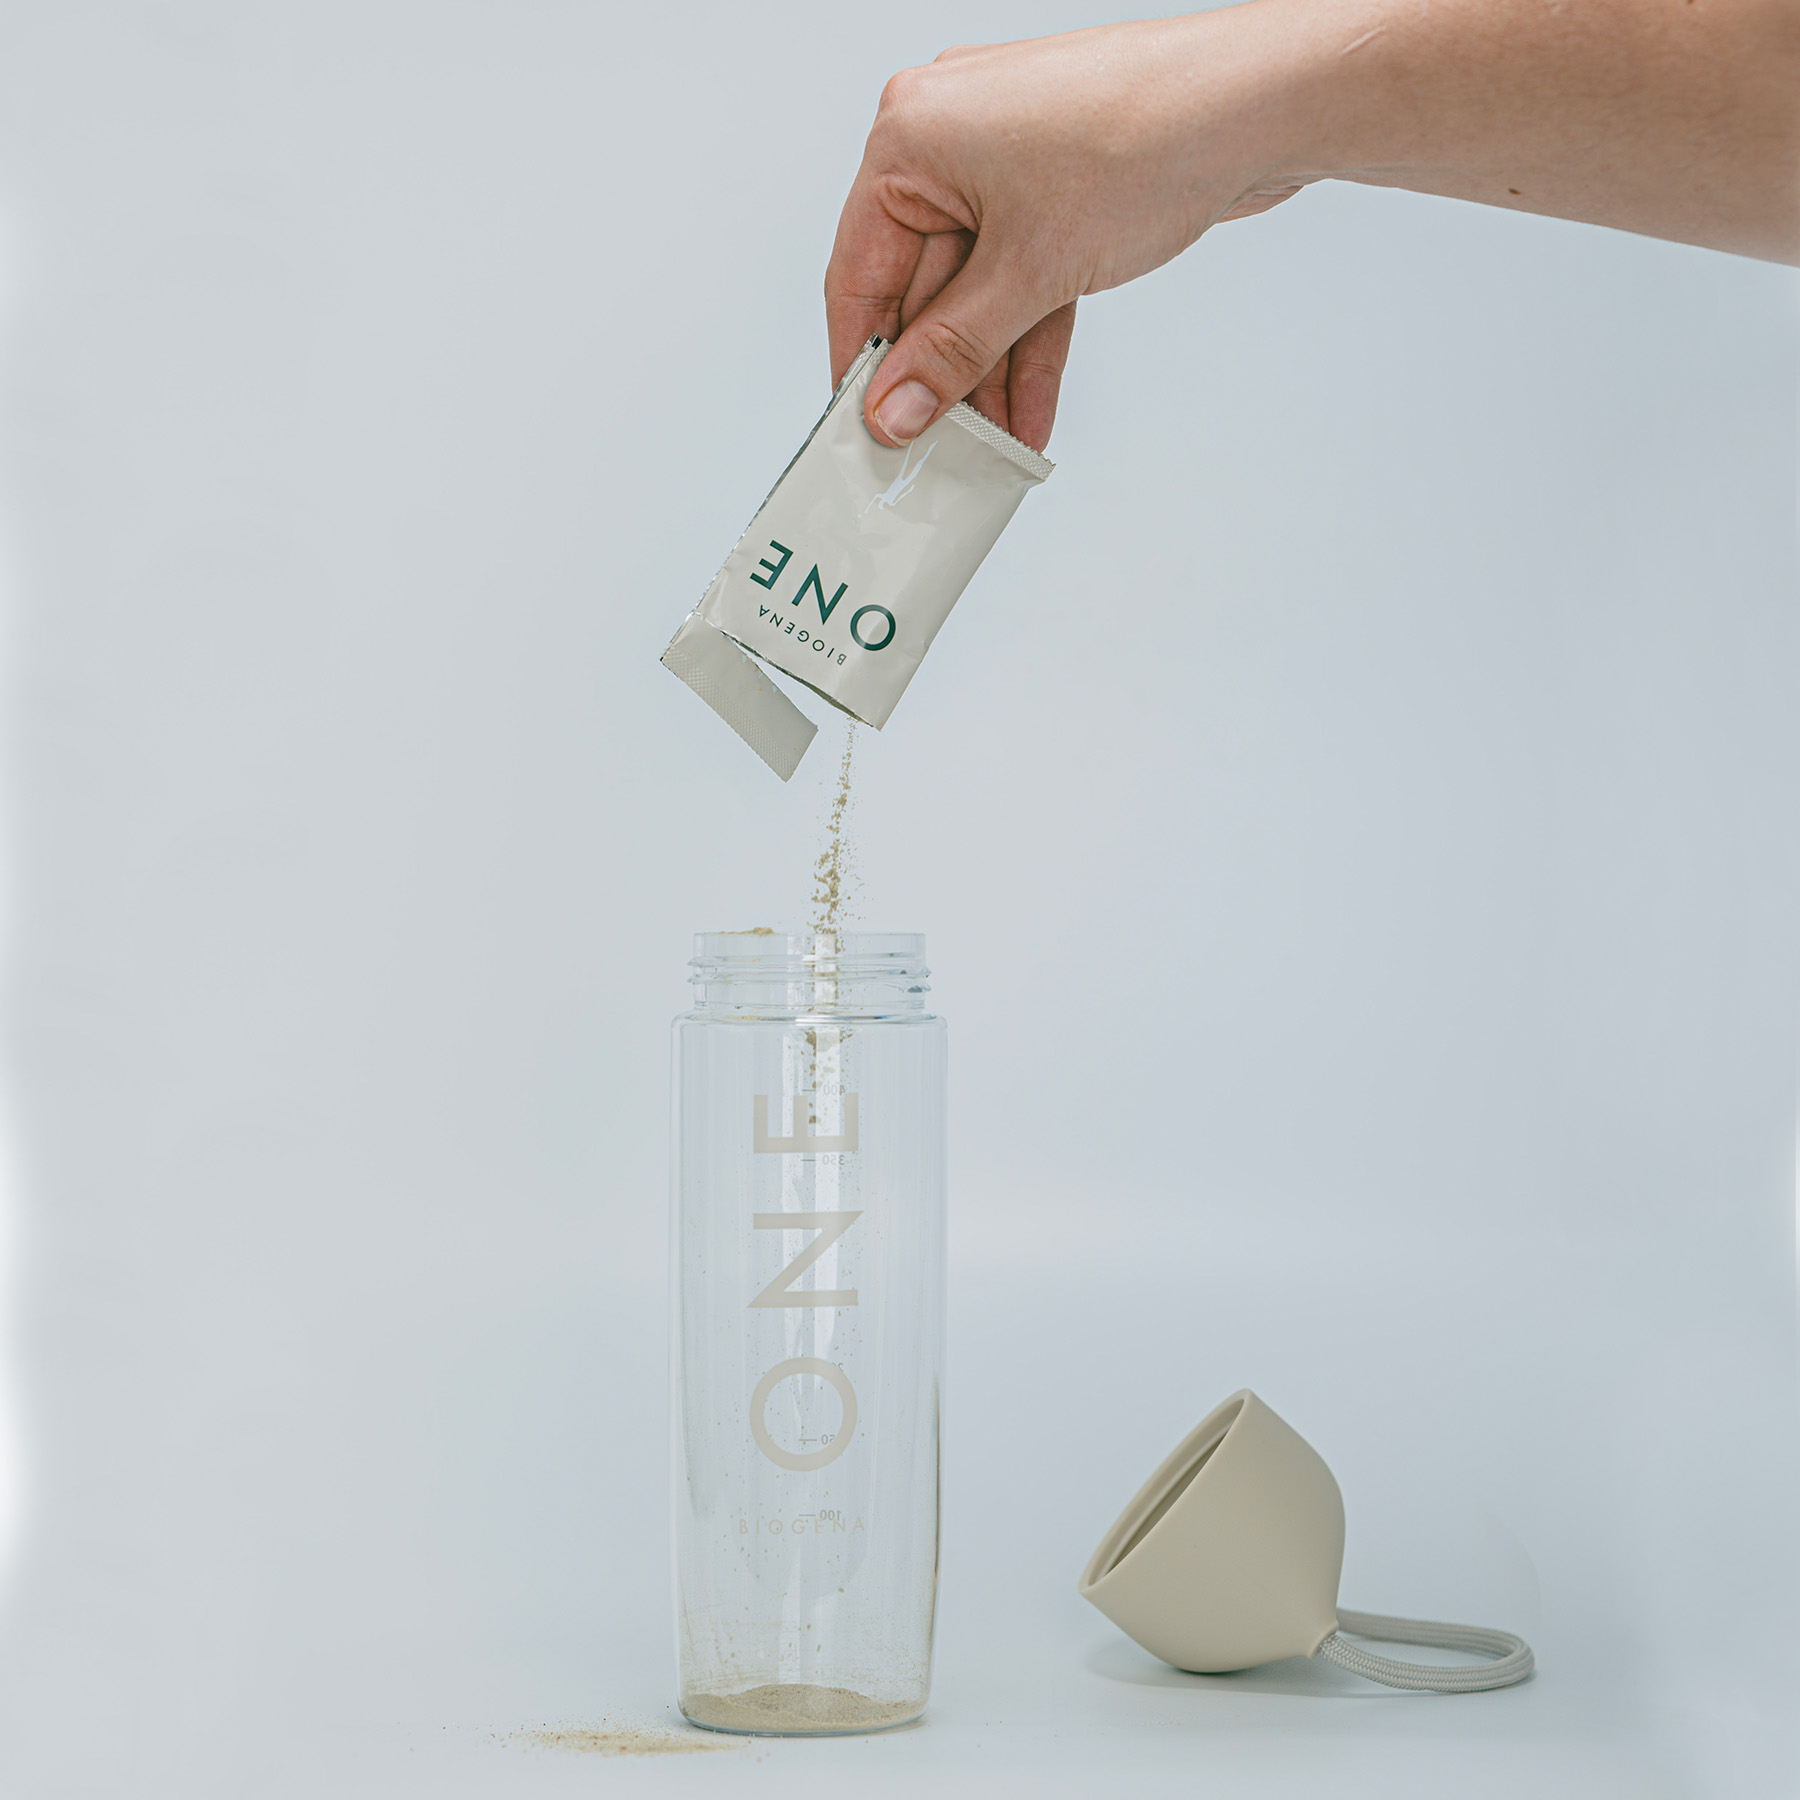
Just do the same as the grass does. Don’t think, just do, by simply drinking a packet of Biogena ONE dissolved in water in the morning.

There is no nasty grass in Biogena ONE, but there are so-called “greens”, i.e. all those things that you know are healthy but never eat.

Or at least not to the extent that it would make a difference. After all, the “alibi lettuce leaf” or the slice of cucumber on the burger will not help to provide the body with so many nutrients from vegetables that it would somehow be beneficial to health.

It is usually said: “Doing something is better than doing nothing at all”. But is that true? Or, to put it another way, do you think that’s a minimally effective dose?

If you consume two broccoli sprouts a day, will there be any benefit? Hardly!

Wouldn’t it be easier if you didn’t have to shovel kilos of vegetables, fruits, etc. and swallow more capsules and pills every day than a chronically seriously ill person?

Wouldn’t it be easier to consume a single product, thereby absorbing most of the daily needed minerals, trace elements, vitamins, etc., plus getting hydrated and not having to worry about it for the rest of the day?

You caught me because this is a rhetorical question. Of course, it would be easier!

Now I can already hear the objections of those who say that you can get all the necessary vitamins, etc. by consuming fruits and vegetables.

With the mineral-poor soils on which our food is grown, this is, sadly, arguably a pointless endeavor these days. Not least because a lack of quality cannot be compensated for by increased quantity.

But I don’t want to go into that discussion any further here.

Even IF it WERE possible, there would still be the question of how MUCH fruit and vegetables you would have to eat, and whether you would be busy eating and digesting all day, etc.

This information article is supposed to answer the question of how to achieve a maximum return on investment with minimal effort and whether Biogena ONE can help you with this approach.

How to absorb a proverbial cornucopia of nutrients and also integrate it into an everyday life that is not just twiddling your thumbs.

If you take a sachet of Biogena ONE every day, you also establish a new routine, and that – if it is kept – is what counts in reality.

No matter what people are going to tell you, benevolent reader, for mumbo-jumbo. You would have to eat this and that daily.

The fact is that probably 90% of people simply don’t do this because it’s too time-consuming. Whether everyone is a deadbeat and whether you really don’t have time to implement it, that basically doesn’t matter at all.

The fact is what can’t be easily implemented is usually not sustained in the long run!

From this point of view, the product Biogena ONE is not “the next best thing”, but from the point of view of invested effort and benefits received, it is, from my point of view, even “the better thing”!

But more on that in a second…

Biogena ONE – A Big Bang for Breakfast?

I recommend taking Biogena ONE, first thing in the morning.

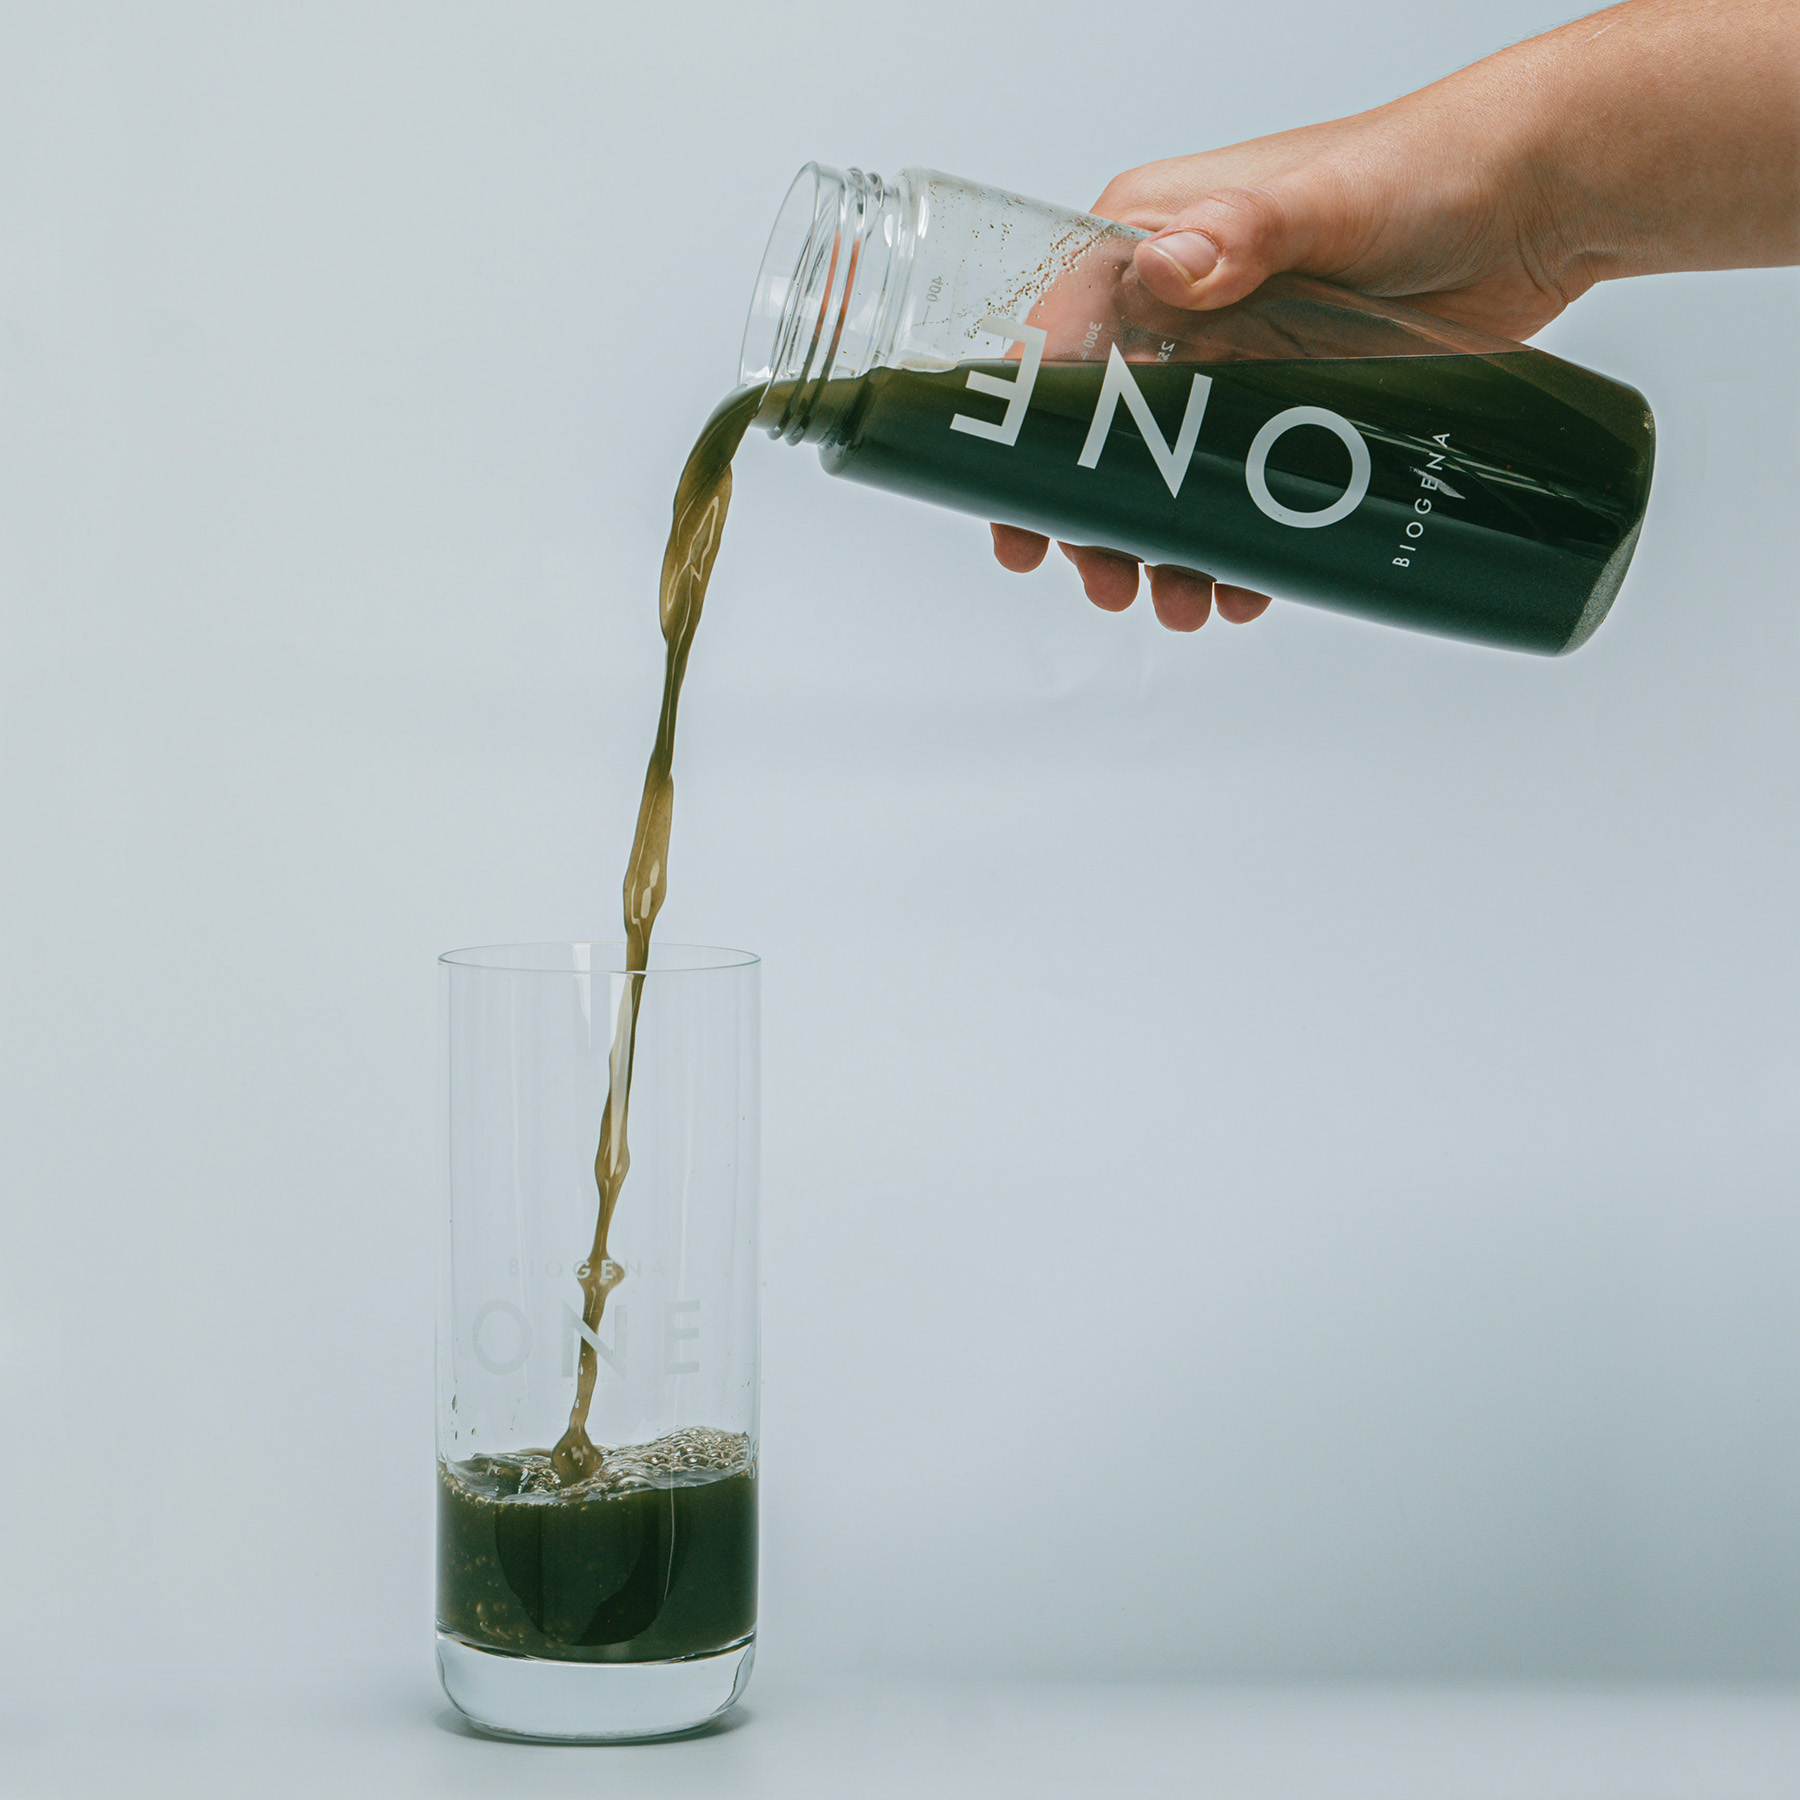
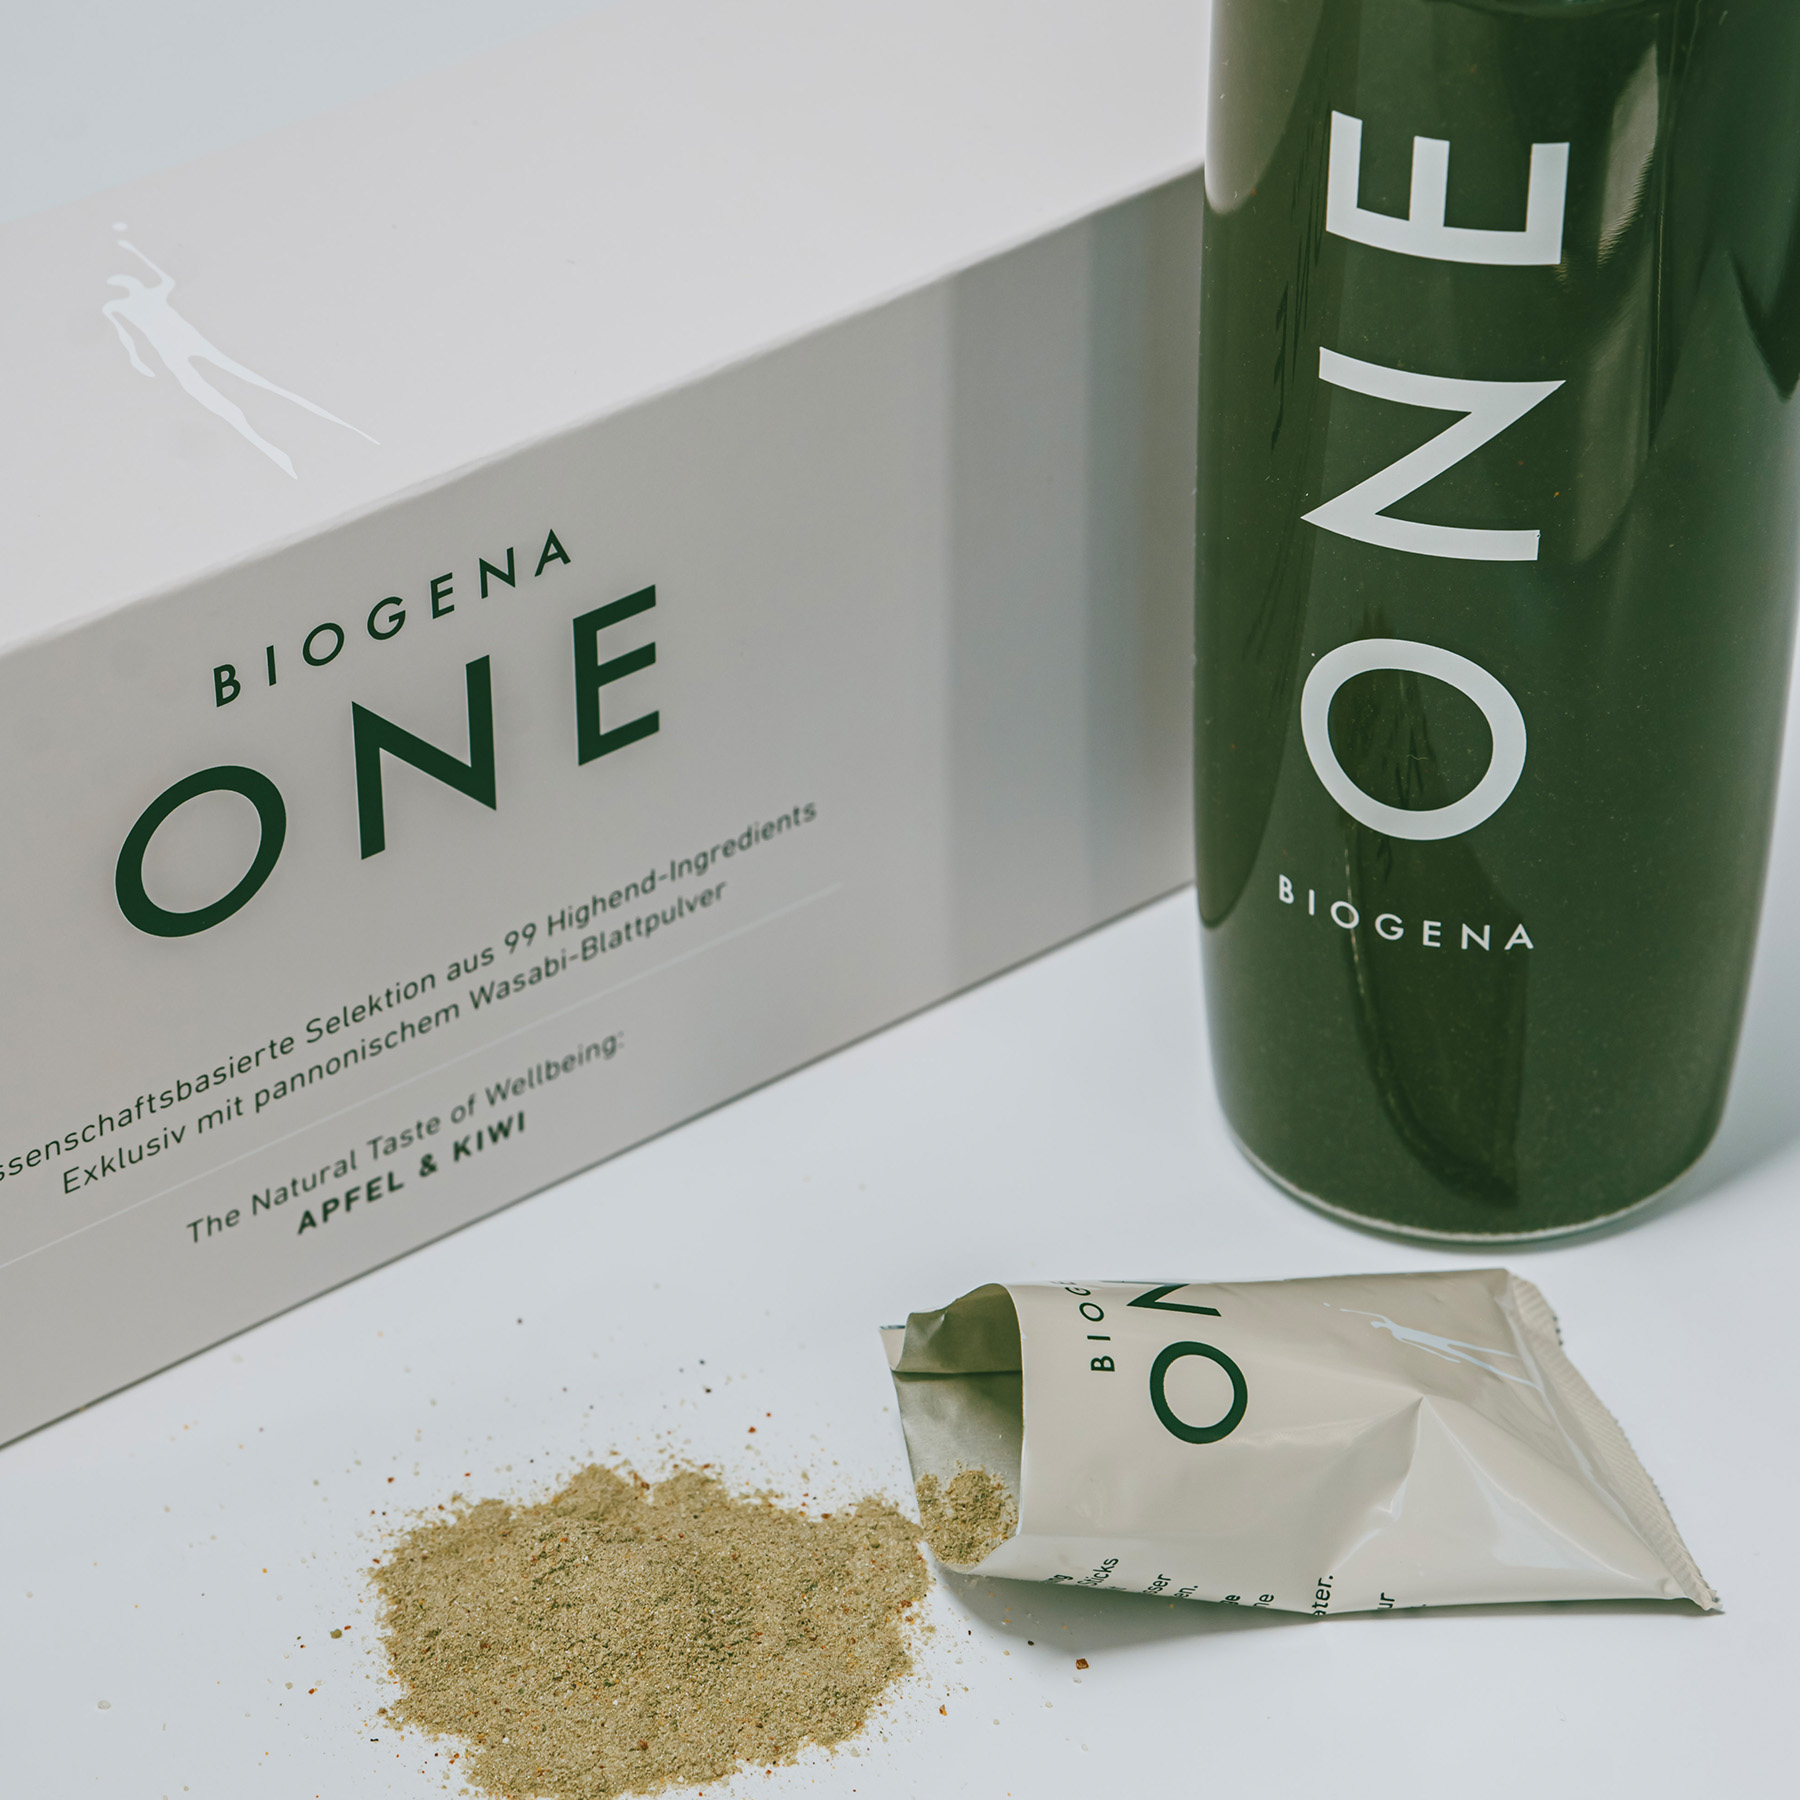
This is due to the following reasons: The product comes with a special drinking bottle (see picture), simply fill it with water (300-400ml) and add the one packet/sachet.

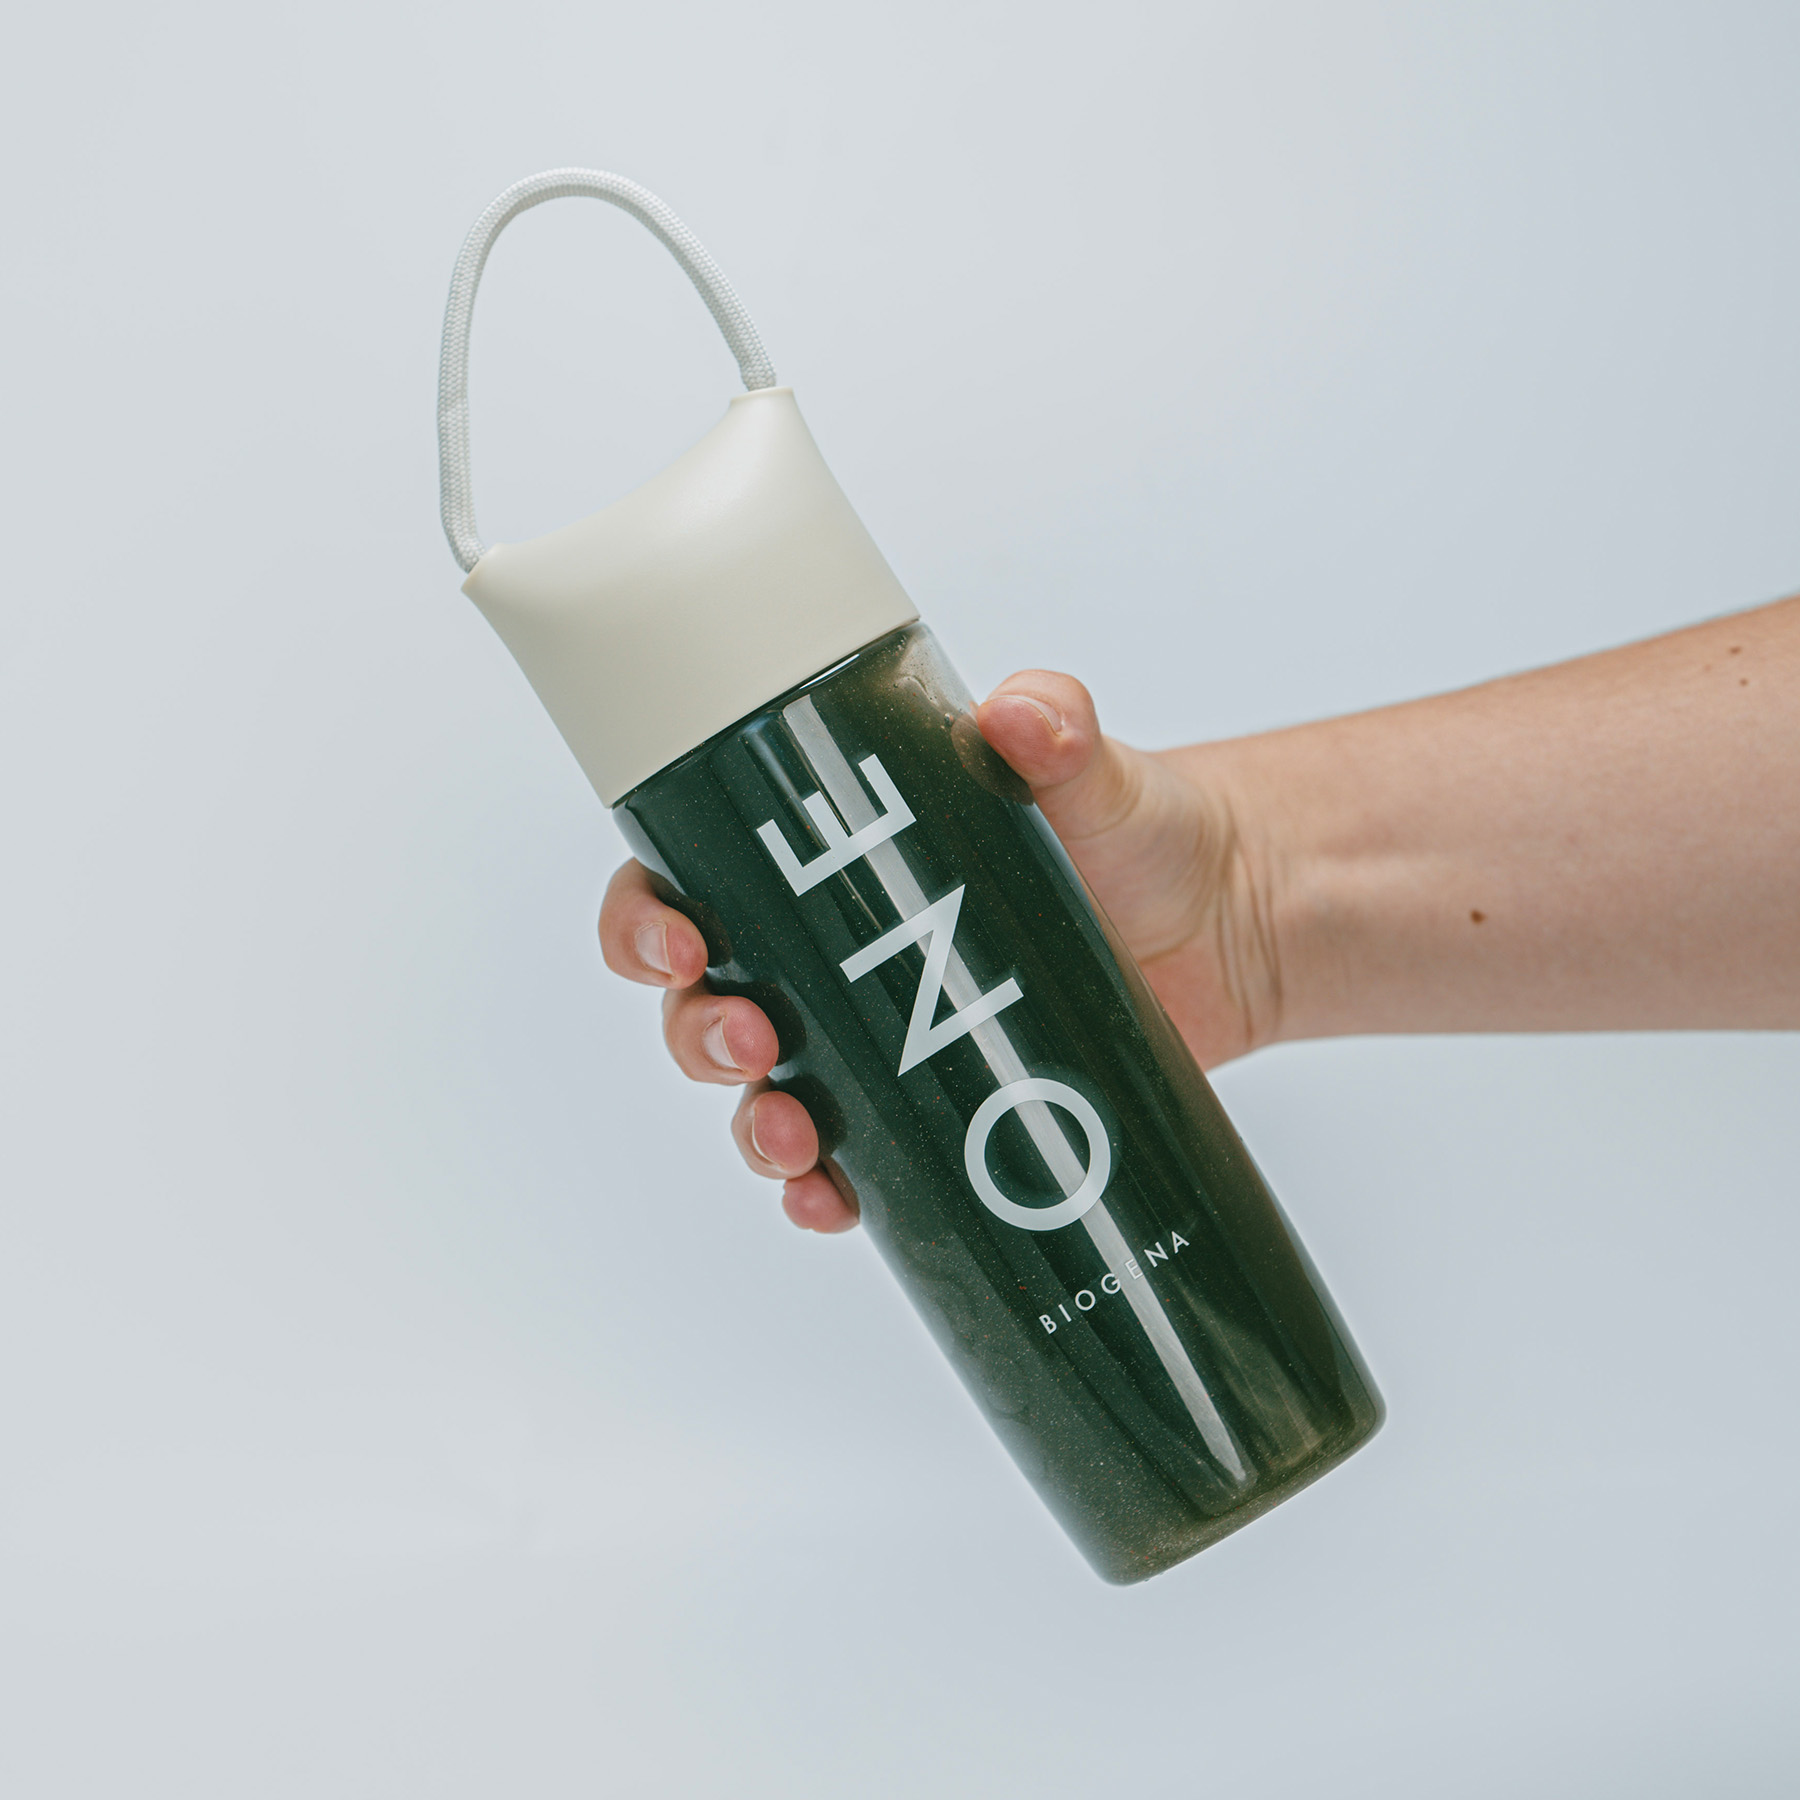
Shake and drink afterwards, it can be as simple as that. There should also be no clumping.

As paradoxical as it sounds, you should never have to think about a routine, but simply implement it and set it to “autopilot”.

By using the Biogena ONE drink in the morning, you will also educate yourself to drink (more) water instead of pouring hot coffee down your throat, the very first thing in the morning.

Cause, after sleeping, we are all dehydrated, which leads to a shrinkage of the protective layer of the stomach.

However, if this  gastric layer is not sufficiently built up and you pour coffee on an empty stomach, then it “triggers” stomach acid production (hydrochloride = HCL) in the so-called parietal cells and you literally “burn” away the cells that are then supposed to produce stomach acid when you need it.

So, it’s better to have a Biogena ONE drink first thing in the morning, then coffee.

Biogena ONE – What’s inside?

As we have now seen, Biogena ONE offers one thing above all, the simple establishment of a new, easy-to-implement routine.

But what’s in the details? There is no such thing as absolute 100% in life, and this is also the case with Biogena ONE, which nevertheless comes up with 99 high-quality, vegan ingredients.

Accordingly, not, as Nena sang about at the time, “99 balloons”, which had nothing else to offer except hot air, but, instead, vitamins, minerals, trace elements, amino acids, plant substances, carotenoids, algae, medicinal mushrooms and more.

As the Frenchman would say, “en détail” (according to the manufacturer, see link):

Vitamins:

  • Vitamin A
  • Vitamin D3
  • Vitamin e
  • Vitamin K2
  • Vitamin C
  • Riboflavin
  • Niacin
  • Vitamin B6
  • Folic acid
  • Vitamin B12
  • Biotin
  • Pantothenic acid

Minerals:

  • Potassium
  • Calcium
  • Magnesium

Trace elements:

  • Zinc Copper
  • Manganese
  • Selenium
  • Chromium
  • Molybdenum
  • Silicon
  • Boron

Amino acids:

  • L-Glutamine
  • Glycine
  • L-Lysine

Plant substances:

  • Wasabi Leaf Powder
  • Ployphenols
  • Glucoraphanin

 Carotenoids:

  • Astaxanthin
  • Zeaxanthin
  • Lutein
  • Lycopene

Algae:

  • Spirulina platensis
  • Chlorella

Vital mushrooms:

  • Reishi Powder
  • Cordyceps Powder

Other:

  • Taurine 100 mg
  • UbiquinolCoQ10 (KANEKA Ubiquinol™ 30 mg
  • Beta-Glucans 20 mg
  • Quercetin 10 mg trans-resveratrol 5 mg
  • 10 strains of lactobacteria and bifidobacteria

Biogena ONE does not remain silent about the ingredients but makes them publicly and transparently visible to everyone.

For me, this is a big plus. In addition, a degree in chemistry is not required to be able to decipher cryptic and/or obscure E-numbers, as these are not added.

Biogena ONE vs. AG1 vs. primalharvest

The attentive and critical reader may now wonder why he should choose the product described here (Biogena ONE), and not its competitors, such as e.g. AG1® or “Primal Greens”, by primalharvest.

At first glance, all three offer similar products, available as a one-time purchase or as a subscription/abonnement.

In order to avoid the already described case of falling prey to decision paralysis due to the flood of information on comparison products and, also in this case, becoming (again) an indecisive “corner stayer” (or “Eckensteher”, as we say in German), here are a few points why I decided to use Biogena ONE.

May these also be useful to the benevolent reader in his decision-making process.

First, Biogena ONE comes along without pomp and parade, they rely on their inner (nutritional) values!

The packaging is white, and the contents are green, with a neutral smell.

This “understatement” is appealing. After all, form follows function! First something must work, then you can think about its design.

However, as is well known, beauty is in the eye of the beholder and “de gustibus non est disputandum” (there is no arguing about taste), so the judgement regarding taste is, at best, secondary for me, because it is very subjective.

Nevertheless, the Biogena ONE tastes very good to ME, so it can score here as well.

Just ask yourself: Would you rather drink something you enjoy but isn’t really healthy, or would you rather drink something that is healthy but doesn’t really taste that good to you?

Well? I can imagine what will be chosen here in the long run. For the establishment of a daily routine, it is therefore only beneficial if it is a pleasure in taste AND health.

This helps immensely, because no one likes to swallow a smelly, crumbly broth every day, no matter how healthy it might be!

One of the main reasons why I finally opted for Biogena ONE was that it does not contain any extra soy, except in trace amounts of ubiquinol.

At this point I don’t want to divide and conquer by splitting people into pro and contra-soy advocates.

I myself had done a so-called nutrigenetics-test and, genetically wise, I simply cannot tolerate soy.

Furthermore, and apart from that, I would also advise against the regular consumption of soy, as it – from my point of view – causes more harm than good!

In addition, Biogena ONE, in contrast to AG1® and “Primal Greens” (as of January/24), also contains vitamin D, the coenzyme Q10 (ubiquinone-10) in a, in my opinion, more absorbable form and the attached wasabi, e.g. from “indoor farming” in Austria.

In addition, Biogena ONE advertises that there are regular quality controls by the LEFO Institute in Germany. Biogena ONE is manufactured in Austria, which makes the transport routes to us in the so-called “DACH” region (Germany, Austria and Switzerland) relatively short and the product does not have to be carted halfway around the world.

Now the reader may think that these are only small differences, if the soy does not bother you, for example, but as we all know, the small difference is also the subtle difference that will make you choose a product!

Biogena ONE – Conclusion

Finally, the thought remains: “the price is right”, because everything has its price, even if it is rarely considered in relation to its value.

Everything in life has a price, even death, because as we all know, it will cost your life!

Whether Biogena ONE is “cheap” or “expensive” is up to you to decide, because both are abstract terms that depend on things like the individual budget, but also the willingness to invest in one’s own self.

Of course, not all investments always pay off, but if you were to buy all 99 ingredients separately, this would certainly be much more expensive and time-consuming and, last but not least, the question would remain whether it would be easier or would not turn into an eternal struggle.

If you just want to change one thing in order to invest in a better version of yourself, but don’t know how and with what, then I would recommend the “egg-laying jack-of-all-trades” (“Eierlegende Wollmilchsau”) Biogena ONE.

Thank you for reading, I wish you an energetic time!

Stay healthy and see you soon.

If my article has offered you value, then I would be happy if you would throw something into my “virtual coffee till” ☕ to balance my energy.

© 2024 HP Bernd Stößlein MBA in Sports Management, All rights reserved!

Aerify FLY dynamic air compression and heat are the latest model by Aerify Recovery Technology. It’s their newest generation of so called “dynamic air compression” range products. The same Aerify Recovery air compression technology yet in a smaller, fully wireless and portable system with additional heat function.
Aerify FLY especially targets the calves plus is designed to be even more handy in use than their other models. This cool “tool” is therefore not only limited to enhance your regeneration after a leg-workout and/or jogging but also to give your calves a nice massage and support your venous pumping system in your lower legs.

If you’re interested in compression “boots”, check out my other review about the Aerify “Charge”.

>> to get 10 % off your purchase, use code: “Bernd10” <<

Aerify FLY compression/heat-sleeves, source: © Aerify.

Why the Aerify Fly? Because it’s hot!

Unless you aren’t Jeff Goldblum you don’t want to be “The Fly”, yet you might be looking for an affordable, easy to use and super portable compression system. Then keep on reading and, let’s fly!

Aerify FLY is especially designed for those who embrace an active lifestyle, i.e. globetrotters or perpetual travelers and are looking for devices that are ultra-portable.

The Aerify FLY perfectly fulfills these needs but, of course, I will also be suitable for home use, office, training camps, race days, the gym or even as a professional’s helper, e.g., in any physiotherapist’s and massage therapist’s practice.

Compared to the Aerify “Charge” (click here for my review), which I also tested, the Aerify “Fly” has – in the truest sense of the word –got a hot extra feature. Namely a heating-function!

Aerify FLY sleeves are equipped with an integrated heating element to help to maximize the effects of the compression massage. As you know, heat naturally increases circulation and hence may contribute to the natural recovery processes of the body.

The sleeves give you the option to choose between three different levels of heat: +45° C, +50° C or +55° C, or, if desired, you might use them with no heat at all. By default, the temperature is set to +45° C.

You cannot use the sleeves while they are charging! If this would be possible they’d be even – metaphorically spoken – “cooler”, respectively “hotter”!

Aerify Fly – Process to compress

The compression modes are pretty much the same as in the Aerify “Charge”. They are:

Mode 1 – Sequence:

Sequential compression: Suitable, i.e., for a warm-up and/or post-workout recovery. This mode commences by inflating the lower air chamber, then the upper one, then both held for a moment and finally the air is released.

Mode 2 – Circular:

Circular compression: Round and round it goes! Ideal, e.g. for a light recovery phase after a leg workout or just as a massage. First the lower air chamber is inflated, then the upper one while the first one releases the air simultaneously. Then the cycle repeats.

Mode 3 – Whole:

Whole compression: appropriate as an intense massage pre and/or post exercise. Both air chambers are inflated simultaneously and then release the air in the same manner. Afterwards the cycle repeats.

Aerify Fly – Dress, press, compress

Just like the use of the Aerify “Charge” you dress, press and then compress!

The Aerify Fly sleeves can be used with or without clothes. You simply wrap them around your calves and then close the Velcro straps to make sure that the sleeves have a tight fit.

Then you press the “on” symbol to switch them on, off or to pause.

How to operate the Aerify Control panel interface, source: © Aerify.

To select or switch the aforementioned modes you use the “M-button”. This will give you the option to choose three different pressures, ranging from 120mmHg, over 180mmHG up to 180mmHg.

With mmHg meaning “millimeter of mercury”. Hg being the abbreviation of Greek for Hydrargyros = “of liquid silver color” (Becher et al., 1995).

Aerify Fly – The power of habit stacking

As “Cool” or “Hot” a biohacking device might be, it might only be beneficial, when you use it on a “frequently” basis!

Of course, the term “frequently” is a question of definition, as once a year could also be “frequently”.

There I prefer the term “the essence of your” being. Use the Aerify Fly during one of your other daily routines. Hopefully you already have established some healthy ones in your life.

So, let’s say you’re doing a (morning) meditation or you’re doing some office work. Simultaneously slip into your Aerify Fly sleeves and give your lower legs a little treat!

This won’t take time off your busy schedule and you will therefore increase your efficiency!

Don’t mix simultaneously with multi-tasking! Multi-tasking doesn’t work and won’t get you done stuff properly, as you’re doing a lot of things at the same time, yet with poor efficiency!

Simultaneous, on the contrary, means you could, e.g. cook, work on the computer, the garden, whatever and – passively – at the same use the compression sleeves. This will increase your efficiency!

The Aerify Ffly compression/heat-sleeves,
source: © Aerify.

Even whilst you’re binge watching an online streaming services (which I’d not recommend) or while reading one of my informative articles (which I highly recommend) you could give you’re calves a nice massage.

Aerify Fly – Massage for “mirage”?

The benefits of regular massages to increase your wellbeing and to improve your recovery are commonly known.

Hence – for reasons of volume and topic – let’s stick to the calves in this article.
Of course, these are all no “health claims’”, just for the record!

If you are unsure whether an Aerify compression device might be contraindicated for you please read the instruction manual prior to use and consult a health care professional!

Some contraindications are the following:

  • Pregnancy
  • Medical implants (i.e. cardiac pacemakers), life sustaining medical electronic devices, medical electronic equipment etc.
  • Any severe cardiovascular disease,
  • Arrhythmia
  • High blood pressure
  • Poor coagulation
  • Acute pulmonary edema
  • Acute infections
  • Osteoporosis
  • Episodes of pulmonary embolism
  • Acute thrombophlebitis
  • Deep Vein Thrombosis
  • Blood Clots​
  • Bone fractures or dislocation
  • Open wounds or inflammation
  • Severe skin allergies or skin infectious diseases
  • Severe nervousness, high fever, convulsions, spasms, manic restlessness
  • Pain (acute and/or chronic)
  • Unexplained tiredness
  • Going through a surgery or slightly post-operation

Properly applied massages contribute to manipulation and loosening of the the calve muscles.
The lower legs are very often overworked just to the sheer fact that they are (mal) used every day.

Therefore, sometimes they appear to be swollen or there is some “issue in the tissue”, so called “adhesions” which might cause movement restriction in the muscles, the facia, ligaments and/or the knee-, as well as the knee-joint that might even compromise your structural balance and movement patterns!

According to that, a little massage once in a while might help restoring proper calf movement, enhance local blood flow circulation etc.

Optimal blood flow is crucial to supply the calf muscles with enough oxygen and helps to get rid of metabolic waste products on cellular levels just to mention a few more benefits of calf massage.

The above-mentioned effects are increased if you combine the power of massage and heat at the same time! Again, this will result in an increase of treatment efficiency!

Therefore, having a massage done by the Aerify Fly is something I’d generally recommend to my readers, clients and patients!

The use of the Aerify Fly sleeves isn’t limited to just rehabilitation, but also suitable for prevention, as well as for what I call “maintenance” work for your body.

To not be confused, in this context maintaining is not the same as training.

Training, on the one hand, is to put OUT effort (that’s why it’s also called workOUT) to achieve a certain goal, like increasing your maximal strength. Therefore, while and right after a workout you’re losing energy as your energy is directed outward.

To learn more about the most important formulas of strength training, take a look at the “Stoesslein Strength Cheat Sheet ©”.

Maintaining, on the other hand, is my definition of restoring the body. Doing things that will “recharge” your “body-battery”, help you to recover and stay healthy and happy! Something Paul Chek defines as “workIN”.

Besides heat-treatment and massaging “maintaining”, nevertheless, could also consist of additional supporting, super high-repetition exercises. In the case of the calves, i.e. the – all too often neglected – training of the m. tibialis anterior!

This will also help to restore your “structural balance in your lower body as optimal strength in your calves will also positively affect your ankle- and knee-joints!

Check out my review-article about the Aerify “Charge”, source: own picture.https://bit.ly/3ygASf9

Aerify Fly – How to usefully apply?

So, let’s say you’re working OUT three times a week with or without weights you could throw in one or two days a week for maintenance and working IN.

This could be, i.e. a “mini workout/workIN” of 20-30 minutes non-stop maintenance work in which you focus on your calves, respectively your ankle- and knee-joints.

Here’s a little Stoesslein lower body “maintenance” circle/program:

  • Peterson Step-Up/Poliquin Step-Up, 3-4 sets, 20-25 reps
  • Tibialis Anterior-Raise with body weight, or e.g. use a tibialis anterior training device of your choice (there are plenty available), 3-4 sets, 20-25 reps
  • Seated Leg-Curls with rubber band, or standing single-leg curls with ankle weights, 3-4 sets, 50-250 reps
  • Apply those three exercises as a circle then use the Aerify Fly treatment right afterwards
  • Program can be done once or twice a week, according to your needs

Of course, the use of the Aerify Fly is not limited to twice a week nor to the combination of the aforementioned exercises.

This was just to give you an example of how you could apply a “hot” tool like the Aerify Fly into your preexisting training regimen.

Combinations are only limited to your imagination. Here are a few examples:

To exemplify, integrate the Aerifly Fly and give these combos a try:

  • Infrared red-light therapy (after using the compression),
  • Gua Sha (before or after)
  • Cold water treatment on the calves (before or after)
  • Frequency Specific Microcurrent (see my scientific publication for further info)
  • Pulsed Electromagnetic Fields (PEMF)
  • Meditation (simultaneously)
  • Etc.

Aerify Fly – What you get if you buy

>> to get 10 % off your purchase, use code: “Bernd10” <<

If you want to get your hand, respectively your calves on a pair of Aerify Flys you’ll invest, at the moment, 259€. But you can get an additional 10% off, by using my discount-code above!

The Fly’s technical information are (according to the manufacturer):

  • Weight – 0.6 KG (1 sleeve)
  • Size – 36 x 11 x 16 cm
  • Power Consumption – 5W
  • Charger output: DC 5V
  • Charging time: 4 Hrs
  • Pressure range: 120-240 mmHg
  • Battery capacity: 2500 mAh
  • Working time: with heat – up to 1 hr, without heat up to 3 hours
  • 2 years warranty

If you’re not entirely satisfied, the manufacturer states that:

 „(…) you may return the product within 14 days from receipt (return policy, terms and conditions apply).“ (Aerify, 2023).

The company further mentions:

Usually it takes 1-6 working days from time of purchase to deliver the product in EU. However, is extra ordinary cases it can take up to 15 working days! We deliver world wide! If you encounter any issues finding your country, please, let us know by e-mail hello@aerifyrecovery.com

Additionally, they list under “warranty and repair” the following:

“We stand behind the quality of our products therefore the warranty for the cupper is 2 years (24 months) from the date of purchase. Warranty is only applied for factory defects! If your cupper has problems due to bad maintenance, e.g. accidental drop of the cupper, someone put something heavy on it or let kids play with it, let it sit too long in the sunlight, used it in a sauna, let it soak in the water, caused any other kind of damage by not using it according to the producers guidelines, then the warranty will not cover it. Make sure to read the warnings and most importantly – please, follow them! In case of any technical issues, however, please, contact us by email: hello@aerifyrecovery.com and we will help you to find the best solution!”

The Aerify Fly „C.A.S. E.” – comply, amplify, supply, edify

Just because out of fun and to give you a more memorable way of telling you a little bitty of the importance of your calves, I enveloped the acronym “C.A.S.E.” for the Aerify Fly!

  • C = comply
  • A = amplify
  • S = supply
  • E = edify

Comply to the function of your calves. Your lower legs are often called “the second heart” for a reason! They play an important role for supporting the circulation of the blood. When you walk, i.e., the calf muscles pump venous blood back toward your heart. Therefore, this system should be regularly maintained to keep pumping properly!

Amplify the circulation (as mentioned above) while dilating your blood vessels in your calves by switching on the heat functions on your Aerify Fly sleeves. This will help to amplify blood flow and support metabolism on cellular level.

Supply the aforementioned cells with nutrients and more oxygen. If you increase blood flow in the muscles and tissue (facia, ligaments, sinews etc.) you aid to the delivery helpful supplemented nutrients like different collagen types into the cell and, vice versa, support the body to mobilize and excrete metabolic waste products.

Edify and contribute to a new healthy lifestyle through regular calf massage and heat treatment with the Aerify Fly. Your calves will love to “fly”!

Aerify Fly – Conclusion

As always, my article ends with a conclusion to sum things up and give an outlook. The question arises whether to invest in a pair of Aerify Fly compression/heat-sleeves, as investments don’t always pay off!

Having tested the Aerfiy “Charge” system, as well as the Aerfiy “Fly” I’d recommend you both, in general.

Therefore, I’d ask two counter questions:

  1. “What’s your budget?”
  2. “What’s the goal?”

If you’re up for a more budget oriented version, you should give the Aerify “Fly” a go! These will give you indeed the benefit of different massage modes plus the heat option. But they are limited to the use of your lower body. Also, they – unfortunately – cannot be used while charging!

When you’re in search for compression boot that also work your upper legs, plus you’d like to invest more, and/or you’d like to implement them into your gym or practice, then you should think about getting a pair of Aerify “Charge”.

The latter are a little less portable plus they lack the heating option. Yet they can be used while they are recharging!

The Aerify Fly do come with a nice travel bag, source: © Aerify.

In the end it’s the “embarrass de richesses”, the “torture of choice” 😉

If you want to book a consultation (online/offline) please feel free to contact me: info@bernd-stoesslein.de

Thanks for reading. I wish you an energetic time!

If you want to book a consultation (online/offline) please feel free to contact me: info@bernd-stoesslein.de

Thanks for reading. I wish you an energetic time!


© 2023 HP Bernd Stößlein MBA in Sportmanagement

Literature

Aerify Fly Return & Refund Policy, source: https://www.aerifyrecovery.com/product-page/aerify-fly-dynamic-air-compression-and-heat, access: 25.2.23.

Lateinisch-griechischer Wortschatz in der Medizin, S. 100.

Westside Special Strengths Certificate is earned, not given! It’s not a weekend “certification” you can pass through on a single weekend to call yourself a strength-coach! If you want to be a real certified strength-coach you must walk the walk and not just talk the walk! I consider my readers not to be cheap, otherwise you wouldn’t consider investing up to 1000 $ (for the “All Study Material Needed” version) and a lot of time into a certification! If you also want to be welcomed to the alumni of Westside Barbell Special Strengths Certified Coaches, you might want to read my review about how I earned this Westside-Barbell certificate.

Practice what you preach – Talk is cheap!

The Westside Barbell Special Strengths Certification is not one of those countless online- “certifications” you can easily klick through to be “certified” without having a clue what strength training is actually all about.

To understand how the Westside system/method works you MUST train like Westside-Barbell, respectively using their so-called Conjugate System.

BUT, YOU DON’T HAVE TO BE A POWERLIFTER to do so!

Westside-Barbell states:

By undertaking the Westside Special Strength Certificate you are equipping yourself with the correct theoretical and practical training methodology that optimizes athletic performance regardless of sporting background. “(highlighted by the author)

Prior to taking the exam I have trained according to the Conjugate System for a consecutive year (and I am still doing it), to put into practice everything they teach you (not only) throughout the course material.

Otherwise I would not have dared to take the exam, despite having a B.A. in Fitnesseconomics, an MBA in Sportsmanagement, having learned a lot from “Strength Sensei” Charles R. Poliquin (†) and having numerous other international certifications, as well as almost 20 years of experience in weight training “in the books”.

You can have a look at all my current (2023) qualification, here.

Of course, you could simply buy the “exam only” version and give it a try. But without a solid knowledge base and proper preparation, you’ll probably fail the test!

In the exam (see chapter below) you will, at least, be asked about the following:

  • Westside Barbell Book Of Methods
  • Squat And Deadlift Manual (Westside-Barbell, resp. Louie Simmons)
  • Bench Press Manual (Westside-Barbell, resp. Louie Simmons)
  • Explosive Strength Development for Jumping (Westside-Barbell, resp. Louie Simmons)
  • Olympic Weightlifting Strength Manual (Westside-Barbell, resp. Louie Simmons)
  •  Special Strength Development for All Sports (Westside-Barbell, resp. Louie Simmons)
  •   Strength Manual for Running (Westside-Barbell, resp. Louie Simmons)
  •   Special Strengths Certification DVDs – (can be downloaded, about 10h of lecture!)
    •   A seminar discussion with Dr. Nicholas S. Romanov
    •   A seminar discussion with Louie Simmons
    •   A specific lecture on success at the NFL combine by Louie Simmons
    •   A specific lecture discussing Explosive Power Training by Louie Simmons
    •   A seminar discussion of Ju-Jitsu and combat fitness training by John Saylor

Additional course materials you should be familiar with are:

I even invested over 1000€ in a velocity-measuring device called “TENDO-Unit”, to take out the guesswork and being able to properly measure my bar-speed on the so called Dynamic-Effort (speed-strength) training days!

If you want to learn more about why speed is actually measured in velocities and not in “heavy” or “light” (what Dragonball Z has to do with it), please feel free to read my article:

The TENDO UNIT – Velocity based training, assess, don’t guess!

The Conjugate System – It’s a Method, not a Style!

Where’s the difference between a system/method and a style or philosophy, you might ask?

Like for example Kung-Fu is a certain method of martial arts. But there are many different styles of Kung-Fu!

Westside-Barbell’s method is called the Conjugate System.

In a nutshell, a mixture of mostly the Russian and Bulgarian weight-training-systems, adapted and slightly modified to the needs of the sport of powerlifting.

Everyone – from soccer moms to professional athletes – can benefit from the Westside Conjugate System.

Especially in Bodybuilding though, lots of people advertise a certain way how to train as THE best way, simply because it was beneficial for THEM and/or to create a “fancy new nonsense”. But this doesn’t mean that it’ll automatically be the optimal thing for everybody else!

And always keep in mind that Bodybuilding has absolutely no necessary component of athletics, it’s only about aesthetics!

In Bodybuilding it’s of no importance i.e. how far/high you can jump, how strong you are, how fast you are etc., in order to win a contest (keep this in mind)!

To have big muscles doesn’t necessarily mean that you’re strong. Big ain’t strong, strong is strong!

If you search the internet for Hideaki Inaba you’ll find out about the strongest guy you probably have never heard of, plus you’ll get an idea how true brute strength can look like!

My Westside Special Strengths Certificate, source: own picture.

Even in his prime, the light weight powerlifter from Japan competed in the 52kg-class.
Not someone you’d have in mind when you’re thinking about a strong human being, right?

Wrong! You couldn’t be further from the truth!
Despite not having the looks of a Hercules, he managed to squat insane 4,6 times bodyweight! Which earned him the (unofficial) nick-name of “Powerlifting’s Pikachu”.

In this video you can see Inaba squatting 240kg at 52kg bodyweight, which, then, sat a new Master’s world record!

Just keep in mind, that e.g. an 80kg trainee would have to squat 368kg to reach the same amount of relative strength! So, Inaba was a true strength-beast and – kg for kg – for sure one of the strongest human beings we are aware of!

Another beast of strength was the little more known nick-named “Pocket-Hercules”, Naim Süleymanoğlu (birth name: Naim Syuleimanov) (†)!

Just to give you a glimpse, the only 1,47m tall Naim’s personal bests were:

152,5kg in the Snatch, and 190kg in the Clean & Jerk, weighing about 60kg at the time of achieving these records, which means he managed to perform a Clean & Jerk with 3,16 times bodyweight!

But, back to the difference between a style and a system:

If you have a system, though, it MUST work for EVERYBODY, otherwise it’s not a system but merely a style! That’s why the Conjugate System is NOT a powerlifting-only system, it’s designed to be used ubiquitously for all kinds of athletes, and strength-coaches.

The same applies to rules:

There is no exception from the rule, as the saying goes. It’s quite the opposite. If there is only ONE exception from a rule, it’s NOT a rule anymore, but merely a correlation between things.

I don’t sell Westside’s Conjugate System, but – to quote its founder Louie Simmons (†) –
I hope you buy this idea”!

This article’s intention is not to tell you in detail about the Conjugate-System, as you can learn all about this method in the Special Strengths Certificate education, respectively from Louie Simmons’ books, videos etc.!

The Special Strengths Certificate – Taking the Exam

For the test they’ll give you 4 hours to complete about 100 questions. The exam can be taken from your home, online.

For me, not being a native English speaker (my mother tongue is German), this time was thoroughly needed as sometimes I had to first think in German but then answer in English, which was rather time consuming.

Nevertheless, if you “weigh” every question with the same time, you’ll have an average of 2:50 Min for your answer.

The test consists of about 1/3 multiple-choice questions, the rest, 2/3 are so called “open” questions where you have to give either detailed or brief explanations of an issue.

Of course, some questions can be answered faster and for some you’ll have to squeeze your brain a little longer, plus you’ll have to type, which is also time consuming.  

To be honest, all the questions were hard, but fair!

If you learn your stuff, stick to the study material and – which I consider to be an obligate duty – practice the Conjugate System in the gym, you won’t be “surprised” by a “strange” question.

Most likely, with everything in life you get what you give and to quote Tom Cruise:
Don’t be careful, be confident!

So, to succeed in the exam you should have absolutely practiced the Westside-Barbell Conjugate System extensively. Otherwise chances are very high you’ll fail the test or end up being a “virgin sex therapist”, to quote Charles R. Poliquin (†).

Please keep in mind that you cannot save the exam! You either go all out or you don’t! Once you hit the “submit” button the test is over, and you’re done! It’s not possible to answer just some questions, save and return later.

During the test, of course, you have the option to go forward or reward to skip questions in order to answer them later (before hitting the “submit” button!).

Please note that it’s not allowed to use “copy and paste”. So, in order to answer a question, you cannot just use an expression you have learned by heart.

You must give answers using your own words to demonstrate that you cannot just memorize things but are able to understand them!

Test Results – The aftermath

The multiple-choice questions are evaluated immediately, and you’ll see if your answers are correct or incorrect and how many percent you have reached.

Westside-Barbell says that you will get your final test result (including the open questions) after about 4-6 weeks. In my case, I have received an e-mail that I passed after pretty much precisely four weeks (see picture below).

E-Mail I received from Westside Barbell.

I received a detailed overview of all the questions I answered and how long it took me (3:46:09 hours) to complete the whole test.

I don’t want to scare you but also stress that you don’t take it easy. The exam has an 86% failure rate, according to Louie Simmons (†).

Westside-Barbell Special Strength Certificate – is it worth the invest?

Now you will probably ask “is it worth the money?” and you most likely want to know whether it’s an investment, as investments don’t always pay off.

Of course, I cannot provide you with a general answer to those questions, but my own personal opinion!

Despite not being a powerlifter, I wanted to take the exam in order to proof that I’m not only capable of training according to Westside-Barbell’s Conjugate System but being able to use it to train other people/athletes.

To proof that I do have profound knowledge in their system. Furthermore, my motto is:

The one who rests, rusts” (“Wer rastet, der rostet.”) [German proverb]

And, to quote Louie Simmons (†) again:

If you run with the lame you will develop a limp.

That’s why I’m always looking for a new certificate, new info, book, course, knowledge and/or achievement to constantly improve.

If you’re the smartest in the room, you’re in the wrong room.” (Confucius)

The same applies for strength-training. If you’re the strongest in the room, you’re at the wrong place.

I’d add: It’s only acceptable that you’re the strongest/smartest etc. in the room if YOU are the one who teaches the attendees!

So, for ME it definitely was an investment, simple due to the fact that I wanted to be an alumnus of Westside Barbell Special Strengths Certified Coaches!

For people who are looking for a profound certification in the field of strength and conditioning I highly recommend the Westside Barbell Special Strength Course!

I also consider making this certificate mandatory for strength and conditioning coaches who’d like to work with/for me as it would guarantee that they have a high level of understanding of proper strength training!

Westside-Barbell Special Strength Certificate – Conclusion

Calling yourself a strength-coach is one thing, being a strength-coach is another thing!

Lots of people call themselves strength-coach without having proper certification.

But, with certification it’s “such a thing” (as we say in German). There are “certifications” and there are certifications.

The question is, do you want to get hired as a strength-coach and need a certification everyone knows, and which is “accredited”, or do you want to have the “real deal”?

I cannot speak for the USA, but I guess it’s pretty much the same as here in Germany.

There are some renown “certifications” you can get, and everybody will recognize. But their “knowledge” is very limited.

But, on the one hand, having a Westside-Barbell certificate in Germany maybe won’t help – in terms of getting a job as a trainer – as most gym owners (sadly) won’t have a clue what it is.

On the other hand, though, those who recognize it, will know about its value and might still employ you as they can assume that you have proper knowledge.

Sadly, even when brilliant Strength-Coaches like “Strength Sensei” Charles R. Poliquin and Louie Simmons where still alive lots of people in the field of training didn’t know who they were.

But, to sum this up, you would not want to work for someone who knows less than you do, right?

So, again, those who know, know. And the proper gym owners who are looking for high-end coaches, will probably rather hire you as a West-Side Special Strengths alumnus than a random guy with a random certificate, although it might be more “popular”!

If you want to book a consultation (online/offline) please feel free to contact me: info@bernd-stoesslein.de

Thanks for reading. I wish you an energetic time!

© 2023 HP Bernd Stößlein MBA in Sportmanagement


Literature

Hideaki Inaba – Powerlifting’s Pikachu, source: https://plagueofstrength.com/hideaki-inaba-powerliftings-pikachu/, access: 17.1.23.

Special Strength Certificate, source: https://www.westside-barbell.com/products/special-strength-certificate-the-louie-simmons-exam-package?variant=35022657355933, access: 14.1.2023.

The TENDO Unit – Velocity Based Training, Assess don’t Guess! source: https://www.bernd-stoesslein.de/2022/10/20/the-tendo-unit-velocity-based-training-assess-dont-guess/, access: 15.1.2023.

The Tib Trainer manufactures an easy to use Tib Bar for working out your tibialis anterior muscles. Compared to conventional tibialis-machines, it comes at a very reasonable price. This Tib Bar is very solid and sturdy built, made from metal! It is super lightweight (about 2,5 kg), portable and easy to store, even in the smallest home gym! In this article you will learn why tibialis anterior training is of utmost importance, in regards of concepts called “Structural Balance”, “Anatomy Trains”, for your ankle joints, knees and overall sports performance by using a Tib Bar by “ The Tib Trainer”.

Tibialis anterior – what it is and what it does

Before we can realize why the tibialis anterior needs special recognition for structural balance we have to look at where it is localized in the body and what it does.

The tibialis anterior muscle is a muscle in humans that originates along the upper two-thirds of the lateral (outside) surface of the tibia and inserts into the medial cuneiform and first metatarsal bones of the foot. It acts to dorsiflex and invert the foot. This muscle is mostly located near the shin. It is situated on the lateral side of the tibia; it is thick and fleshy above, tendinous below. The tibialis anterior overlaps the anterior tibial vessels and deep peroneal nerve in the upper part of the leg.” (Wikipedia, 2021).

Because medical terms tend to be sometimes a bit confusing, I’d like to explain what you can find in the quote above, that’s not already explained.

The word tibia derives from Latin, meaning pipe, flute or shin (Becher et al., 1995). The term cuneiform is Latin as well, and translates into “having the shape of a wedge”, due to cuneus = wedge (Becher et al., 1995).

Meta/tarsal is made up of two terms, the Greek prefix meta = after(wards), subsequent, between; and Greek tarsus = “braided device for dehydration and drying” and “a designation for various flat structures” (Becher et al., 1995). Therefore Meta/tarsus = the “middle foot”.

Tibialis anterior, source: Wikipedia.

Functional anatomy is always important to see the bigger picture (structural balance) and why it is important to train a certain muscle, rather than just doing something without knowing why.

Moreover, you should not look at the world “through a straw”. So to speak, you cannot look at the tibialis anterior isolated but you’ll have to develop an understanding of how it interacts with other muscles in the lower leg.

According to Tom Myers, the inventor of “Anatomy Trains”, the tibialis anterior is part of, what he calls, the “spiral line”, respectively the “jump rope” of the leg.

Myers writes:

There is a long fascial loop that connects the front of the pelvis to the back of the pelvis via the arch of the foot. This line start out from the anterior superior iliac spine with the tensor fasciae latae, which feeds into iliotibial tract, which is connected fascially and very strongly to the tibialis anterior. The tibialis runs down to the weakest point of the arch – the first metatarsal-cuneiform joint, where it is always shown attaching. However, we were able to dissect a clear and strong attachement to the peroneus longus tendon that comes at the joint from the lateral side. Thus this “jump rope”continues its connection upt the outside of the calf to the fibular head, and right on into the lateral hamstring, the biceps femoris. Again, this is a strong and distinct connection; nothing wimpy about it. This of course, brings us to back of the pelvis at the ischial tuberosity.” (Myers, 2012).

You can have a look at this “jump rope” by looking at “Anatomy Trains – Early Dissective Evidence”.

Content is nothing without context! According to that, understanding the importance of the tibialis anterior we must also think according to the concept of “structural balance”.

Structural Balance is a concept/term that was coined by my strength coach mentor, Charles R. Poliquin (R.I.P.), aka “Strength Sensei”, back in the early 1990s.

Charles figured out, that when the muscles are all in proper balance with each other, his athletes made much faster progress in the weight room and were less likely prone to injuries.

In a nutshell: Charles approach was first to identify the “weakest link in the chain”, then strengthening it, to achieve optimal developed/strengthened muscles for optimal sport specific performance.

Please keep in mind that this is a simplified summary of what structural balance is attended to be.  Of course, you have to take further variables into this “equation”, like things that prevent muscles from working properly.

It’s not always only a lack of strength but rather a combination of improper strength, adhesions, trigger points, scars,  and many other things, like “Emotional Anatomy” (embodied feelings, a term coined by Stanley Keleman).

Nevertheless, to keep a long and rather complicated anatomically story short, the tibialis anterior is one of the most neglected muscles, not only among professional athletes.

The Tib Trainer – How to use the Tib Bar

OK, now that you have a little background of why it is important to properly train your tibialis anterior, let’s go into practice and see how it’s done, using the Tib Bar by “The Tib Trainer”.

Tib Bar in action, source: own picture.

Using a the TibBar is easy as A, B, C.

It is made in the UK, using locally sourced, laser cut, steel. After welding the bars are enameled to finish. Weighing just 2.5kg, it is perfect for any home- or commercial-gym.

It provides a specialty, custom made, 48mm collar (with rubber coating inside) to ensure the weights fit perfectly secure without the use of pins or shims. Due to that, the attached weight plates won’t chatter during training, which would be super annoying.

So, you simply attach the weight of your desire and secure it with the aforementioned collar. Now, you’re ready to go. For a comfortable training I’d recommend to place the heels of a regular gym bench. This will allow free range of motion for your feet, respectively in the ankle joint.

If the bench isn’t soft enough and you feel your Achilles tendon to be compressed too much, you might want to place a towel between your lower legs and the bench to increase comfort.

Of course you can play around with various angles of the bench and/or your knees, keeping them bent or straight. To narrow it down, changes of doing something wrong in this exercise are almost zero. Except you don’t do this exercise at all!

Basically, tibialis anterior training is a simple curling movement, so don’t overthink it.

Tib Bar against shin splints and Co.?

Speaking from my expertise as Strength-Coach and “Heilpraktiker” (Complementary and Alternative Medicine Practitioner) I often see professional and hobby-athletes in my practice complaining about shin splints.

For those of you who are not familiar with this issue here’s a brief explanation:

shin splint, also known as medial tibial hematoma, is pain along the inside edge of the shinbone (tibia) due to inflammation of tissue in the area. Generally this is between the middle of the lower leg and the ankle. The pain may be dull or sharp, and is generally brought on by high-impact exercise that overloads the tibia. It generally resolves during periods of rest. Complications may include stress fractures.” (Wikipedia, 2021).

End of free preview. If you want to read the whole article (2500 words in total), you can do so at: https://www.buymeacoffee.com/berndstoesslein/the-tib-trainer-review If you like my article you can support my work by becoming a supporter: www.buymeacoffee.com(berndstoesslein or a member. This helps me a lot, for creating future quality content. Thank you in advance. I wish you an energetic day!
Best,
Bernd Stoesslein

Tib Bar in action, combined with a Power Plate, source: own picture.

If you like to book an online consulting with me to learn more about strength and conditioning, nutrition, brain coaching, supplements etc. please feel free to send me an E-Mail to:

info@bernd-stoesslein.de

© HP Bernd Stößlein, Master of Business Administration in Sportmanagement.

If you liked this article please share it with your friends, subscribe to the newsletter and the blog.

If you like to book a professional treatment as a patient of my “Heilpraktiker” (Complementary and alternative medicine practitioner) patient in Germany, please contact me:

info@heilpraktiker-stoesslein.de


Pictures:

Tibialis anterior muscle, modified by Uwe Gille – Gray437.png, source: https://de.wikipedia.org/wiki/Musculus_tibialis_anterior#/media/Datei:Tibialis_anterior_2.png, access from 21.9.21.

Literature

Tibialis anterior muscle, source: https://en.wikipedia.org/wiki/Tibialis_anterior_muscle, access from 8.9.21.

Lateinisch-griechischer Wortschatz in der Medizin, S. 64.

Lateinisch-griechischer Wortschatz in der Medizin, S. 135.

Lateinisch-griechischer Wortschatz in der Medizin, S. 220.

Lateinisch-griechischer Wortschatz in der Medizin, S. 227.

Anatomy Trains – Early  Dissective Evidence, source: https://www.anatomytrains.com/wp-content/uploads/2012/07/dissection.pdf, access from 8.9.21.

Shin splints, source: https://en.wikipedia.org/wiki/Shin_splints, access from 8.9.21.

Tip: Tibialis Anterior Raise, source: https://www.t-nation.com/training/tip-tibialis-anterior-raise/, access: 8.9.21.

FingerWeights, as the name suggests, are little weights, especially designed for improving one’s finger extension (with 10g up to 90g/finger). Speaking from my expertise as a Strength-Coach and “Heilpraktiker” (Complementary and Alternative Medicine Practitioner) I claim that finger extension is by far one of the most neglected movements in the world of health and sports performance! Nevertheless, in regard of structural balance and overall performance, the training of the finger extensors is of uttermost importance! In this article I’ll show the benevolent reader how and when to integrate FingerWeights in regard of structural balance and more.

—> With Code “ENERGY” you can safe 10% on everything you purchase on Fingerweights.com 

FingerWeights – What are these?

Obviously, FingerWeights are little weights for your fingers! But what makes them unique?

In this article I’m focusing on the Therapy Pro Mobile Kit, that comes with 10 so called “Flex Finger Weights” (see picture).

Therapy Pro Mobile Kit, source: © FingerWeights.

This kit is designed for therapists/coaches/medical professionals who know about structural balance and the importance of not only flexing your finger/hand/forearm, but also to properly extend it!

The Flex Finger Weights are designed to fit any size finger, each unit’s resistance is adjustable in 10-gram increments up to 90 grams per finger with the addition of three “Tungsten resistance rods”.

The kit comes with:

  • 10 Flex FingerWeights
  • 30 Stainless Steel Resistance Rods (10g each)
  • 3 Tungsten Resistance Rods (30g each)
  • A light weight transport case that stores the FingerWeights shock proof
  • A rod removal tool
  • A QR-code for exercise instructions

Extrinsic extensor muscles of the hand

Let’s have a brief anatomical excurse about the extrinsic extensor muscles of the hand.

These “(…)are located in the back of the forearm and have long tendons connecting them to bones in the hand, where they exert their action. Extrinsic denotes their location outside the hand. Extensor denotes their action which is to extend, or open flat, joints in the hand. They include the extensor carpi radialis longus (ECRL), extensor carpi radialis brevis (ECRB), extensor digitorum (ED), extensor digiti minimi (EDM), extensor carpi ulnaris (ECU), abductor pollicis longus (APL), extensor pollicis brevis (EPB), extensor pollicis longus (EPL), and extensor indicis (EI).” (Wikipedia, 2021).

The most important are:

  • Extensor carpi radialis longus: extends, abducts wrist
  • Extensor carpi radialis brevis: extends, abducts wrist
  • Extensor digitorum: extends fingers, wrist
  • Extensor digiti minimi: extends little finger at all joints
  • Extensor carpi ulnaris: extends, adducts wrist
  • Abductor pollicis longus:  abducts, extends thumb
  • Extensor pollicis brevis: extends thumb at Metacarpophalangeal (MCP) joint
  • Extensor pollicis longus: extends thumb at MCP and interphalangeal (IP) joint
  • Extensor indicis: extends index finger, wrist

FingerWeights for Structural Balance?

The term “structural balance” was coined by my strength-coach mentor Charles R. Poliquin (aka the “Strength Sensei”). It describes an optimal interaction of muscles involved in movement in general (like an economical gait) or while performing a specific task (like grapping, pulling, pushing etc.).

Just to give you an idea, here are some numbers that are considered to be “optimal” when it comes to compared lifts:

  • Front Squat: 85% of back squat
  • Preacher Curls: 40% of flat bench press
  • Military Press (standing, strict): 45% of back squat
  • Power Clean: 68 % of back squat

Unfortunately, to my knowledge, there are no numbers  (yet) for structural balance that show an “optimal” ratio between forearm/finger flexion and extension.

So, what’s the point of structural balance, considering forearm/finger strength?

Well, in general, grip strength is already a neglected and overlooked aspect in strength training.

Training the finger EXTENSORS, however, is maybe something you have never observed in a commercial studio, or elsewhere.

To be honest, chances of seeing someone training his finger extensors might be higher than seeing Big Foot!

Even Strength Coaches on an elite level hardly take finger-extensor training into consideration.

Why? I cannot answer this question. Maybe, because nowadays people tend to rather consume information than producing it.  You learn some stuff from a coach and pass it on, without critically questioning these information.

As content is nothing without context, I’d like to explain why I think finger extensor training is as important  as any other extensor muscle training in your body.

Grip strength is super important, in pretty much any sport performance. But with gripping power (finger/forearm flexion) you should also develop proper forearm extension strength!

Otherwise your forearms/fingers will eventually suffer from structural disbalance. You might be able to close your hand properly but opening it and especially extending all fingers might cause problems.

This one-sided movement pattern might not only result in structural disbalance, but also cause “issue in the tissue”, i.e. trigger points in the tendons, adhesions in the fascia and much more.

Then the “downward spiral” starts, as the mentioned issues above might cause even more movement restriction, pain, inflammation etc.

So, in a nutshell, not training one’s finger/forearm extensors is like not training your tibialis anterior (a muscle of your shin, that is commonly neglected in training). It is, as we say in German, “only half of the rent”. Therefore, not good for anything!

If you want to learn how to train your tibialis anterior, you can do so in my article about the Tib Bar (coming soon).

A matter of strength curves

The company writes:
FingerWeights apply the basic principles of progressive resistance training as a means to increase gentle range of motion, endurance, flexibility, dexterity, precision, and overall strength. The Flex Model provides proprioceptive and kinesthetic input so the person can better sense the position of their fingers and the movement of their fingers. Along with the more obvious health and wellness aspects, athletes looking for that edge will also benefit from utilizing FingerWeights (Flex). Whether it’s better ball control in baseball, or improved handles and shooting in basketball, FingerWeights hone in on the fine motor muscles in the fingers and hands to help maximize overall performance” (FingerWeigths, 2021).

FingerWeights do come in different options: As the “Original” and the “Flex” version. Of course you do not always have to buy a complete kit, but can purchase single ones, too.

But, in this article, I’m going to focus on the “Therapy Pro Mobile Kit”.                                                                                                             

The bands are designed to fit any size finger, each unit’s resistance is adjustable in 10-gram increments up to 90 grams per finger with the addition of the 3 Tungsten resistance rods.

Insert pic with FW on hand

So what makes these little weights unique? Well, I’ll tell you what. If you’re looking for a ways to train your finger/forearm extensors, you probably stumbled upon this article.

Probably you also have done some research on the topic and found conventional methods of training finger extensors, with rubber band devices, like the “Handmaster Plus” (see picture below).

Handmaster Plus (affiliate link) “Your All-in-One Hand Strength Solution, source: own picture.

Don’t get me wrong, these bands are not bad. But, considering “strength curves”, they work entirely different than FingerWeights, which are like super small dumbbells.

To explain the difference, we’ll have to look at something that is called “strength-“ or “resistance curves”.

By the way, this will teach you thinking in principles, as these strength curves apply generally to the whole body, and not only to working out your fingers/forearm extensors.

When you use a band, the force you need to apply will increase exponentially, as the resistance will increase (exponentially) the more you pull the band.

If you use FingerWeights, on the contrary, their strength curve applies to the laws of gravity. The strength vector will always point perpendicular to the floor, even if you lift the finger, due to gravity.

This has the advantage that you can decide whether and how much force you want to apply on each individual finger, whereas with a band you’ll have to extend harder and harder, the more you extend a finger!

Strength curve, using a “Handmaster Pro“, source: own picture.

Using FingerWeights (as shown in the picture/exercise below), the strength-curve would be more “bell-shaped”, with the greatest resistance at a 90° angle, when the finger is parallel to the floor/table.

If you continue to ascend your finger, the resistance curve descends, as the strength you’ll have to use (to lift the finger up) will decrease.

Strength curve, using a “FingerWeight”, source: own picture.

Always keep in mind, that, by using a dumbbell (in this case the FingerWeight), the force of gravity will always point perpendicular to the ground, due to gravity (see picture)!

Direction of gravity, using a “FingerWeight”, source: own picture.

FingerWeights and Esports

So, maybe you have heard about the multi-million/-billion dollar industry of professional gaming, called “Esports”. If not, you will find plenty of info about it on the internet.

For all of you who already know about the topic but want to learn more about it, I’d recommend my article: “Strength and Conditioning Training for Esports”.

In this article I’ll explain why grip- and neck-strength, as well as “electromechanical delay” are important for increasing an Esport-Athlete’s performance!

While I explain in detail how to improve this performance in the linked article I’d like to add here, that training your finger extension will boost your Esport performance even more.

This makes sense, as a movement in the finger does not only acquire someone to hit a key on a keyboard (which is finger-flexion) but also to lift one’s fingers (which is finger-extension) to reach another key, or to hit a key again.

Therefore, not only training your finger flexion, but also focusing on your finger-extension is super important to increase your “typing-“, respectively “key-hitting” speed.

In my opinion FingerWeights have the advantage of micro-adjusting weights, from 10-90g/finger. This will give an Esport Athlete the possibility to increase the weight for finger extension, without messing up his “movement pattern”.

As I already wrote in 2020:

Being a pro esport gamer requires you being able to process information as fast as possible to make the winning move! That means that it is not only some typing on a keyboard and scrolling around with the cursor of your mouse. It is about the speed of information ßàreaction time! How fast can you absorb, realize, interpret your esport related environment (game) AND how fast you can take action!” (Stößlein, 2020).

When would I integrate them in a training program?

Ok, now it’s time to answer the question: “How do you integrate FingerWeights” into a strength-training workout.

It’s not always easy to answer a question in a general manner. But, I’d recommend the following:

If it is structural balance you’re aiming for, you could simply integrate finger extensor training into your grip-training session.

For example as an agonist-antagonist training.

Let’s say as a D1 and D2 exercise, performed immediately after each other.

D1: Gripedo Grip Training (click on the link, to read my article)

D2: FingerWeights Finger extension

Both could be performed either on a separate “grip-strength-day” or at the end of any other workout.

If you don’t have time at the end of a workout you can even integrate your finger extensor training in the evening, while watching TV or at the office, during a little break.

Simply grab a Lacrosse ball (can be bought for under 6 EUR/$). With this you can perform grip strength (finger/forearm flexion) and finger extension with your FingerWeights at once, respectively in a “superset”.

Just grab and squeeze the Lacrosse ball as hard as you can, then extend each finger individually without lifting the other fingers from the ball.

You will be surprised how hard it is, i.e. to only lift your ring finger without extending other fingers as well!

Using a “FingerWeight” in combination with a Lacrosse ball (affiliate link), source: own picture.

FingerWeights Therapy Pro Mobile Kit Conclusion

In a nutshell, FingerWeights are an easy to use and affordable method to reach structural balance in your forearms. Training finger extensors is a very rare thing to do, even amongst professional athletes.

But that should not scar you from implementing finger extensor training into your routine. From my expertise, I’ll state that this – if done correctly – will only improve your output.

No matter if you like to improve sport specific tasks, your daily routine or to improve your rehabilitation.

Having an instrument like a hand (which is a super complicated “tool”) is something we should be thankful for. Why then only train one half of it with grapping?! Take your life to the fullest and learn how to properly extend every single finger.

If you liked this article, then subscribe to the blog / newsletter, leave a comment or contact me.

In this and other articles you will find one or the other “affiliate link” to amazon. If you purchase something through this link, you will support my blog articles and create resources for further high-quality research and articles like this. There are no additional costs for you! You can find all of my basic recommendations at: https://www.amazon.de/shop/bernd_stoesslein

If you like to book an online consulting with me to learn more about strength and conditioning, nutrition, brain coaching, supplements etc. for (e)sports please feel free to send me an E-Mail to:

info@bernd-stoesslein.de

© HP Bernd Stößlein, Master of Business Administration in Sportmanagement.

If you liked this article please share it with your friends, subscribe to the newsletter and the blog.

If you like to book a professional treatment as a patient of my “Heilpraktiker” (Complementary and alternative medicine practitioner) patient in Germany, please contact me:

info@heilpraktiker-stoesslein.de


Literature

Extrinsic extensor muscles of the hand, source: https://en.wikipedia.org/wiki/Extrinsic_extensor_muscles_of_the_hand, access, 31.8.21.

FingerWeights, Athletics, source: https://fingerweights.com/pages/athletics, access from: 1.9.21.

Stößlein, 2020, Strength and Conditioning Training for Esports, source: https://www.bernd-stoesslein.de/2020/08/28/strength-and-conditioning-training-for-esports/, access from 1.9.21.

Sacro Wedgy® is a special device, invented in the late 1950s by Football Coach Meares, to assist you with elevating your tail-bone and using gravitational force to relax, re-align and re-balance your hip. It might help releasing the “muscle of the soul”, the M. (Ilio)psoas, help stretch your M. piriformis and give your sciatic nerve a break from potentially being compressed- through structural disbalance. In this in-depth article I will give you my biggest take-aways and review after having used the Sacro Wedgy® (SW) for an extensive period.

Sacro Wedgy® – In a Nutshell explained

The Sacro Wedgy® is – as the name implies – a small rubber-like tool (see pictures) that can be used to release specific muscles, like the (Ilio)psoas and/or joint, e.g. the lumbosacral joints. I have corresponded with Cindy Littlefield, CEO of Sacrowedgy.com, the daughter of the inventor of the Sacro Wedgy®.

Sacro Wedgies, male (blue) and female (pink) version, source: own picture.

Cindy claims, that the Sacro Wedgy®:

“(…) helped lower back pain, hip pain, “pain in the butt”, common to runners, golfers, tennis players and all athletics (…) it has helped others with fibromyalgia, piriformis syndrome, scoliosis, knee pain, back pain, sciatica and more. The Sacro Wedgy® is not ALWAYS a quick fix, but it’s great when it is! The Sacro Wedgy® is a “tool” to use and like any “tool”, you will get out of it, what you put into it. You’re taking responsibility for your own back care.“ (Littlefield, 2021).

I first learned about the Sacro Wedgy® (SW) from Liz Koch. She’s the author of three fascinating books about the (Ilio)psoas, which you can learn more about in depth in my article.

Liz highly recommends this special device, that’s why I contacted Cindy.

Special thanks to Cindy Littlefield who sent me Sacro Wedgies for testing!

I really appreciate her approach, as she states, that it lies in your responsibility to take care of your (back)health.

Like many other “tools” the Sacro Wedgy® falls into the category: “use it or lose it”. That means, you cannot expect wonders if you have been suffering from pain for a long time, if you only use it once or twice!

Therefore, as you can read in the quotation above, the Sacro Wedgy® is not always a so called “quick fix.

Yet it is, from my perspective, a really wonderful “tool” for every therapist’s “toolbox”.

It could also be a “most bang for your buck” approach, especially when you want to use it for yourself and if your anatomical knowledge might be limited.

You can simply follow the instructions, don’t need a therapist from “the outside” who treats you, it can be taken almost everywhere (due to the small size and super lightweight) and it has an absolute reasonable price.

Actually it doesn’t have a price, but it is rather an investment! The best investment you can do in your life will always be in yourself, respectively your health.

My “Stoesslein Investment Advice”:

Invest in the best (=yourself).

This will bring you health,

The one who invests in oneself, will achieve more wealth!

Sacro Wedgy® – an anatomical excursion

The Sacro Wedgy® comes in two versions , a male and a female one. This takes care of the fact that there are slight anatomical differences between the hip of a man and a woman.

Some taller women and some women that just have a longer, narrower torso do better though on the male version!

In a nutshell, the Sacro Wedgies are special devices which isolate and elevate the sacrum and uses gravity help relax, aligned and re-balance from the hips out. 

The word “sacrum” derives from Latin: sacer = holy, respectively sacr(o) à os sacrum (Becher et al., 1995).

The word “os” is also Latin and derives from ossis = bone (Becher et al., 1995).

So, literally translated “os sacrum” means: “cross-bone”.

The SW is also placed on your tail-bone (os coccygis). This “little fella” got its name from the old Greek term kokkyx = cuckoo (Becher et al., 1995).

The sacrum (…) in human anatomy, is a large, triangular bone at the base of the spine that forms by the fusing of sacral vertebrae S1–S5 between 18 and 30 years of age.” (Kilincer et al., 2009).

Interesting fact:

The os sacrum (sacred bone) was so named by the Romans as a direct translation from the older Greek hieron osteon. Explanations of the attribute “sacred” or “holy” in the past have included misinterpretation of the Greek word hieron, use of the bone in sacrificial rites, the role of the bone in protecting the genitalia (themselves considered sacred), and the necessity for the intactness of this bone as a nidus for resurrection at the Day of Judgment. A more plausible explanation may be that the holiness of the sacral bone was an attribute borrowed from the ancient Egyptians, who considered this bone sacred to Osiris, the god of resurrection and of agriculture.” (Sugar, 1987).

Sacrum, Ilium, Pubis, Ischium and Sacrum, source: Henry Vandyke Carter und ein weiterer Urheber – Henry Gray (1918) Anatomy of the Human Body (See “Buch” section below) Bartleby.comGray’s AnatomyTafel 241.

Cindy Littlefield says that:

Having revealed the etymological origin of the word Sacro Wedgy®, we now can dig into some more anatomical layers, as we are creatures who do not only consist of bones but also a lot of other living tissues.

Due to the fact that this is only a 2500 words blog article I cannot address every little detail concerning the work-mechanisms of the Sacro Wedgy® nor all the soft tissue that is involved, using this device. Please keep this in mind!

Nevertheless, I’d like to address some important muscles here, to give you an idea of how the Sacro Wedgy® is working and why I recommend using it.

Concerning this, let’s talk about the pear-shaped muscle, that actually doesn’t have the shape of a pear.

The so called “piriformis”.

This muscle “(…)originates with the wide end of the triangular shaped muscle attached to the front of the sacrum and the narrow end attached to the hip. As gravity takes over and the hips relax, the piriformis has a chance to stretch a little.” (Sacro Wedgy®, 2021).

Posterior view of gluteal region showing the small gluteal muscles and gluteus minimus. Source: Beth ohara (raster), Offnfopt (vector)

This is another confusing term. Piriformis derives from Latin pirum = pear (Becher et al., 1995).

If you look at the Musculus (M.) piriformis though, it rather looks like a triangle than a pear!

Interesting fact:

If you wonder why some muscles have names that are quite misrepresenting then please send you complains to the University of Padova, Italy. That’s where probably 90% of all these names derive. Furthermore it has the oldest permanent anatomical theatre in Europe, dating from 1595 and began teaching medicine around 1250! (Wikipedia, 2021).

Cindy writes:

For some people, this (relaxation of the hip, annotation of me) is going to hurt like the devil so they have to relax even more. The sciatic nerve is involved with this muscle so you can understand how this has helped so many with sciatica. This muscle is also thought to be the beginning of a series of misalignments or what we call a “snowball” effect.” (Littlefield, 2021).


Sacro Wedgy® and the Sciatic Nerve

You have probably heard about the so called “Sciatic Nerve”. To give you a maximum of transparency, here’s the etymological decryption:

Sciatic derives from the old Greek word ischion = hip joint (Becher et al., 1995).

Therefore sciatic nerve describes the nerve that is trespassing the hip bone, descending into the lower extremities.

It is:

“(…) a large nerve in humans (…) which is the largest branch of the sacral plexus and runs alongside the hip joint and down the lower limb. It is the longest and widest single nerve in the human body, going from the top of the leg to the foot on the posterior aspect”. (Wikipedia, 2021).

Approximatelylocation of the Sciatic Nerve, source: Henry Vandyke Carter und ein weiterer Urheber – Henry Gray (1918) Anatomy of the Human Body (See “Buch” section below) Bartleby.comGray’s AnatomyTafel 1244

Regarding its function:

The sciatic nerve supplies sensation to the skin of the foot, as well as the entire lower leg (except for its inner side). Sensation to skin to the sole of the foot is provided by the tibial nerve, and the lower leg and upper surface of the foot via the common peroneal nerve.” (Drake et al., 2005).

Besides being a Strength-Coach I do also work as a “Heilpraktiker” (Complementary and Alternative Medicine Practitioner) in Germany.

Due to my observations from clients and patients, I can says that the sciatic nerve is commonly blocked through misalignment, respectively structural disbalances, which will often result in great pain!

These are symptoms of different causations, including emotional anatomy!

I see the value in the Sacro Wedgy® as it gives patients/clients the opportunity to continue their treatment at home, on their own. This will enhance a manual treatment and will bring back health in “the own hands” of people instead of being conditioned that some external “authority” will cure their diseases!

How to use a Sacro Wedgy® ?

In this article I will focus on how to use the Sacro Wedgy®. If you’re also looking for some isometric exercise you might include around using the SW you will find some instructions on the SW company’s site.

Sitting on the Sacro Wedgy® (during strength training)

The Sacro Wedgy® (both versions!) can also be used during seated exercises (e.g. seated dumbbell presses), source: own picture.

Lower back problems, sciatica and leg pain do often start after having been on a long trip, and/or sitting for prolonged periods.

The Sacro Wedgy company writes:
Years ago many seats had a small hump in the middle. Farm tractor seats or older secretarial furniture are examples. What this hump was doing was filling in the gap under the coccyx (tailbone) and about 40 years ago the design changed to the bucket seat. After sitting for a while, gravity takes over, slumping starts and the spinal column pushes the sacrum down causing the hips to spread and pain begins. You will recieve most of your correction and relief from lying down on the Sacro Wedgy® with a neck support, but we like to recommend sitting on the Sacro Wedgy® for preventive maintence.” (Sacro Wedgy®, 2021).

As I mentioned earlier, I’ve been experimenting quite a lot with the SW. I also included it into my strength training.

Regarding the quote above, I thought “well, let’s see if this will add any benefits”. And, it did!

In a nutshell: you can use the SW during any exercise in which you have to sit on a machine, bench, whatsoever.

The most benefit however will probably occur while overhead pressing movements or, at least, exercises where gravity is pushing you down into a seat, respectively the Sacro Wedgy® (see pictures of example exercises).

Klick on the link to Instagram below the screenshot and you can see me performing seated dumbbell presses, sitting on the Sacro Wedgy® and with my BAMBOO BENCH®.

Lying on the Sacro Wedgy®

Obviously you might experience the biggest benefit of the Sacro Wedgy® by lying on it. I, for myself, especially like to use it before/after a leg workout and while lying on my back during a coffee enema.

Lying on the Sacro Wedgy® is the most efficient way of using this tool for helping muscles (in the hip area) return to a better structural balance.

Please consider the neck to be stabilized, too, with a sufficient firm support.

Place the Sacro Wedgy® under only the sacrum to isolate, cradle and elevate this very important “wedged” shape bone between your hips.

“The beginning stages may, for some, be awkward. Just finding the “sacrum” may be daunting. It is below the waist, shaped like a triangle with a curve at the very end sometimes called the “tailbone”. Lying on the SACRO WEDGY® is like lying on top of another sacrum. There is a curve or “cradle” in the SACRO WEDGY® similar to the curve of the sacrum.” (Sacro Wedgy®, 20221).

As mentioned above, I first learned about the SW from Liz Koch who recommends using it during a position called “constructive rest position”.

According to that, I’d suggest to start using the SW while keeping your knees bent with feet on the floor (in a “constructive rest position”) and with the hands move the SW up towards the waist and down to the feet ½ inch (approximately 1,27cm)  at a time until you feel the “cradle” (see pictures).

How to place a Sacro Wedgy®, source: © Sacro Wedgy®. Place index finger in the hollow part of the narrow end of the Sacro Wedgy®. The narrow knob should be placed below the coccyx (tailbone).

Sacro Wedgy® Conclusion

To make a long story short: I do recommend to use a Sacro Wedgy®! Of course, you should consult a physician first!

Being a Strength-Coach and a “Heilpraktiker” (Complementary and Alternative Medicine Practictioner) I do see the benefits of using a little “helper” like the Sacro Wedgy®.

You might use it during treatment, to increase the efficiency and/or e.g. around (before/after) a leg workout.

It (the SW) might therefore be used as well as preventive as rehabilitative. Moreover, it serves as a subtle (Ilio)psoas releaser.

The Sacro Wedgy® has a reasonable price and follows the “Pareto-Principle”, respectively the 20:80 rule.

Will the SW “cure” all your back-problems? Certainly not. But, it might fall into the 20% range of things you can do by yourself to achieve 80% of better back-health.

Especially, if you’re suffering from hip pain. Of course you will always have to question yourself what led to these problems and how YOU can solve them! Nobody and nothing will be able to “cure” yourself.

All “cool tools” and therapists are only able to give help for self-help! Keep this in mind!

© HP Bernd Stößlein, Master of Business Administration in Sports Management.

If you liked this article, then subscribe to the blog / newsletter, leave a comment or contact me.

In this and other articles you will find one or the other “affiliate link” to amazon. If you purchase something through this link, you will support my blog articles and create resources for further high-quality research and articles like this. There are no additional costs for you! You can find all of my basic recommendations at: https://www.amazon.de/shop/bernd_stoesslein


Literature

Sacro Wedgy®, source: https://www.sacrowedgy.com/store/, access from: 30.5.2021.

Lateinisch-griechischer Wortschatz in der Medizin, p. 105.

Lateinisch-griechischer Wortschatz in der Medizin, p. 113..

Lateinisch-griechischer Wortschatz in der Medizin, p. 153.

Lateinisch-griechischer Wortschatz in der Medizin, p. 170.

Lateinisch-griechischer Wortschatz in der Medizin, p. 193.

Kilincer, Cumhur; et al. (2009). “Sacrum anatomy”. Scientific spine. Trakya Üniversitesi Rektörlüğü, Yerleşkesi, 22030 Edirne, Turkey: Self. Retrieved 8 November 2015.

University of Padova, source: https://en.wikipedia.org/wiki/University_of_Padua, access: 30.5.2021.


Sciatic Nerve, source: https://en.wikipedia.org/wiki/Sciatic_nerve#cite_note-1, access: 30.5.2021.

Drake, Richard L.; Vogl, Wayne; Tibbitts, Adam W.M. Mitchell; illustrations by Richard; Richardson, Paul (2005). Gray’s anatomy for students. Philadelphia: Elsevier/Churchill Livingstone. 

How the Sacrum Got Its Name, Oscar Sugar, JAMA. 1987;257(15):2061-2063. doi:10.1001/jama.1987.03390150077038.

Pictures

Sciatic Nerve: Henry Vandyke Carter und ein weiterer Urheber – Henry Gray (1918) Anatomy of the Human Body (See “Buch” section below) Bartleby.comGray’s AnatomyTafel 1244; File:Gray1244.png, Erstellt: vor 1858 date QS:P,+1858-00-00T00:00:00Z/7,P1326,+1858-00-00T00:00:00Z/9, Ungefährer Verlauf des Ischiasnervs (Nervus ischiadicus), im Bild mit Sciatic Nerve beschriftet, source: https://de.wikipedia.org/wiki/Ischialgie#/media/Datei :Gray1244.png, access from: 9.6.21.

Posterior view of gluteal region showing the small gluteal muscles and gluteus minimus. CC BY-SA 3.0, File: Posterior Hip Muscles 1.svg, Erstellt: 29. September 2017. Source: https://de.wikipedia.org/wiki/Musculus_piriformis#/media/Datei:Posterior_Hip_Muscles_1.svg, access from: 9.6.21.

Henry Vandyke Carter und ein weiterer Urheber – Henry Gray (1918) Anatomy of the Human Body (See “Buch” section below) Bartleby.comGray’s AnatomyTafel 241, Sourece: https://de.wikipedia.org/wiki/Kreuzbein#/media/Datei:Gray241.png, access from: 9.6.21.

Zelter Shelter is a dream of every outdoor-fan and biohacker! In a nutshell, it’s a wearable tent!  Of course you can sleep INSIDE the tent, but you can also WEAR this tent as a poncho! In this article I will tell you why the Zelter Shelter is now part of my bug out bag, in my car and why everyone should have this fast, simple and reliable personal shelter!  You always fall down to your level of preparation. That’s why you should always go prepared! As I bonus you will find an interview with Lee (the mastermind behind the Zelter® Shelter) an me, chatting about his idea, philosophy and upcoming products of the Zelter® brand!

Zelter Shelter – Every Biohacker’s dream?

As you might not know, I not only work as a Strength and Conditioning Coach/Personal- Trainer but also as a “Heilpraktiker” (Complementary and Alternative Medicine Practitioner) as well as a Consulting-Biohacker. 

So, why am I writing about a special kind of tent/tarp? Well, because I think that biohacking is a skill, as much as survival. 

According to the Merriam Webster Dictionary biohacking is defined as:

“biological experimentation (as by gene editing or the use of drugs or implants) done to improve the qualities or capabilities of living organisms especially by individuals and groups working outside a traditional medical or scientific research environment”.

Let’s go a little deeper to get to know into this biohacking stuff and what it actually has to do with a wearable tent… 

The word Biohacking is a construction of the old Greek word bios = life (Becher et al., 1995), and the English suffix: to hack which could be used in different meaning, like “to gain access” to something (computer network, etc.). 

Let’s stick to those explanations. If you fuse both together you get a literal translation of: “to gain access to life”. 

Being a bio/hacker means that your effort/aim/goal is to decode life – and all its situations – to its deepest core.  Furthermore, you are not following a narrative you’re being told but have learned to question things. 

You might also be a “truth seeker” and probably you are a so-called “prepper”, too. That means that you are trying to be prepared for any situation whatsoever.

To keep this straight, this does not mean that you are necessarily a tinfoil-hat-wearing conspiracy theorist, although lots of former conspiracy “theories” in history turned out to be true!

You are probably someone who has more foresight than others, and that’s exactly why you should consider equipping yourself with a Zelter Shelter!

No matter when and how…you are most likely to encounter a “Shit Hits Your Fan” (SHTF) situation. Some might be worse than others but something inevitably will happen to you. 

So, let’s talk how at least to be safe from “wind and weather”, as we say in German.

Zelter Shelter – What it is and why I got one

When you’re reading this article you have probably searched the net for a review about the Zelter Shelter (ZS). That’s why we don’t have to start from scratch. 

You most likely know that it is a “unique new wearable personal shelter for the outdoors” (Zelter Shelter, 2020). So what is all the fuss about? 

Zelter® Shelter – wearable mode, source: © Zelter® Shelter.

Well, I will tell you. As already mentioned the ZS is not only a tent you can sleep INSIDE but which you can also WEAR, as a kind of poncho!

This is important because think of this:  you’re in the middle of nowhere and – for which reason whatsoever – you cannot find a proper shelter, nor do you have the time (or skills) to build one. That’s where the ZS comes into play. 

It is so small that it perfectly fits into almost any backpack. I even consider it being mandatory for every car driver!  I, for myself, never ever drive my car again without my SZ in my trunk! 

The above mentioned scenario could strike you not only in the middle of nowhere. It could happen anytime, anywhere. Even in an urban setting! You could be stuck in a traffic jam, overnight, without heating etc. 

Just pull out your SZ and you have a 10K waterproof poncho that is light weight and RET12 breathable! It comes in a signal color (“flame orange”), if you want to use it as an emergency device or you go for “mystery green” or, like me, “midnight black” (limited edition). 

Zelter® Shelter – Tent-mode, source: © Zelter® Shelter.

That might depend on what you want to use it. I prefer black as you can use it in any situation whereas military cameo and or just green would look too much paramilitary.

If you don’t want to address people’s attention immediately or even want to avoid it, black is good to go (and hide, if you wish to in a the scenario that makes it necessary).

As you see, the ZS is not only for outdoor use in the woods, but also for urban scenarios. Just think of a blackout, rioting, tumults or even worse things. 

You might end up stuck in a foreign country, in a lockdown, without enough money for both accommodation AND food.

Sure that is a very harsh scenario but the year 2020 has shown that you have to expect the unexpected. Therefore: “always go prepared”!

But back to the features of the Zelter Shelter:

Let’s say you do not want to wear it but use it as a tent, respectively tarp. No problem. You don’t need anything except a strong breath. 

In less than one minute you can inflate the three stays of the ZS. No poles needed (although you can also use them if you want, as they’re included). 

The Zelter Shelter has a built- in valve with a little hose that are used to inflate the stays. The cap of the valve can’t be lost as everything is built together. To open or close the valve you simply turn it. 

So, you do not need to carry extra equipment like a pump or compressor. You are independent wherever you need to set up your shelter!

To be honest, I was really surprised how much space there is in this one-man tent/tarp. There is plenty of space to turn around. If you are a regular- built human you will perfectly fit into the tent, except maybe you’re extremely tall, and/or super fat 😉 

To store the ZS, it comes in a nice water proof carrying bag with an instruction printed on how to use it.

Even in case of repeating myself, I must tell you again and again: please don’t wait for a

scenario in which you need shelter to save your life, by all means: practice, practice, practice!

First thing I did when my ZS arrived was to read the instruction and then I spent the next

couple of nights sleeping in it! Yes, IN my flat. Why? Because when SHTF I want to be able to

set up the Zelter Shelter “blindly”. 

Really really bad, if you don’t know how to use/operate equipment in a serious situation! Use your ZS right away. Inflate/deflate it, wear it and learn to store it in your bag!

Technical details:

Quality: ISO 9001:2008 standard
Packing size: 35 x 15cm
Weight: 1.2 – 1.3 Kg (in total)
Material: 75D Nylon
Set up time: < 1 minute (after having practiced)
BivouacSize: 2.3m L x 1.1 B x 1.0 H

Zelter® Shelter – folded together, outside of its bag, source: © Zelter® Shelter.

Zelter Shelter – Best equipment for your EDC and Bug Out Bag

I have already mentioned that I never leave my house by car without my Zelter Shelter anymore. Therefore you could consider it part of my Every Day Carry (EDC). 

Another great way how to use the SZ is in your Bug Out Bag (BOB). I highly recommend you to have one for every family member. Meaning, if you have kids, you create a BOB that fits the size and strength of every individual family member. 

In this article I won’t go further into detail of what you should store in your BOB except for one thing: shelter! Most tents are simply too big and/or too heavy to carry. 

The Zelter Shelter is really light-weight and could even be stored in a child’s backpack!  So, if you (and your family) haven’t set a BOB, I highly recommend you to do so! 

Even if you’re a business man and on the road a lot, please store one of these in your car. It is super affordable and you get it starting from £169.95 (flame orange), which is about 186€ (October 2020).  The Wearable version in Mystery Green is available with International shipping from Amazon DE/UK (affiliate link).

Zelter Shelter – what can it do?

Okay, now you have heard some ideas of how to use the ZS. Of course that’s not all, I bet you can come up with other great useful implementation. Please feel free to share your ideas in the comment section below this article. 

Besides the fact that you can wear the SZ and use it as a kind of regular tent there are further options. 

You can use it as a two person tarp with use of a trekking pole! An in depth video explanation of how this is done can be found in this video. 

Moreover, there’s another option. You might use the Zelter Shelter as a “regular” tarp, i.e. to cover a hammock or something else you’d like to protect from the weather.  A simple, short and cool demonstration can be found in this video. 

How to cover a hammock with the Zelter® Shelter, source © Zelter® Shelter.

As it is waterproof, you might also use it in a real emergency situation/survival situation to collect and transport water or other stuff you need for your camp etc. 

Even the SZ’s bag can be repurposed to carry water and other materials. Just be creative! The possibilities are endless!

Zelter Shelter – The man behind the idea

I had the chance to do an interview with the mastermind behind this great product.  In our interview we talk about how the Zelter Shelter was folded into existence and what’s Lee’s philosophy behind the ZS. 

Enjoy my chat with Lee here:

Zelter Shelter Review Conclusion

To draw a conclusion, I’d like to answer the question whether the Zelter Shelter is THE best tent/tarp out there. Well, as you probably know, there is no such thing as THE best, as everything is always a matter of perspective.

Nevertheless, I’d say that the Zelter Shelter, from my point of view, is probably one of the best when you’re looking for the most bang for your buck.

Following the Pareto-Principle (20:80 rule) the ZS is probably one of the best outdoor/biohacking/survival essentials out there. 

Please remember its almost unbelievable versatility!  You can sleep IN it, UNDER it and even WEAR it!! Plus all the aforementioned other potential features.

For me the Zelter Shelter has more than just a “price” – it has a value!  Invest under 200 € for a device that is waaaaay more than just a “cool tool”! 

The version that is for sale now has had some design improvements added with upgraded comfort and weatherproofing features that will benefit any user.  

Available now from Amazon DE/UK (Affiliate Link) and Mountainmen.ch in Switzerland.

Conclusion:

Go get one immediately and (at least) put it in your car!


Literature

Biohacking, Source: https://www.merriam-webster.com/dictionary/biohacker, access:

20.10.20. 

Lateinisch-griechischer Wortschatz in der Medizin, S. 47.

Zelter Shelter, source: https://www.zeltershelter.com/, access: 20.10.20.

Coffee Enema – After reading tons of positives about the effects of enemas, I thought long and hard about trying coffee enemas for myself.

After I initially resisted it and couldn’t really get used to the idea, I then made a “heroic” self-experiment of the effect myself.

After that I felt as pure as never before and my energy level was “superb” all day!

Enemas are by no means a new trend from the “biohacking scene”, but have been used for centuries – if not for millennia – for various purposes.

In this article you will find out why I now swear on (coffee) enemas and how I use them on a regular basis. Don’t worry, there won’t be any explicit pictures of the application 😉 😉

—> THIS ARTICLE IS ALSO AVAILABLE IN GERMAN! <—


Everything You Always Wanted to Know About Coffee Enemas * But Were Afraid to Ask

An enema is called clyster.

This comes from the Greek klysma, klysmatos = intestinal enema or irrigation. The origin of the word is derived from the Greek verb klyzein = rinse, rinse, clean (Becher et al. 1995).

With the enema, the name says it all, different types of fluids can be passed through the anus into the intestine. Anus comes from Latin and means “ring”, because of the ring-shaped muscles in this area (Becher et al., 1995).

Generally, enemas can of course be used with a wide variety of liquids/solutions. Depending on the area of ​​application and objective.

The story of the (coffee) enema

Although enemas have been known and used for thousands of years, the use of the coffee enema is comparatively “new”.

History of the Coffee Enema, source: Pixabay.

Naturopath (Heilpraktikerin) Ariane Zappe writes in her book (written with co-author Dr. med. Dietrich Klinghardt) “ImmunSymbiose” on the coffee enema, among other things:

The healing and pain relieving effect of coffee enemas was discovered by chance during the First World War, when, as a result of the occupation of Germany, morphine and other painkillers were no longer available in sufficient quantities. […] Some nurses had the idea of ​​adding the surgeons’ leftover coffee to the enemas. Lo and behold, the soldiers reported an enormous relief and pain relief through this application ”(Zappe and Klinghardt, 2017).

The above quote was translated by myself.

In an article by Dr. Lawrence Wilson, I was even able to find information on somewhat earlier usage. According to that Dr. Wilson writes:

“Coffee enemas have long been in use. In a case report in the Pacific Medicaland Surgical Journal in December 1866, M.A. Cachot, MD, described successful use of a coffee enema to treat a child dying from an accidental poisoning. Articles from the late 1800s reported that coffee enemas were helpful in post-operative care; at a medical meeting in 1896, Dr. W.J. Mayo, one of the founders of the Mayo Clinic, mentioned coffee enemas as a routine part of care for patients after abdominal surgery.  Coffee enemas were listed as a stimulant and as a treatment for shock in medical and nursing textbooks in the early 1900s.[…]” (LD Wilson Consultants, Inc., 2019).

On the way to my own coffee enema

Since this article is expressly only an information article, be only my anecdotal experiences are presented here. It is not about healing statements, promises or treatment recommendations. Please note the disclaimer / note at the very end!

The topic of the coffee enema has come across me (July 2019)  again and again “by chance” in various kinds of literature. Well, since I don’t believe in “coincidences,” I still believe in the meaning of the word.

So since I got this “in-formation” over and over again, I decided to take a closer look at the topic. Although I could not really get used to the idea of a ​​physical application at first, I was fascinated by the positive qualities, of which I found more and more to read about.

Depending on the literature, I found (partly) overlapping statements, among others at Zappe / Klinghardt, Wilson or Greenfield e.g. over:

Detoxification properties, colon cleansing, pain relief, stimulation of bile production, opening of the bile ducts, vasodilation (vasodilation) of the portal vein circulation, strengthening of glutathione-S-transferase (responsible for removing toxic radicals in blood and serum), stimulation of the organ-nerve system, anti-inflammatory (due to theophyllines & theobromines contained in coffee), etc.

All of this sounds exciting, of course, and made me very curious. The desire for the “heroic” self-experiment grew. After all, you can only report authentically about what you have tried out yourself.

Why do I give myself (coffee) enemas?

At this point I can only speak for myself again, but I am of the opinion that we live in a world that is becoming more and more toxic. It used to be said: “Go out into the fresh air”. But how “fresh” is our air really today?

How pure is food from the sea? How are meat, vegetables and fruits from our fields treated? How many minerals are still in our soils? In my article: “Magnesium chloride -“ legendary ”salt” I go into more detail.

Who can tell me how much – from my point of view – other harmful substances are contained in shampoos, cosmetics, beverages, plastic packaging, dyes, etc.?

Who can honestly tell me how artificial substances will affect my health in the long term?

It is therefore my aim to avoid these substances as far as possible. In particular:

1. Phytoestrogens

2. Mycoestrogens

3. Atrazines

4. Triclosan & APEs (alkylphenols)

5. BP & 4-MBC (Benzophenones & 4-Methylbenzylidene)

6. Red dyes # 3 and # 40

7. Parabens

8. Phthalates

9. BPA & BPS (isphenol A & S)

10. EE2 (17a-ethinylestradiol

This list comes from the book “Estrogeneration” [Affiliate Link], by Dr. Anthony G. Jay. I strongly recommend you to read this book!

In addition, in this world I see myself increasingly confronted with other harmful substances such as:

· Lead

· Mercury

· Cadmium

– Arsenic

Aluminum (nickel)

· Uranium

· Beryllium

· Bismuth

· Antimony

· Zirconium

· Gadolinium

· Tin

·      etc.

How can this be tested? Well I do use a device called SO/Check, respectively “Oligoscan”. It uses spectra/photo/metrics to determine the 21 most important minerals, Vitamins and 15 most toxic heavy metals intra- and extracellular.

This is a super-fast, non-invasive method to get an overview of your “toxicity-level”. If you’re interested in getting measured, please consult me over my “Heilpraktiker”-Practice (= Complementary and alternative Medicine Practitioner) in Germany.  

 Feel free to drop me a mail: info@heilpraktiker-stoesslein.de

Then there are herbicides, fungicides, pesticides, insecticides and certainly thousands of other chemicals. More about the origin of these words and an alternative to “sprayed” vegetables can be found in my article: “Greenunit 2.0 – Your start to the garden in your own four walls?”

Even if I live a healthy lifestyle, these and other substances could still build up in my body. In order to expel these and keep my intestines healthy and functional, I give myself coffee enemas.

Positive effects on me

Through my research on the subject of coffee enemas, I found other positive properties about this procedure. The following has worked for me:

To me, coffee (when used as an enema) seems to have an antioxidant effect. In contrast to other antioxidants, the coffee enema is also said to have a yang effect (Wilson, 2019).

At this point I don’t want to go into the principle of Traditional Chinese Medicine (TCM) of Yin & Yang in detail, because that would fill an entire article. Let me just mention so much for a better understanding:

Yin und Yang; source: Pixabay.

Yin and Yang are words used to describe opposing forces in nature. Yang means warm, astringent and centripetal. Yin means cold, expanding and having a centrifugal effect.

I am convinced that the balance between Yin and Yang significantly reduces my stress level, contributes positively to my spiritual development, can better drain toxic metals, chemicals, etc. from my body, has a beneficial effect on most of the enzyme reactions in my body and promotes my vitality!

To what extent mediation can be helpful in this process, you can read in my article “Why you should meditate – your thoughts create your reality”.

Own experience:

I can only confirm the alleged Yang effect that coffee enemas have! A 45-minute coffee enema, with constant self-massage of my colon (counterclockwise), was by far the most relaxing thing I have done in the last 30 years!

I can’t say 100% whether it was just the coffee and / or the combination with the self-massage, but I can only underline the YANG effect!

Perhaps the massage simply mechanically stimulated the vagus nerve and thus triggered a parasympathetic (relaxing) effect. Anyway, just fantastic!

 The colon and its reflexpoints; source: Iridology Simplified, Bernard Jensen Healthy Living Publications.

The graphic is from the book: “Iridology Simplified” [Affiliate Link], by Bernard Jensen. Courtesy of Bernard Jensen Healthy Living Publications!

Possible positive effects of coffee (as an enema)

In the course of my research, I have found all kinds of positive aspects about coffee. So Dr. Max Gerson, a big proponent of the coffee enema application, said:

Heubner and Meyer of Goettingen University, Germany had shown in animal models that rectal administration of caffeine would dilate bile ducts and promote bile flow. Theophylline and theobromine, major constituents of coffee, dilate blood vessels and counter inflammation of the gut. The palmitates of coffee enhance glutathione S-transferase, which is responsible for the removal of many toxins from the blood. Finally, the water in the enema stimulates peristalsis or the movement of toxic substances from the duodenum or upper intestine, through the intestine, and out through the rectum.” (Wilson, 2019).

Palmitic acid

Palmitic acid (Kahweol & Cafesol Palmitate):

“(Hexadecanoic acid) is a saturated organic acid and is counted among the fatty acids (= higher carboxylic acids). Palmitates (systematically also hexadecanoates) are the salts and esters of palmitic acid. Palmitic acid is a colorless solid at room temperature (Wikipedia, 2019).

Zappe writes: “Palmitates in coffee strengthen the so-called glutathione-S-transferase, which are responsible for removing toxic radicals in the blood and serum.” (Zappe, 2017).

As far as I could research, this discovery dates back to the late 1970s and early 1980s and was made by researchers in Lee Wattenberg’s laboratory.

As cited above, palmitates are said to act as potent enhancers of glutathione S-transferase (an important liver enzyme).

Adding coffee beans to the diet of mice increased glutathione S-transferase by 600% in the liver and by 700% in the small intestine. Similar stimulation of glutathione S-transferase in humans by coffee is likely (Wilson, 2019).

Mechanical cleaning

In my experience, a coffee enema cleans my colon by simply “cleansing” it – physically speaking – with the amount of liquid flowed in.

This gives me the feeling that my intestinal villi and microvilli are mechanically cleaned and give me the opportunity to remove toxic substances, parasites, bacteria, yeast colonies and other deposits from me. In this way, I can basically empty all kinds of substances that are not removed otherwise.

Theobromine and theophylline

Theophylline and theobromine are ingredients of coffee types (Lehmann and Martinod, 1965) and tea types (Franzke et al., 1968). They cause vasodilation. (Zappe, 2017). That is, an increase in the diameter of a blood vessel by relaxing the smooth vascular muscles. The term comes from Latin vas = “vessel” and Latin di / latatio from latus = broad, wide, of large size = di / latatio = expansion, expansion (Becher et al., 1995).

When blood vessels expand, blood flow naturally increases in the corresponding area.

You can read more about the “Latin-Greek vocabulary in medicine” in this lexicon or my article: “Latin-Greek vocabulary for personal trainers?”.

Expansion of the biliary tract / “dialysis” through the colon wall?

According to the “Gerson Regimen”, it is believed that the caffeine from the coffee enema either causes a type of “dialysis” of toxic products from the blood via the colon walls or could cause the biliary tract to widen, which in turn could cause the process of removing toxic products from the liver more easyly (Gerson, 1978, 1999).

More N-methylpyridinium from dark roast?

The question arose, of course, about the “optimal” coffee for my enemas. After intensive research and correspondence with Dr. Larry Wilson, who – by his own account – had recommended coffee enemas to over 30,000 people, Dr. Wilson said:

[…] medium or dark roast, Columbian or at least South American is usually best.

Dr. Wilson also writes that the nutrients in the soil of Colombia would be best for growing coffee (Wilson, 2019).

However, it could also be decisive that coffee from a dark roast should contain more N-methylpyridinium.

This substance is produced by roasting coffee beans and a “dark roast” should therefore be more effective – compared to a weak, “light” coffee roast – in terms of body fat reduction (through better glucose utilization) and in terms of restoring Vitamin E in red blood cells, and glutathione concentrations (Kotyczka et al., 2011 and Riedel et al., 2014).

I  have  tested looooots of coffee brands and I currently stuck to Dave Asprey’s “French Kick”, a dark roasted blend from his “Bulletproof” Company. This, btw, is also recommended by Dr. Wilson!

For ME it has proven to use the whole coffee beans and then grind them fresh. For this I use a “Skyline” coffee grinder from WMF [Affiliate Link].

This coffee grinder is not very expensive and you can set the grinding degree differently. This is interesting because you can use it to chop the beans sometimes more and sometimes or less.

Of course, this changes the surface structure of the bean or has an effect on the contact surface between water and bean.

Of course, high-quality coffee also needs to be stored appropriately in order to retain all of its valuable ingredients for as long as possible. For me, the container from Coffee Gator® have been best.

I keep all my coffee beans stored in an airtight container and then prepare them with a so-called “French press”. I also got this from Coffee Gator® because it is made entirely of stainless steel!

This means that microplastic particles cannot dissolve through the hot coffee! Here are my recommendations:


Enema equipment

Of course, for a coffee enema – in addition to a suitable coffee (more on that later) – you also need an enema set [Affiliate Link]. There are different ways of doing this. An enema set consists of an irrigator (either a kind of “bucket” or a bag) and a tube with different attachments (for anal and vaginal rinsing).

Such an enema set [Affiliate Link] was kindly made available to me by the company P. Jentschura [advertising, not paid for] (see picture).

Enema device from P. Jentschura, consisting of: irrigator, enema hose (brown), enema end piece (removable) with stopcock, attachment for vaginal irrigation, and flexible enema piece (with yellow attachment), source: © Jentschura.

This set consists of the irrigator (in which the inlet liquid is located), an inlet hose, two different attachments and a flexible hose end piece.

I prefer the enema buckets to the bags. One reason for this is the possibility of cleaning. Since the buckets are open at the top, they can be cleaned thoroughly and easily.

There are plastic or glass buckets. But I also use a set made of stainless steel [affiliate link]. Here I would pay attention to the type of metal. As long as it is not stainless steel, there is basically the risk of the metal being oxidized by the coffee!

My stainless steel enema bucket + hose, source: own picture.

But caution should also be exercised with plastic. Since I don’t want to ingest microplastics, I only pour the coffee into the mug shortly before use (about body temperature; approx. 36/37° C) or use a glass or stainless steel irrigator.

As a big glass lover, I mostly use an irrigator and end pieces for insertion, made of glass. However, these glass enema sets are very difficult to find and certainly at the upper end of the “enema price scale”.

In my opinion, glass has the advantage (when it comes to borosilicate glass) that it is completely free of metals and plasticizers. The glass end pieces for insertion are probably the best choice for people with sensitive mucous membranes.

Of course, you should be careful with glass!

Glass enema Kit, by reverse coffe co. Source: © reverse coffee co.

Such a glass “Ultimate Enema Kit” was kindly sponsored by the Australian company: “reverse coffee co” (advertising, not paid). Thank you at this point!

There are two versions of an enema bag – open at the top or closed. The open bag is – equivalent to the bucket – easier to clean because the opening is larger.

Of course, with the large openings there is always the risk that the coffee might pour out. A closed bag is more difficult to clean. I don’t use an enema bag myself.

My enema application

At this point it should be expressly mentioned again that I am only giving MY experience here for information purposes. Anyone who should thereby play with the idea of ​​also giving themselves an enema should definitely consult a naturopath or doctor beforehand.

1. First of all, I only started with a teaspoon of coffee per liter of water (restructured, filtered, ionized) to see how my body reacts to it. Otherwise I don’t drink coffee. In the meantime I use 4 tablespoons of coffee per liter.

2. Before the procedure (usually in the morning on an empty stomach) there was of course a visit to the toilet. Then I drank about 500ml of lukewarm water (filtered, restructured, ionized, enriched with biophotons).

3. Before the enema, I swung on my mini trampoline for 7 minutes

4. I usually do the enema in the bathtub.

5. Basically I stick to the rule that the whole procedure should not cause any discomfort or pain. Otherwise I would abort the process immediately.

6. The boiled coffee (12-14 min) is cooled down to a little below body temperature, approx. 36/37° C.

7. I use commercially available Vaseline [Affiliate Link] but usually better coconut oil [Affiliate Link] both for myself and for the inlet piece.

8. I hang the irrigator on a coat hook on one of the towel rails above the bathtub. I use about 1 liter of water for the enema.

9. When inserting the inlet piece, I lie on my back. But there are other users who swear on other positions, such as a quadruped stand or lying sideways on the left side.

10. When everything is “in place”, either the stopcock of the inlet piece or the hose clamp can be slowly opened (depending on the model). When the liquid rushes in, I think it’s important to relax completely and breathe calmly and deeply.

11. After the coffee has run in slowly and completely, I lie down briefly on my left side and massage my abdomen counter-clockwise to “move the coffee up” in the colon. Then I perform a “candle” position (feet/trunk up in the air) to let the liquid “flow up” according to gravity.

Because of deep abdominal breathing, I don’t feel uncomfortable. Then I usually lie on my back and lift my hips a little (either with a Rumble Roller®) or just put two to three towels under my hips.

12. I then hold the enema for at least 15 minutes, up to max. one hour. Optionally, I also use my so-called “Gou Gong® – China Lamp” to provide even more relaxation in my stomach area through its infrared heat and minerals from its clay plate.

At the end you have to go to the toilet for emptying, of course always with your feet raised on a stool / “Squatty Potty” [Affiliate Link], so that the bowel can empty itself completely!

You can find out more about it here. When emptying, I rub my right calf, below the hollow of the knee. An acupressure point from TCM that is supposed to stimulate the emptying (seems to work for me!)

How do I use a coffee enema; Source: Own illustration.

13. For me, the meal after the enema is mostly also a “yang meal”, usually eggs with cooked vegetables from my own garden (no tomatoes, as these should have a “YIN effect”).

If I don’t want to consume a solid meal after the enema not to stress my digestive system again, then I drink, for example just 250ml of water (see above), with a teaspoon of “Ambro Greens” [Affiliate Link].

With regard to the frequency, there are different statements in the literature, from up to 4-6 enemas per day. I think that it depends a lot on the duration of use. I myself prefer only one enema a day / morning and I keep it up to 60 minutes.

In theory, one could perform 4 x 15 minute enemas. For reasons of time efficiency, I prefer an application of up to 60 minutes.

Since the enema is supposed to have a “yang effect”, for me the relaxing effect is most important. Carrying out a hectic and hasty procedure four times would – from my point of view – be rather counterproductive.

Enema breathing technique

Now I’m going to demonstrate a breathing technique called Oxygen Advantage®. As a certified Oxygen Advantage Coach, I use this breathing technique not only during the entire enema procedure, but also in everyday life, e.g. activation of the parasympathetic nervous system.

1. Either lying on the floor or in the bathtub

2. Optionally small Rumble Roller® (RR) [Affiliate Link] with towels under the hip

3. Towel rolled up under the head (keep the cervical spine in a natural position, no pillow / towel that is too high)

4. Soles of feet together (when lying in the bathtub), diamond shape, when lying on the floor, legs upright

5. Breathe in for 4 seconds (diaphragmatic breathing), breathe out for 6 seconds

6. Place your hands either folded below the navel or next to your torso / buttocks

7. Repeat

8. During the application I use so-called “Binaural Beats” (affiliate link), for (my) optimal relaxation, preferably in the theta brain wave range. For listening to them, I use special headphones with pneumatic sound transmission (affiliate link). Why I use them can be read about my EMF optimization in my article.

9. I also like to use red and infrared light during my enema. You can read more about this in my articles on so-called photobiomodulation.

Why not just drink coffee?

Now one or the other might ask the quite legitimate question, why not just drink the coffee instead of giving yourself an enema ?!

The main difference is probably the way the body absorbs the coffee. While coffee that is taken orally has to pass the stomach before it first reaches the small intestine, coffee that is taken rectally reaches the large intestine (colon), see picture above.

Dr. Wilson states:

 “The colon seems to block the absorption of certain toxins found in coffee, including cadmium and some of the caffeine. Drinking one cup of coffee daily is okay, but not recommended. Drinking more than one cup is harmful for most people.” (Wilson, 2019).  

Of course you can argue about the toxicity of drunk coffee and from my point of view, a different dose decides for each individual when to becomes toxic.

That depends to a large extent on the quality of the coffee. As with coffee for drinking, I would only use organically grown coffee for the coffee enema, which is free of impurities, chemicals, pesticides, etc.

But even the best coffee – like all other substances in the world – will contain traces of toxins. That is why the dose decides when something becomes toxic.

Coffee can e.g. contain some toxic metals like lead and cadmium as well as some toxic alkaloids.

Ground coffee can also be rancid because it contains polyunsaturated oils that can go rancid quickly.

(…) from our experience, when taken by rectum, these toxins are not absorbed nearly as much as when the coffee is taken orally.This occurs because the colon is designed to absorb nutrients, while filtering out and leaving behind toxic substances inside the colon. In fact, a healthy colon is quite amazing in its ability to absorb nutrients while protecting the body from a wide variety of toxic substances. This is the reason why drinking coffee is somewhat toxic, but coffee used in an enema is much less so. In fact, we have seen very little toxicity from repeated coffee retention enemas, while those who drink coffee regularly exhibit some toxicity from the beverage.” (Wilson, 2019).

My thoughts on increased fat burning

From a subjective point of view, through the use of regular (daily use) enemas, I have the feeling that I am also seeing increased body fat burning. Especially in the area of ​​the lower abdomen, which is quite stubborn even through good nutrition and exercise.

At this point it should be said that this is not a guide on how to lose weight or get rid of body fat through coffee enemas alone. Bad eating and exercise habits cannot be outdone with coffee enemas.

I am only reporting here on my own experience. I could explain a stronger body fat burning by increased liver activity, added caffeine, N-methlypyridinium in coffee (from dark roast) and by an accelerated metabolism. Information without guarantee, of course!

Coffee enema with DMSO?

The idea of ​​combining a coffee enema with dimethyl sulfoxide (DMSO) came from colleague Dr. rer. nat. Hartmut Fischer. He writes regarding the addition of DMSO in enemas:

If it is rather small enema quantities of up to 500 ml, so I definitely add the full 15% DMSO. At 500 ml, that would be a maximum of 75 ml. For even larger volumes than 500 ml, I leave this 75 ml DMSO as an additive. ” (Fischer, 2020).

I myself add 75 ml to the approximately one liter of liquid that I use for my coffee enema and have no problems with it.

The only side effect lies in the smell (which I don’t smell myself) that I evaporate after the enema (caused by the DMSO).

DMSO has, in a nutshell, e.g. pain- and anti-inflammatory properties, has a cell-protecting and regenerating effect and is part of the new formulation of the German Drug Code (Rezeptformularium des Deutschen Arzneimittelkodex).

FeetUp®, Inversion & the coffee enema

To better distribute the coffee enema in the intestine, you can of course use the gymnastics exercise of the “candle”.

If you want to achieve a better inversion, you can also use an inversion table (a detailed article on this topic can be found here).

Since an inversion table would probably be too bulky for most bathrooms, I discovered the following alternative for myself: A so-called FeetUp® (unpaid advertising).

FeetUp®-Trainer, source: own picture.

How do I clean my enema kit?

Every now and then people seem to like to use an enema set that is particularly dangerous for introducing germs, viruses or other things into the intestine.

This is completely incomprehensible to me, since – from my point of view – it is self-evident that the principles of hygiene are also observed in the context of this application.

Enema utensils that are in use should therefore always be appropriately disinfected before and after use, and the enema nozzles should only be used individually and not be shared with other people!

When choosing the disinfectant, everyone can choose his/her favorite agent again. Common alcohol-based products are available in every drugstore and / or pharmacy.

I prefer to use a 3% hydrogen peroxide (H2O2) solution for myself. This is also available from the aforementioned sources.

Coffee Enema Conclusion

I don’t want to make this article too long, which is why I will draw my conclusion:

It was “coincidence” that I stumbled upon the topic of the coffee enema. I couldn’t and didn’t want to ignore that, so I got into this interesting topic.

Since it is well known that trying is more important than studying, a self-experiment was inevitable. Because only those who have tried something can report authentically.

After the mental and physical inhibitions had been overcome, the positive effects reported above also appeared. I can definitely confirm the relaxing yang effect! At least in my experience.

After a coffee enema, I always feel clean as a whistle and super energetic throughout the day.

From a therapeutic point of view, the positive effects mentioned by Zappe, Wilson, Gerson and other sources clearly make sense to me.

I corresponded with Dr. Wilson by email. You can find his extremely detailed article on coffee enemas here.

© HP Bernd Stößlein, Master of Business Administration in Sports Management.

If you liked this article, then subscribe to the blog / newsletter, leave a comment or contact me.

In this and other articles you will find one or the other “affiliate link” to amazon. If you purchase something through this link, you will support my blog articles and create resources for further high-quality research and articles like this. There are no additional costs for you! You can find all of my basic recommendations at: https://www.amazon.de/shop/bernd_stoesslein


Sources/Literature

Lateinische griechischer Wortschatz in der Medizin, 1995, S. 39.

Lateinische griechischer Wortschatz in der Medizin, 1995, S. 112.

Lateinische griechischer Wortschatz in der Medizin, 1995, S. 242.

Ariane Zappe und Dr. med Dietrich Klinghardt, ImmunSymbiose, 2017, S. 285 f.

Coffe Enemas, Dr. Lawrence Wilson, LD Wilson Consultants, Inc., Quelle: https://www.drlwilson.com/articles/COFFEE%20ENEMA.HTM#CH1, Zugriff v. 23.7.19.

Detusches Wörterbuch von Jakob und Wilhelm Grimm, 16 Bde. in 32 Teilbänden. Leipzig 1854-1961. Quellenverzeichnis Leipzig 1971, Bd. 32, Sp. 342 bis 34.

The Kion Coffee Enema: Everything You’ve Always Wanted To Know About Coffee Enemas (But Were Afraid To Ask), Quelle: https://bengreenfieldfitness.com/article/digestion-articles/kion-coffee-enema/, Zugriff v. 23.7.19.

Coffee Enemas, by Dr. Lawrence Wilson, LD Wilson Consultants, Inc., Quelle: https://www.drlwilson.com/articles/COFFEE%20ENEMA.HTM, ZUgriff v. 26.7.19.

Palmitinsäure, Wikipedia, Quelle: https://de.wikipedia.org/wiki/Palmitinsäure, Zugriff v. 26.7.19.

Lehmann G; Martinod P. Über Das Vorkommen Von Theobromin Im Kaffee. Hoppe-Seyler’s Zeitschrift Fur Physiologische Chemie 1965341 (1), 155–156.

Franzke C; Grunert KS; Hildebrandt U; Griehl H. Zum Theobromin- Und Theophyllingehalt von Rohkaffee Und Tee. Die Pharmazie 196823 (9), 502–503.

Gerson Therapy Handbook : Practical Guidance, Resources, and Recipes for Following the Gerson Therapy, Rev. 5th.; Gerson Institute: Bonita, Calif., 1999.

Gerson, M. A Cancer Therapy : Results of Fifty Cases ; and, the Cure of Advanced Cancer by Diet Therapy : A Summary of 30 Years of Clinical Experimentation, Sixth.; Gerson Institute: San Diego, CA, 2002.

Jensen, B. Iridology Simplified : An Introduction to the Science of Iridology and Its Relation to Nutrition, 5th ed.; Healthy Living Publications: Summertown, TN, 2011.

Kotyczka C; Boettler U; Hofmann T; Lang R; Marko D; Stiebitz H; Bytof G; Lantz I; Somoza V. Dark Roast Coffee Is More Effective Than Light Roast Coffee in Reducing Body Weight, and in Restoring Red Blood Cell Vitamin E and Glutathione Concentrations in Healthy Volunteers. Molecular Nutrition and Food Research 201155 (10), 1582–1586 DOI: 10.1002/mnfr.201100248.

Riedel A; Hochkogler CM; Lang R; Bytof G; Lantz I; Hofmann T; Somoza V. N-Methylpyridinium, a Degradation Product of Trigonelline Upon Coffee Roasting, Stimulates Respiratory Activity and Promotes Glucose Utilization in Hepg2 Cells. Food & Function20145 (3), 454–462 DOI: 10.1039/c3fo60320b.

Fischer Hartmut, DMSO-Rundbrief, Zitat entnommen aus: “DMSO & Co. Medizin zum Selbermachen – Dr. Fischer’s Rundbriefe 2017-2020”, Praxisinstitut Naturmedizin, 2020.

Neck Flex – Due to my observation, expertise neck training, besides grip training, is one of the most neglected and underrated parts of strength training. In amateur as well as in professional sports! Just keep in mind, that only because someone pretends to be, or even is, a professional athlete (which is even worse and also embarrassing for his or her trainer) they are not necessarily doing professional workouts! Prepare for some serious neck attacks in this article! I’ll show you how you can proceed from a pencil neck to getting “yoked” with a cool neck training tool, the Neck Flex Pro, and the according techniques.

Let’s get yoked…

Neck Flex  – The Story behind the tool

I communicated with the very friendly staff from Neck Flex as I wanted to know more about what drove them to create their stunning neck training tool. They said:

The co-founders of the Neck Flex both had varying backgrounds in fitness when coming together with the ideals which supported the need for a new and innovative approach to neck training and development.”

They further stated that:

“There was an obvious need for attention to be drawn towards athletes and the importance of neck strength in order to ideally prevent neck and head injuries. The more research that was conducted, the more it became apparent how vital neck strength truly was in preventing these common neck and head injuries that often occur within the field of contact sports and also within the military.”

Moreover they told me:

“As all this research came flooding in, it was then and there that it was decided to create the most effective and versatile neck training device. Everybody is mostly familiar with the standard methods of neck training, such as plate loading with chained head harnesses, machine based neck stations, bridging, and also isometrics.”

In addition to that they wrote:

“So based off the those standard methods, a design was orchestrated that could not only provide a limitless range of motion and resistance, but also provide a very high level of safety in which virtually any gender, age, or background could easily use the product.“

According to that they continued with:  

“After a couple years of testing and development the Neck Flex was finally ready for action. Every step was taken to ensure that the Neck Flex was of the highest quality and a step above all others that have come before.”

Concluding they added:

“The ultimate goal of Neck Flex is to promote and provide the means in which to effectively and efficiently train the neck for everyone from contact sports, military members, youth sports, fitness enthusiasts, and also to those just looking to simply firm or tone their necks. Whatever your training goal is… Neck Flex has got you covered.” (Neck Flex, 2020)

Neck Flex MMB Pro Series, source: Neck Flex.

Neck Training – Last but (not) least?

As you know the saying normally goes: “last, but NOT least”. Unfortunately when it comes to the training of the neck it is probably the opposite!

Of course some bodybuilders build their traps (as traps are supposed to be the “new” abs) but most often only emphasize the upper part of the m. trapezius, which is only ONE of many muscles that enable the movement of your neck!

Moreover, from a sport-specific training point of view, lots of athletes suffer from something that Charles R. Poliquin, aka “Strength Sensei” (R.I.P.) used to call structural balance deficiencies.

According to that it is not uncommon for athletes suffering from faulty movements and/or bad posture.

What your brain has to do with your movements, how your eyes, respectively your sight influence your posture etc. can be found in depth in my article:

POSTUREPRO BRAIN COACH PERFORMANCE CERTIFICATION REVIEW

There are literally thousands of tests to perform/asses restricted movements and or postural deficiencies/disbalances and exercises to correct them. But, how many (ever professional) athletes have you seen performing proper neck training?


It is hardly done and sadly overlooked too often! Why? To be honest I don’t know! Neck training and grip training are probably the two most overlooked things, when it comes to (professional) strength and conditioning training.

More about how to become a certified strength and conditioning coach can be found in my article:

NCSF CERTIFIED STRENGTH COACH REVIEW

Back to the neck: When you are training in a sport specific manner it differs way from what people like to call “fitness” training. Fitness training is more about burning (as much as possible) calories, i.e. in order to lose excessive body fat.

Sport specific strength on the contrary focuses on sparing calories while improving an athlete’s economy, depending on the sport he/she wants to perform (team sport vs. individual sport).

Depending on that, it makes sense that you must train an athlete not only to be strong or to be “in good shape” (lean, and muscular) but in a manner that he/she is able to perform at his/her best during a competition.

That is important as it emphasizes that neck training, in the first place, is not meant to be an aesthetical integration into e.g. a bodybuilding routine.

Remember, as Louie Simmons from Westside Barbell quoted: “big ain’t strong. Strong is strong”. Furthermore, being muscular does not necessarily mean that someone is strong, too!.

But what actually is strength? Well, as this is not the main topic of this article I’ll only give you a very short explanation:

Physical strength is determined by the cross-sectional area of muscle fibers as well as the intensity of so called “motor-unit” recruitment (quality and quantity).

In a nutshell, strength does not equal power, power is not the same as work and/or force and so on.

As you can see, strength and conditioning training is far more complicated than simple “pumping up” in the gym.

You must assess and correct an athlete’s weakness, and create a proper structural balance.

That’s where neck training comes into consideration, as a “pencil neck” won’t be able to enhance an athlete’s performance through increased strength nor enable improved shock absorption capacities in sports with lots of collisions, like American Football or Rugby.

Using the Neck Flex on a cable pulley, source: own picture.

Neck issues and its correlation to chronic fatigue syndrome?

Besides being a Strength and Conditioning Coach/Personal-Trainer & Consulting Biohacker I’m also working in Germany as a “Heilpraktiker”, too.

A proper translation would be something like “complementary and alternative medicine practitioner”. I’m allowed to diagnose and treat disease (with restrictions) and i.e. use invasive techniques, e.g. injections and/or i.v. infusions.

I see lots of patients in my practice who are complaining/suffering from chronic fatigue syndrome, aka “secondary mitochondropathy”. Now I can hear you asking: “What might have mitochondria and a syndrome to do with the training of the neck?”

Well according to Dr.Dr. Kuklinski (affiliate link) an instability of your neck can cause a wide range of (severe) symptoms you normally would not automatically associate with your neck!

Accidents (trauma) and overstretching can damage ligament structures in the neck joint which might lead to a permanent hypermobility in the neck!

Depending on the  head’s postures, this hypermobility might lead to circulatory disorders in the brain, e.g. dizziness, rapid heartbeat or visual field deficits.

Often this isn’t  noticed at all or, as mentioned before, not associated with “issue in the tissue” of your neck.

In addition to that, these circulatory disorders may also occur during sleep, depending on your head resting position.

The brain cells then will start to “panic”, in fear of suffocating, due to lack of oxygen. In response to the circulatory disorder, they release large amounts of nitric oxide (NO).

Dr. Dr. Kuklinski calls this: “nitrosative stress”. The excessive release of NO might lead to the destruction of intracellular vitamins and might excrete micronutrients through the urogenital tract.

This is such an interesting topic, but it is not the main part of this article! I just, again, wanted to show you how many facets the training of your neck “kaleidoscope” has ! And most of them are overlooked.

Like all of my blogposts this one is intended to give you some impulses and to be used as a springboard to your own research!

The only thing I can do is aid you how to help yourself.

Neck Flex – How to attack your neck?

Like in most of my articles about training devices, I like to make a short  but necessary excursion into functional anatomy. Just to give you an overview of how the Neck Flex can be usefully integrated in a structured training program

So, let’s have a look at the neck!

Most important muscles of your neck:

  • M. rectus capitis posterior minor (tilt the head to the same side & dorsal extension)
  • M. obliquus capitis superior (ipsilateral head tilting & double sided dorsal extension)
  • M. rectus capitis posterior  major (ipsilateral turning of head & double sided dorsal extension)
  • M. obliquus capitis  inferior (ipsilateral turning of head & double sided dorsal extension)
  • M. sternocleidomastoideus caput mediale & laterale (unilateral contraction, tilting the head to the same side, turning the head to opposite side, dorsal extension)
  • M. trapezius (pars descendens)

As you can see, the neck is quite a “tricky part”. The above mentioned list is, by all means, not complete and there are much more deep-lying muscles that should be considered!

Neck Flex – How I use it

Neck flex manufactures two different types of neck-training devices. The “original” Neck Flex and the “Neck Flex Pro”. This review focuses on the latter.

Using the Neck Flex, for neck extension, source: own picture.

The USA-based company itself describes their product as followed:

The Neck Flex MMB Pro Series is truly game changing in all aspects of design. It was developed with the unwaivering intention of producing a harness and kit which surpasses all others in terms of versatility, function, and construction. The MMB Pro Series was designed in close collaboration with Mike Bruce, and thus it proudly bears his initials out of our tremendous respect for all he has accomplished and contributed towards the pursuit of neck strength and conditioning. The MMB Pro series takes our patented Neck Flex platform and introduces”dog ear” anchor points, which allows for the integration of plate loading applications as well as resistance band applications. No other head harness in the world can lay claim to such a design. However the ground breaking design is just one feature of the MMB Pro Series. Our construction materials and methods also adhere to the highest standards of quality. This includes diamond embossed neoprene padding, heavy duty nylon webbing, and all buckles are composed of polished metal. We set forth to raise the bar, and after much time and effort we are proud to present the MMB Pro Series.” (Neck Flex, 2020).

For the Neck Flex Pro the company charges around 110$ which, from my perspective, is a really fair price! Besides the neck harness you’ll get:

  • Heavy Duty Chain for plate loading
  • Carabiners for chain attachments
  • Bodylastics Patented 19 lb (=8,6kg) Resistance Band
  • Bodylastics Door Anchor
  • Neck Flex Tote Bag

Of course the other, priceless, advantage of the Neck Flex is its portability. You can store everything in your gym bag and take it with you when hitting the road and train, in different gyms or even a hotel room! A very versatile approach!

Door mount option of the Neck Flex MMB Pro Series, source: Neck Flex.

Neck Flex/Neck Training Conclusion

As Strength and Conditioning Coach I highly recommend professional athletes to incorporate neck training into their strength training. Of course there are myriads of possibilities how you can train your neck.

With machines, other devices or even only your bodyweight. Incorporating a Neck Flex though might be the most bang for your buck-approach if you don’t have a lot of space/budget for machines or other fancy equipment to get “yoked”.

Integrating neck training into your workout routine might be the “missing link” you’ve been looking for to break plateaus and/or boost your performance. No matter if you’re just a “weekend-warrior” or a professional athlete!

© HP Bernd Stößlein, Master of Business Administration in Sportmanagement.

If you liked this article please share it with your friends, subscribe to the newsletter and the blog.

If you like to book a professional online/offline consultation please feel free to contact me:

 info@bernd-stoesslein.de


Literature

Neck Flex, About us, source: https://www.theneckflex.com/about-us-1, access from 10.09.2020.

Neck Flex, mmb-pro-series, source: https://www.theneckflex.com/mmb-pro-series, access from 11.09.2020.

WristBall was originally designed as a special tool for improving your technique, respectively strength for arm wrestling. As I always point out: I like to think very much: to think outside of the box and grip training. So, why not fusing too cool things together? Although not being an arm wrestler, I implemented the WristBall into my own training and the one of my clients and patients. Why? Because I think this “cool tool” is very versatile and a true enrichment for everyone who is trying to work on improving grip strength. In this article I’ll cover furthermore how you might also use the WristBall besides from grip training!

WristBall: 70mm, source: © ArmSprot.

WristBall Review – All good things come in threes?

Special thanks to Misha from Israel who was kind enough to send me not only one of his WristBall trainers but also a pair of his Cone Grips, as well as his WristMax! So, kudos to Misha, respectively his company called “ArmSport”.

If you want to read my other reviews of the aforementioned tools, please feel free to read it in my extensive reviews, here:

WRIST MAX – EQUIPMENT REVIEW

CONEGRIP FOREARM TRAINER REVIEW

WristBall – THE most versatile gripping device?

As mentioned before, I’m a huge advocate of training grip strength. Why? Well, besides neck training and training to improve electromechanical delay, grip strength training is probably one of the most underrated aspects in Strength and Conditioning training!

If you want to know more about the importance of training in regards of electromechanical delay and why it is especially important in esports, I highly recommend to read my detailed article:

STRENGTH AND CONDITIONING TRAINING FOR ESPORTS

So, why might the WristBall be at least one of the most versatile tools for improving grip strength? I’ll give you my expertise.

First of all, the WristBall is suuuuper pricey! They do sell these things (depending on the diameter of the ball) starting from 39.90 (medium, 60mmÆ)-41.90 (large, 70mmÆ)$. Pretty economic, if you ask me!

I emphasize the fact that I chose the words economic and pricy over cheap, as “cheap” usually has a more negative connotation. Regarding the versatility of the WristBall it’s rather pricy, respectively more an investment than an expense!

To make a long story short, the WristBall is, as the name describes, a ball, attached to some kind of seat-belt-like material with the possibility to attach a carabiner.

Therefore you can mount it on anything that can hold a carabiner, such as any cable pulley and/or so-called loading pins.

Grip Training with the WristBall, source: own picture.

WristBall – Let’s do some functional anatomy

What makes the WristBall super versatile are its multiple options. You can train:

  • Wrist extension
  • Wrist flexion
  • Hand abduction
  • Hand adduction                    
  • Finger opposition
  • Thumb flexion

Which muscles can be trained? Well, as always, that depends. Literally, on the one HAND on your flexibility (Range of Motion = ROM) restriction and/or on the other HAND other pathologies that might prohibit one or more of the aforementioned functions.

Let’s say you don’t have any issue in the tissue, bones or whatsoever and no problems with structural balance, here’s a list of muscles that can be trained in your hand (and of which you might probably have never heard of):

  • M. abductor pollicis brevis
  • M. opponens  pollicis
  • M. flexor  pollicis brevis Caput superficiale
  • M. flexor  pollicis brevis Caput profundum
  • M. adductor  pollicis  Caput transversum
  • M. adductor  pollicis Caput obliquum
  • Mm. lubrivales I-IV
  • Mm. lubricales III-IV
  • Mm. interossei  palmares  I-III
  • Mm. interossei dorsalis I-IV  
  • M. aductor digit minimi
  • M. flexor digiti minimi brevis
  • M. opponens digiti minimi
  • M. palmaris brevis

That should cover pretty much all of our major hand muscles. If you want to know where all of them are located, you can use this publication as a springboard for your own little research!

Well, wait a second. It is called WRISTBall and not HANDBall, right?! Correct! But all of these muscles do play an important role when it comes to gripping!

According to that, it might be helpful to have at least  heard of them. Of course you can also train your forearm muscles with the WristBall, as mentioned above.

WristBall – Other exercises

Which other exercises, besides the already mentioned, can be performed with the WristBall? Maybe a myriad, but I’ll give you only an impulse of what can be done. You should always use your own fantasy and think outside of the box.

You could perform the following:

  • Single arm standing/seated rows
  • Chin ups (if you have a pair of WristBalls)
  • Biceps curls (you need a loading pin)
  • Triceps extensions in all variations (on cable pulley)
  • Butterflies on a cable machine (pair of WristBalls needed)
  • Spider curls (pair of WristBalls needed)
  • Reverse Flies (single/double handed)
  • Lateral raises (single/double handed)
  • Front raises (single/double handed)
  • Grip help for front squats (pair needed)
  • Internal/external rotation for shoulders/rotator cuff
  • Much more

As you can see, you can use the WristBall for quite a bunch of exercises, and that’s just what I came up so far. There are probably lots of more usabilities to this “cool tool”.

I’d be happy if you share your ideas with me and others in the comment section.

WristBall – Round and round it goes?

We haven’t discussed the most obvious fact of the WristBall, its shape! Compared to other grip tools, which are normally cylindrically shaped, the WristBall, of course, is round…sure, as it’s a ball!

Yet, you must understand that in terms of training/gripping round is actually better than cylindrical! Why? That’s due to its great transfer effect to everyday life. Most things you grip are rather round than cylindrical.

Furthermore, if you train sport specific, for first responders, for self-defense sports (e.g. Krav Maga) and/or law enforcement you need to grab your opponent. Therefore your life literally might depend on a strong grip!

WristBall review Conclusion

In my obligatory conclusion I’ll provide you with my expertise, being a Personal-Trainer, Strength and Conditioning Coach, Consulting Biohacker and Heilpraktiker (Complementary and Alternative Medicine Practitioner), with (2020) over 13 years of professional experience in the Health and Fitness- Industry.

Should you use a WristBall? Well, as mentioned earlier, that depends. Are you a novice lifter with less than two years of “training age” you probably don’t need it yet, as you are trying to build some foundations first. A WristBall could be too specific yet!

I think, besides the fact of its original purpose, you could benefit from incorporating a WristBall in your training, especially in prehab and rehabilitation phases, i.e. if you’re suffering from something called “Tennis- and/or Golfer’s arm”.

If you’re looking for new input for your training for constant progression, you could also benefit from integrating the WristBall and, of course, if you are trying to get a stronger grip!

© HP Bernd Stößlein, Master of Business Administration in Sportmanagement.

If you liked this article please share it with your friends, subscribe to the newsletter and the blog.

If you like to book a professional online/offline consultation please feel free to contact me:

 info@bernd-stoesslein.de

Synctuition – Meditation is a spiritual technique of relaxation and introspection that has been practiced in many cultures for thousands of years. It teaches you to reach a state of mental quietness, “no mind” as Eckhardt Tolle calls it, respectively inwardly directed concentration and attention. Using suitable meditation techniques, you are able to influence or shape your external perceived and experienced, subjective “reality” by reprogramming your subconscious beliefs and stored behaviors. In this article you will find out why everyone should meditate, how you can benefit healthily and spiritually from it, and how you can use meditation techniques, like Synctuition to strengthen both your mind and your body. Because you don’t perceive the world as it is, but only depending on your own current inception! Let’s take a look inside yourself and you’ll be surprised what you might discover…

Synctuition Review – Why you should start meditating!

Meditation will make you more powerful than ever before!

If you follow my fitness blog, you will surely have already gained experience with training your physical body. But how about the training of your mind or your “consciousness”?

You are probably already dealing with the different facets of physical training, such as various training methods, training parameters, food supplements, forms of nutrition or special “tools”.

Everything including influences from your external (environment) world. But have you ever dealt with your internal influences? The power of your thoughts and how they have an impact on your life?

“Your inner world creates your outer world” (T. Harv Ecker)

Your thoughts create your reality

You can like him or not, but not only because of his sporting achievements everyone can learn from Arnold Schwarzenegger, even if you have no competition ambitions yourself. He is credited with the following quote:

Bodybuilding is like any other sport. To be successful, you have to dedicate yourself 100% to your training, your diet and your mind. “

In this art icle we want to address the last point mentioned – the mind – and how you can take it to a whole new level through meditation.

Because only when your body and mind form a unit (are coherent) you can develop your full potential.

In addition to all the external influences that you can have on your body, it is the mind that is mostly neglected or underestimated. But a truly strong body is also animated by a strong spirit!

Meditation and sport

What do (strength) sport and meditation have in common?

At first you might not think much. Concentrated, motionless sitting with inward-directed attention (meditation) on the one side and lifting dumbbells on the other.

However, if one does not allow oneself to be confused by the obvious and looks deeper, not only common denominators can be recognized, but also additions and mutual influence / support.

By meditating regularly you can direct your focus from your outer to your inner world. You will learn to access your subconscious and to find out what moves you and which beliefs and behavioral patterns you live by.

All good things come in threes – even within the human brain

As is well known, all good things come in threes. It is the same – or similar – with your brain or your brains. Most because your brain is basically made up of three big parts.

Neocortex = 1. brain, Limbisches System = limbic system = 2. brain, Cerebellum = 3. brain, source: own picture.

The neocortex (first brain), the limbic system (midbrain / second brain) and the cerebellum (cerebellum / third brain). There are of course different structures of the brain depending on the literature, for the sake of simplicity we will limit ourselves to the above-mentioned ones in this article.

Why we are concerned with the structure (simplified) of a human brain at this point is because we have to understand that we are not our thoughts, and much of what happens to us every day is attracted by unconscious thoughts/behavior patterns, respectively is not consciously thought/devised.

Your mind rules over matter (or the reality you perceive), but positive thinking alone is usually not enough; you should then use meditation or suitable meditation techniques for this.

Why positive thinking alone is probably not enough

The diagram above shows you the large area of ​​the so-called neocortex, the seat of your conscious thinking. This makes up about 5% of your “consciousness”.

The remaining 95% are almost completely in the cerebellar convolutions (see picture).

Since this is a very complex topic, I don’t want to go into the structure of the brain too much in the context of this article.

However, it can be seen that – if your Conscious Mind is only 5%, positive thinking alone is not enough to realize or manifest actual changes in your life.

Example:

You exercise because you don’t want to be thin. So you say to yourself every day “I don’t want to be thin, that’s why I lift weights”. So now 5% of the neocortex is working (conscious thoughts that you are actively thinking).

In your subconscious, however, you have adopted something else, perhaps due to an experience / a belief system dating back decades, for example: “I am a failure and a weakling”.

This creates a huge inner conflict, in which the 5% of the new “positive” thinking have to face a superiority of 95% of the old “negative” thinking.

A hopeless fight? Not necessarily. Because through meditation you learn to access your subconscious mind (the divine in you), to determine old thought patterns / beliefs and to eliminate or replace them with new ones.

Meditation cleans your “hard disc drive”

Think of your brain as your body’s software / operating system (“computer”).

During meditation you will learn to search the operating system for “viruses” and then to clean your hard drive (brain). A process that will not work overnight, but should be carried out regularly.

The topic of body detoxification or “detox” as it is now called in modern German is on everyone’s lips these days and is used almost inflationary! Of course, this is useful and important and you can find out more about it here.

But when was the last time you “washed” your brain? (Of course in a positive sense) Never? The time has come! But not by mass media, the news manipulate you and tell you what to do and think, but by yourself.

 Not by daily news and co., but by your own “inside look”!

“reset” you mind, source: pixabay.

Which meditation is the “right one”?

As with so many things, there is no “right” or “wrong” in meditation. Ultimately, it is rather about ascending/transforming through/after a meditation as a different human being.

It is important for any meditation to do it free of distractions. Regardless of whether it is by family, friends, pets, cell phones, computers, etc. This time should only be yours and always take place in the same place, preferably in a dark place, free from wind, noise etc.

If you like, use a blindfold to keep your eyes away from visual distraction. Using a blindfold is much more convenient during meditation than just closing your eyes. Especially for beginners!

To answer the question of what’s the “best” meditation I would recommend you synctuition!

Why? Let me explain. Synctuition is probably the “most bang for your buck”. No matter if you are a complete novice to the topic of meditation or if you have already tried lots of meditational stuff.

Synctuition will probably blow my mind. I have been using it quite a while before writing this article and have already recommended it to clients and patients. 

Working as a Strength and Conditioning Trainer and “Heilpraktiker” (Complementary and Alternative Medicine Practitioner) I see lots of people who are in a chronically stressed state (sympathicotone).

I always recommend them to integrate a form of daily meditation to find a simple but effective and non-supplement based approach of coping with the stressors in their lives.

But why Synctuition you ask? Well, because it follows the “Pareto Principle” (80-20 rule). You can choose every day among different meditations but I would recommend you just to follow the journey Synctuition has prepared for you.

Each meditation lasts about 25 minutes and you are not recommended to do more. You can only log into your account, respectively the meditational sounds once every 12 hours.

That’s an approach I really like, as more is not always better. Same when it comes to discovering your hidden potential and going on a quest/journey to your inner self. According to that Synctuition is a very clever, smart AND effective way of meditation.

What else is special? Well, they recommend you to do a short recording of your own voice initially.

This is to convert the meditation tracks into “tailor made” tracks for your brain, incorporating your own voice and using special (gamma) brain-waves, so-called “binaural beats”, to enhance your meditational experience!

Synctuition even claims that 25 minutes of their meditation is as equally effective as a 4 hour “conventional” meditation technique.

Well, to be honest, I cannot give you proof of that, but what I can tell you, from my own experience is: the 3D sounds they’re using are aaaaamaaaaaaaaaaazzzzzzing!

Of course you should not trust me, go and make your own experience. Synctuition will give you the possibility to test them 7 days for free!

Meditation is head and heart energy – together they stand

Thoughts in the brain – whether consciously or unconsciously – always run electronically or electrochemically. You can find out more about this here. Your heart rate is magnetic.

Through meditation you will learn to bring your head and heart back into harmony. Because if you think something but do not have the appropriate emotion (and vice versa) your wishes will not come true.

Unfortunately, many people are too trapped in their minds these days, that’s why we all too often only understand things but do not understand them!

The addiction to (unconscious) behavioral patterns

The reason why most people don’t develop is because their body is addicted to certain states of being.

So you think e.g. “I’m weak, a failure, I can’t do it anyway” etc. Each of these (or other thoughts) has a chemical influence on your organism / body, e.g. permanent stress hormones such as adrenaline or cortisol are released.

If this happens over days, years, months, years, decades, your body gets used to it in the truest sense of the word and recognizes this as the status quo, i.e. as normal.

If you now begin to determine such destructive behavior patterns / beliefs by meditation and to dissolve them using suitable techniques, your body will of course resist at first! Like a nicotine addict longing for his next cigarette.

But don’t let that confuse you and the best is to do your meditation every day!

By meditating daily you will not only improve your focus and all other areas of life during your training, but you will also learn to live in the “here and now”.

No more concentration problems, no more fears of thinking about a future you don’t want or a past that is long gone.

Synctuition – Synchronicity meets Intuition

There’s one point I haven’t mentioned so far.

What does “synctuition” actually mean? Well, being a true nerd of linguistics I looooove to decrypt terms! Therefore I’ll give you quite an etymological explanation of the constructed term Synctuition, from my perspective.

Synctuition derives from synchronicity and intuition. Pretty sure you figured that out on your own.

But what is a syn/chronicity? The term synchronicity derives from the Latin prefix syn = with, together, at the same time; and the Greek suffix chronos = time (Becher et al., 1995).

Therefore, a literal translation would be. “with time”…

According to the “father of synchronicity” Carl Gustav Jung, this term yet is described as:

the coincidental occurrence of events and especially psychic events (such as similar thoughts in widely separated persons or a mental image of an unexpected event before it happens) that seem related but are not explained by conventional mechanisms of causality (…)” (Merriam-Webster).

Intuition, of course, and how could it be otherwise, also derives from Latin. Can it also be further decrypted? I’ll give it a try. To be fair, this is not backed up with 100% linguistical proof!

From my point of view in/tuition can further be broken down into the Latin prefix in = “into something”, on (Becher et al, 1995); and Latin tuitio = protection (Frag Cäsar).

Interesting. According to that, intuition would mean something like “ into protection”. Does this make sense? I think so! Think of intuition…what else could it be as your “inner voice” that prevents you from doing mistakes?

Of course Synctuition could also just mean syn = with + (in)tuition  à Synctuition. Anyhow, I think it’s always interesting to know what all the terms mean in the context of meditation and beyond.

Synctuition Meditation Conclusion

Meditation, source: pixabay.

As you can see, meditation is an extremely complex topic and the length of a single blog article is by far not sufficient to adequately present such an exciting but also multi-layered topic.

This article is intended to give you a first glimpse of this extremely useful and invigorating technique of “looking inside”.

Do not let yourself be influenced too much by your external world and learn that ultimately everything is a manifestation of your conscious / unconscious thoughts.

A very exciting field that even leads you into the world of quantum physics, in which you learn that all possibilities of our “reality” ultimately exist at the same time and that our idea of ​​linear time is most likely wrong.

You decide for yourself how deep you want to go down the “rabbit hole” and you will be surprised and fascinated by what awaits you on your spiritual journey.

As an introduction to this topic I highly recommend you to start with Synctuition. Is it worth the investment? Well, there’s always only a subjective answer to such a question. Nevertheless, I think it is an investment as it could bring you a huge return on investment!

Investing 25 minutes a day could lower your stress-levels, might support your immune system, could contribute to discover your own subconscious beliefs and sooooo much more.

Synctuition charges about 100$ per year, which makes it about 8,33$/month. If you stick to the program and meditate every day this is about 1,92$/week, which will “cost” you 0,275$/single meditation! This is a ridiculous amount of 0,010997$/minute of meditation!!! Think of that!

© HP Bernd Stößlein, Master of Business Administration in Sportmanagement.

If you liked this article please share it with your friends, subscribe to the newsletter and the blog.

If you like to book a professional online/offline consultation please feel free to contact me:

 info@bernd-stoesslein.de


Literature

Lateinisch- griechischer Wortschatz in der Medizin, S. 59.

Lateinisch- griechischer Wortschatz in der Medizin, S. 102.

Lateinisch- griechischer Wortschatz in der Medizin, S. 218.

Synchronicity, source: https://www.merriam-webster.com/dictionary/synchronicity, access from 21.08.2020.


Tuitio, source: https://www.frag-caesar.de/lateinwoerterbuch/tuitio-uebersetzung.html, access from 21.08.2020.

Esports players should train like “normal” professional non-esport related athletes! Every professional gamer should invest in a professional Strength and Conditioning Coach, and there are at least a ton of reasons to do so!

Esports players benefit from strength and conditioning training as it is a sport specific performance coaching, consisting of a special nutrition designed diet, posture improvement, musculoskeletal efficiency enhancement, brain coaching for faster neural processing and so much more!

Regarding how much money pours into esports, it would be simply stupid not to consider, and treat, pro gamers as professional athletes! But just like any other professional athlete they should hire a professional strength and conditioning coach to get a winning edge!

This article is primarily designed for professional esport players, those who want to make a living out of pro gaming and how the collaboration with a professional Strength and Conditioning Coach will enhance their game.

My article is also intended to show Strength and Conditioning Coaches how they can work with professional athletes they might never have thought of and how and where they might start to work with them.

Ok, what does a Strength and Conditioning Coach for professional esports do? Well, pretty much the same he does with all his other professional clients, too. He trains them in a sport specific manner, to make them better athletes in their particular sport.

Esports – The relentless training of professional gaming stars

If you’re reading this because you’re a professional esport gamer, respectively athlete, I won’t have to explain you how relentless and hard you’re training to be(come) one of the world’s best.

For all my other readers I will give a brief overview of how intensive a pro-gamer’s training routine is:

It’s not uncommon for professional esport athletes to perform gaming for more than 12 hours daily, on a regular basis, respectively every day!

In an industry in which the fraction of a second can decide over hundreds of thousands of dollars, the margin for errors is thinkable small!

Esport is not a sport?! That’s probably what lots of non-gamers might think now. What’s the deal? You sit all day long in front of a computer, watching your ass getting bigger and bigger? Everybody can do that…

Something like that is what you usually hear, when you talk about people who are not related to sports of any kind and particularly not to esports!

Esports – the fastest gamer wins!

From a traditional point of view esport gamers/athletes are not what you have in mind when you think of an “athlete”. A bunch of guys sitting in their mom’s basement thriving on junk food and energy drinks to stay awake as long as possible.

You might change your stereotype view!

Esports have evolved in the last decades to a multi-million, respectively multi-billion dollar industry!

Their top athletes have sponsoring contracts, earn hundreds of thousands of prize money and are followed by a huge fanbase. Just like other professional non esport athletes as well!

Being a pro esport gamer requires you being able to process information as fast as possible to make the winning move!

That means that it is not only some typing on a keyboard and scrolling around with the cursor of your mouse. It is about the speed of information<—>reaction time!

How fast can you absorb, realize, interpret your esport related environment (game) AND how fast you can take action!

According to that there are lots of points that have to be taken into consideration:

  • Range of Motion (ROM) improvement
  • Information processing capacity in total
  • Neuromuscular control
  • Fine motor skills
  • Sensory perception (especially visual and auditive)
  • Alignment of musculoskeletal system
  • Neuronal efficiency
  • Motor control efficiency
  • Firing rate of motorneurons
  • Nutrition
  • Supplementation
  • Biochemistry (Neurotransmitter !)
  • Much more
  • Physiology & psychology

As you can see there are lots of things you can optimize with an athlete. Please bear in mind that the list above, by all means, is NOT complete! It’s just to give you a glimpse of what you can work on with a professional Strength and Conditioning Coach!

Esports and brain performance optimization

Of course every pro gamer wants to be the best. A simple yet effective way of improving an esport athlete’s performance is to “rewire” his/her brain!

This does not mean that you haywire some neurons…it’s a metaphorical meaning!

How can you do that? Well, I’ll give you a little glimpse of how I do it, by correcting/improving visual perception.

As I write more in detail in my article about my Brain Coach Performance Certification:

“ (…) it simply has to do with basic human anatomy and how your brain is wired. How you observe and process the world you live in, particularly visually. What you see, in terms of sensory impulses, and HOW this information is perceived and processed in the correspondent part of your brain (visual cortex) determines your motoric actions!

According to that, postural problems are not always and only limited to misalignments of your musculoskeletal system, but most likely due to neuromuscular problems, especially problems with sensory perception through the eyes.” (Stoesslein, 2020).

In a nutshell, this means if an esport athlete receives misaligned information due to eye divergence, this will result in asynchronous visual information procession. This, in turn, will lead to slower information processing which inevitably will lead to slower reaction time.

And we all know that in esports it’s all about speed! You might have the best reaction time on your hardware (super-fast screen and keyboard) but if you are simply not performing on your best due to slow neuromuscular control, bad neurotransmitter distribution, diet issues etc. (the list is long) you will waste a lot of potential optimization!

Esports – Secret to success

Nowadays people are always looking for short-cuts. They don’t want to learn something properly but want to know how something works, explained best in just one sentence.

According to that, and the drastically decreasing attention span I’ll give you (at least some “ingredients”) of my “magic formula”, concerning strength training for esports:

  • Grip strength
  • Neck strength
  • Electromechanical delay

In a nutshell, these are, by far, the most neglected and overlooked factors when it comes to esport performance. Of course an esport athlete doesn’t have to be as “yoked” as Mike Tyson at his prime but a “pencil neck” won’t do the job either.

Especially when we think 20 years ahead, when the average retiring age of professional esport athletes might rise from mid-twenties to, let’s say around 40 or even above.

Considering posture and grip strength might even predict the longevity of an individual, not only in esports. There are countless studies which say that grip strength is a better vital parameter for longevity than blood pressure!

More about the importance of grip strength, how to measure and implement it in a strength and conditioning training (for esports), can be found in my article:

HANDKRAFT MESSEN – HAST DU ALLES IM GRIFF? (German)

If you like to receive an English translation, please email to: info@bernd-stoesslein.de

The third “ingredient” on my list is something called “electromechanical delay”, in human skeletal muscle under concentric and eccentric contractions. Think of the following:

In contraction of skeletal muscle a delay exists between the onset of electrical activity and measurable tension. This delay in electromechanical coupling has been stated to be between 30 and 100 ms.”(Cavanagh & Komi, 1979).

Wouldn’t it make sense to improve/maintain/enhance that speed? Remember, the margin between winning and losing in esports is super small! Therefore optimizing the fracture of a second will determine whether you win or lose a lot of money!

Of course there is a ton more of optimization potential. Lots of more useful tools and techniques, but you will understand that this article is supposed to “whet your appetite” for more!

If you want to get a professional coaching/consulting (online/offline) please feel free to contact me:

info@bernd-stoesslein.de

Esports Performance Continuum

Of course a single blog article is far too short to tell you all about Strength and Conditioning Coaching for esports. Yet, I’d like to give you some input how to start and what the most important things are, from my expertise.

Considering the training of an esport athlete, a very important point comes into play! The periodization of the athlete’s training. What do you train when and how? Is there an in-season, and off-season, how do you schedule strength training etc. etc. etc….

I will give you my basic PERFORMANCE CONTINUUM FOR ESPORTS on which you can build on specific programming:

  1. Assess and Correct
  2. Enable full ROM
  3. Stabilize full ROM
  4. Load full ROM
  5. Load & Link bodily segments
  6. Load segments & start focusing on improving velocity
  7. Load segments + further increase velocity
  8. Unload segments + keep on increasing velocity

Esports and Soft Tissue Treatment

When it comes to esports there is one big issue every professional Strength and Conditioning Coach must pay attention to: How to assess and correct movement restrictions!

This is my Number One on my PERFORMANCE CONTINUUM FOR ESPORTS!If you fail to assess and correct a pro gamers movement restriction all the other listed points cannot be addressed in a proper fashion! Therefore “first things first”!

Remember this blog article is the “finger in the eye approach” of how and where to start if you either want to coach professional esport athletes or you are/want to become a pro gamer and are searching for info how to get coached.

The best, so called Instrument Assisted Soft Tissue Mobilization (IASTM) tool, due to my expertise, is the Heskiers All-In massage tool.

Heskiers All-In-One massage tool + method is a special designed IASTM tool and soft tissue treatment, developed by Danish acupuncturist and designer Martin Heskier.

So, you might wonder if the Heskiers tool is just another IASTM tool out there. To make a long story short: it is, BUT it is one of a kind!

How do I know? Because besides working as a strength coach/personal-trainer, I do also work as something that is called “Heilpraktiker” in Germany. A proper translation in English would be something like “complementary and alternative medicine practitioner”.

It’s a unique profession that, in this constellation, is only available in Germany and in modification in Switzerland. You’re allowed to diagnose and treat patients (with restrictions), even with invasive techniques, i.e. like giving injections, infusions etc.

Therefore, I’m also allowed to treat patients with acupuncture- and of course acupressure-techniques. According to that I’ve been using lots of IASTM tools in all kinds of variations + massage guns and other devices.

I’ve also been certified by my mentor Charles R. Poliquin aka “Strength Sensei” (R.I.P.) as a Certified Kinetic Chain Enhancement Practitioner.

Esports  – The most important task of a Coach

So, with all the info you already received, what do you think is THE most important task of a Strength and Conditioning Coach for esports? It’s to keep the athlete save from injuries and ready to perform at his/her best!

Strength and Conditioning Coaching is different from coaching “joe average”. A coaching that focuses on athletics intents to spare energy instead of trying to burn as much calories as possible!

You must pay attention to the energy system that are used during an esport competition and how you can improve an athlete’s movement economy!

These energy systems have to be considered:

  • Phosphagen
  • Glycolytic
  • Aerobic

Considering the fact that esports are most of the time done while sitting, the aerobic system won’t be competition winning thing to focus on, right? Wrong!

Training the aerobic system will also benefit the anaerobic (phosphagen and glycolytic) systems!

Just by giving you a glimpse of the myriads of things that can be improved in a professional gamer’s life, should open your eyes on how much potential is hidden in this sport.

Both, for the Strength and Conditioning Coach AND the pro gamer! Due to my experience and expertise neither the Coach nor the esport athlete.

Most likely that’s the case as they come from different ends of the continuum of sports, or maybe really from different “worlds”.  

But why not combining the best of two worlds to create something new?

I hope my article lays the foundation for the collaboration of professional Strength and Conditioning Coaches and professional esport players to work together!

Conclusion

Let’s come to a conclusion. Are esports something that can be considered to be a serious “sport”?

Well, that kind of depends on your definition of “serious” and “sport”. From the perspective of economics, esports far surpass lots of “traditional” sports.

From the perspective of a “real” athlete that has a lot more physical involvement some might say: no!

But the same could be said about other sports like horse riding, car driving or chess!

Being a professional means “leaving no stone unturned”! Who cares what other people think? If you want to be a professional game player, respectively esport athlete, go for it!

But you should/could be the one who thinks outside the box! Think of the benefits it would bring to you and your team to hire a professional Strength and Conditioning Coach!

If you like to book an online consulting with me to learn more about strength and conditioning, nutrition, brain coaching, supplements etc. for esports please feel free to send me an E-Mail to:

info@bernd-stoesslein.de

© HP Bernd Stößlein, Master of Business Administration in Sportmanagement.

If you liked this article please share it with your friends, subscribe to the newsletter and the blog.

If you like to book a professional online/offline consultation please feel free to contact me:

info@bernd-stoesslein.de


Literature

Electromechanical delay in human skeletal muscle under concentric and eccentric contractions, P R Cavanagh, P V Komi, Eur J Appl Physiol Occup Physiol . 1979 Nov;42(3):159-63. doi: 10.1007/BF00431022.

Literature

Brain Coach Performance Certification, source: https://www.bernd-stoesslein.de/2020/07/22/posturepro-brain-coach-performance-certification-review/, access from 26.08.2020.

PSO-RITE (affiliate link) is a u-shaped device designed for working on your psoas muscles. In this article I will cover a holistic view on this topic and you will gain information about where the M. psoas is located, why some people consider it to be the “soul muscle” and how you can use the PSO-RITE properly. We will also discuss the PSO-RITE’s “siblings”, the PSO-SPINE and the PSO-MINI! I invite you to join me on this “lovely dance” we’re going to perform on our journey to the “power psoas”. Hopefully, I can help you to unlock your full potential by guiding you through some psoas exercises and some spiritual impulses concerning this “miraculous” muscle.

Let’s begin…

PSO-RITE – hidden like the “dark knight”

I really like to use a little pun here and there, to give the benevolent reader a more sophisticated reading experience. The pun in the header (dark knight) is referred to the “dark knight”, better known as Batman, just in case you wondered 😉

This pun, though, has a particular reason. I chose it as the M. psoas major is really “hidden” deep inside us. It’s a muscle that cannot be seen superficially nor is it easy to be touched!

To be precise it “(…)is a long fusiform muscle located in the lateral lumbar region between the vertebral column and the brim of the lesser pelvis. It joins the iliacus muscle to form the iliopsoas. In animals, this muscle is equivalent to the tenderloin.” (Wikipedia, 2020)

But what does “psoas” actually mean and where does it come from? Well, the term psoas derives from Greek psoa = “meat of the loin”, respectively “muscle of the lumbar region” (Becher et al., 1995).

Now that we know where the medical term originates, we’ll take a look of what the psoas is supposed to do, again from an anatomical/school medical point of view.

Again, our first approach is Mr. “know-it all”, aka Wikipedia. There you will find the following:

The psoas major joins the upper body and the lower body, the axial to the appendicular skeleton, the inside to the outside, and the back to the front. As part of the iliopsoas, psoas major contributes to flexion in the hip joint. On the lumbar spine, unilateral contraction bends the trunk laterally, while bilateral contraction raises the trunk from its supine position. In addition, attachment to the lesser trochanter, located on the postero-medial aspect of the femur, causes lateral rotation and weak adduction of the hip. It forms part of a group of muscles called the hip flexors, whose action is primarily to lift the upper leg towards the body when the body is fixed or to pull the body towards the leg when the leg is fixed.” (Wikipedia).

Sounds fancy, right? But what does it mean? Well, let’s take a closer look and decrypt the most important of these medical terms.

First, ap/pendicular derives from Latin pendere = to hang, to hag, to sag (Becher et al., 1995).

The ilio/psoas is the combination of the  Latin prefix ili(o) = “belonging to the iliac bone” and the aforementioned psoas (Becher et al., 1995). Therefore the ilio/psoas is a more or less grown together of two muscles, the M. iliacus and the M. psoa becoming the: Ili(o)psoas.

How much these muscles are grown together differs from human to human.

Picture description: Anterior Hip Muscles 2.PGN, Beth ohara, CC BY-SA 3.0, 31 Jan.,2006.

The picture above will give you a quite good example of how tight/narrow the Iliacus and the Psoas Major are located plus that they are often, at least partially, grown together.

Due to reasons of volume we will keep the other displayed anterior hip muscles aside, as we’ll focus on the psoas and keep the anatomical excurse to a minimal effective dosage 😉

Just bear in mind that on top of the displayed muscles in the image above you also have different layers of abdominal muscles. That’s why it is rather hard to “get in touch” with your psoas.

As one of the major anatomical functions of the psoas is to perform a hip flexion it should be no wonder why it is often to be found too tight!

When you enter this realm, which we call earth, respectively reality, you are born into flexion. According to that, you are struggling, literally from day one to work against that. In a physical, as well as in a spiritual and psychological manner.

Just think of the English word “live” spelled backwards…take all the time you need 😉

You have to develop a proper posture, your own conscious mind and you must fight against extensive inward rotation due to prone sitting, driving, “smart phone posture” etc., you get the point.

If you want to learn more about the importance of posture and what a “proper posture” is considered to be, you may read my articles:

·      POSTUREPRO BRAIN COACH PERFORMANCE CERTIFICATION REVIEW

·      ALIGNMENT FROM 🗣️ HEAD TO TOES 👣

·      FREO FOOT CARE SYSTEM REVIEW

It is not uncommon that the Psoas is part of something called: “lower cross syndrome”. An “issue in the tissue”, and posture, that will result in an anterior pelvic tilt, a too tight (ilio)psoas, a crosswise tight erector spinae and, on the other “cross” too weak abdominals and too weak gluteus maximus.

When I write: “it is rather hard to “get in touch” with your psoas”, do you know what a great kind of transition that is?

Well in a couple of minutes I’ll hopefully contribute to your enlightenment.

PSO-RITE – Are you emotionally tight?

Speaking of the psoas you now got a glimpse of what this “bad boy” is capable of doing, at least from an anatomical point of view. Now let’s ascend and experience the psoas from a total different perspective, a spiritual one!

Can you think of muscles in a spiritual sense?! Sure, why not?

According to Liz Koch’s amazing work, the psoas is far more than a core stabilizer and/or a hip flexor muscle!

It is an “organ” of perception composed of bio-intelligent tissue and “literally embodies our deepest urge for survival, and more profoundly, our elemental desire to flourish.”

Furthermore, Koch and others have contributed to the view of the psoas as influencer to your (emotional) health, state of being and vitality.

In Yoga the psoas even is considered to be the “muscle of the soul”. Is it that absurd to think of a too tight (ilio)psoas being the result of a chronically (over) stimulated sympathic nervous system?

I wonder if a tight psoas does not only contribute to faulty posture and restricted movement patterns but ultimately reflects a “tightened” soul? Does the body function as kind of ultra-dense signal transmitter of your soul? 

Would a release of a tight psoas help in “calming” your sympathic nervous system? Resulting in a physical AND psychical/spiritual release?

I keep this open for debate and your constructive comments below this article. Please feel free to share your ideas about that approach!

Apropos, the psoas is, by all means, not the only muscle associated with your soul! The ancient Greek belief was that what we call “the soul” was also to be found within your dia/phragm. That’s what the term schizo/phrenic derives from!

As the belief goes your dia/phragm inheres your soul. Let’s use another brief decryption of those Latin, respectively Greek terms to see what that “fuzz” is all about.

The term dia/phragm is a combination of the Latin prefix dia = through and the suffix phragma, respectively Greek diaphragma = “partion wall” (Becher et al., 1995).

Moreover, diaphragm and phren describe the same muscle, on the one hand you have Latin (diaphragm) and on the other you have the Greek term  = phren (Becher et al., 1995).

In addition to that, you have another Greek term: schizein = to split, to divide (Becher et al., 1995).

Now, let’s connect schizein with phren and, voila you get: schizo/phrenic, which exactly describes what it is supposed to be: a divided/split apart personality, respectively soul!

Concerning the psoas and its “soul connection” I highly recommend you to read the books of Liz Koch, especially:

PSO-RITE – How to use it

Let’s take a look at the PSO-RITE device and how it works. It’s a specially designed, u-shaped device. Simple to describe but not always easy to use!

In the video below I show you a brief demonstration of how the PSO-RITE is supposed to work:

In case you want to skip the video, here’s my short manual:

  • Place the PSO-RITE on a non-slipping surface
  • Locate the location of your (ilio)psoas (take a look at the picture above)
  • Lay on the PSO-RITE, resting on your forearms
  • Just get a gentle feeling of the PSO-RITE “diving” into your tissue
  • Take your time and get used to the feeling, there’s no need to hurry!
  • Breath out and let the PSO-RITE sink in further
  • If you feel any pain immediately stop the exercise!
  • If you feel comfortable you might lower your upper body to the ground (keep your palms besides you, this will help you getting up more easy)
  • Try to gently move up and down as well as side-to-side with your hips
  • Limit the hold of a position to a max of 60 sec. until you get more experienced

PSO-RITE – When to use it?

Now that you have an idea HOW the PSO-RITE is supposed to be used the question arises WHEN do you best use it. Well, of course, this question has to be answered with: “it depends”.

It depends on how severe your “issue in the tissue” is. If you suffer from any pathologies like the aforementioned “upper cross syndrome” i.e. you might use it more frequently than someone with pretty good psoas flexibility.

Please, also keep in mind that a manipulation of the psoas might also contribute to a release of your emotional “traps” or at least might release constant stress by “freeing” you from a chronic state of being in “Fight- or Flight” mode!

This is only my opinion and I did not come up with that, but from a holistical point of view it makes total sense! Just don’t take my words for granted, do your own research and see if all this makes sense to YOU!

PSO-SPINE – Feeling fine?

The PSO-SPINE company didn’t stop with thinking of the psoas, they also came up with another “cool tool”, called the PSO-SPINE!

Basically it’s the opposite approach of the PSO-RITE, as its intention is to work the back muscles, especially those around your spine.

I highly recommend you to invest in the total bundle. The PSO-RITE, the PSO-SPINE and the PSO-MINI. Just because I think that you always have to see the “bigger picture”.

It doesn’t stop with just treating a too “tight” psoas. Not from a physiological, nor from a psychological/spiritual point of view. You should incorporate “the whole thing”.

According to that, it ultimately makes sense for me that “issue in the tissue” (tight erector spinae) can also be some unsolved emotional problems and/or the result of faulty movement patterns.

Therefore having the right “tools” in your “health tool box” will enhance your possibilities of working on your problems.

PSO-MINI – The all-rounder?

The PSO-MINI is not round, but it seems to be the most versatile of the three PSO-RITE products. With the other ones being specialists, the PSO-MINI is the “all-rounder”.

Due to its rather small size, firmness and shape, its strength lies in its miscellaneous usability.

I use it for working on trigger points. That’s where I see the PSO-MINI’s biggest advantage. But, again, that’s only my opinion.

Do you have special issues you could solve with this tool? I’d be happy if you share it with me and the readers of this article!

Hollywood actor Mark Wahlberg also seems to be a fan of the PSO-RITE (see picture), as well as famous Podcast-host Joe Rogan.

Picture description: Copyright PSO-RITE.

PSO-RITE REVIEW CONCLUSION

In the end you always want to know whether something is only an expense or an investment.

To make a long story short: the tools of the PSO-RITE family are a great investment, speaking from my own experience!

By the way, otherwise I would not have taken the time (as time is a kind of “energy-currency”, too) to write a whole article. I’m not that kind of human who invests time in something he doesn’t like and takes even more time telling other people why he dislikes it so much…

Thinking of the psoas as “the soul muscle” is a lovely approach that really fits well into my understanding of what we tend to call “world”, as I also work as a “Heilpraktiker” (complementary and alternative medicine practitioner).

I incorporated the PSO-RITE and the other mentioned tools into my daily routine as well as in the work with my patients and clients.

Hopefully this article contributes to your decision whether to invest in these “cool tools” in a positive manner.

Thanks for taking your precious time and reading my article, much appreciated!

I wish you an energetic time, see you soon!

© HP Bernd Stößlein, Master of Business Administration in Sportmanagement.

If you liked this article please share it with your friends, subscribe to the newsletter and the blog.

If you like to book a professional online/offline consultation please feel free to contact me:

 info@bernd-stoesslein.de


Literature

Psoas major muscle, source: https://en.wikipedia.org/wiki/Psoas_major_muscle, access from 11.8.20.

Lateinisch-griechischer Wortschatz in der Medizin, S. 68.

Lateinisch-griechischer Wortschatz in der Medizin, S. 161.

Lateinisch-griechischer Wortschatz in der Medizin, S. 167.

Lateinisch-griechischer Wortschatz in der Medizin, S. 181.

Lateinisch-griechischer Wortschatz in der Medizin, S. 196.

Optimo Fitness Ergonomics are specially designed grips to enhance your way of gripping. These “cool tools” can be used on pretty much any regular Barbell, Dumbbell and/or cable attachments. They do even work with cambered bars! In this article you will learn about these special grips and why I have them in my “special grip training toolbox”.

Optimo Fitness Ergonomics – the better grip?

Ok, if you follow my blog you will have noticed, that I am kind of obsessed with gripping devices. Why? Because, speaking from the perspective of a Strength and Conditioning Coach,  there are two things that are heavily neglected, Neck- and Grip-Training! 

If you want to learn more about thick grip implements and other special stuff, please feel free to read the following articles:

So why another pair of grips, you ask? Well, why not?! Too much cool grip implements are never enough! Progression is one of the keys to success. For me training must be fun, too, and I get bored very fast.

That’s why I need lots of “cool tools”, especially grip tools to keep my training diversified. Furthermore, having lots of grips in your “gym-toolbox” is very space-saving. You don’t need lots of space and can take your grips, like the Optimo Grips, wherever you go.

They  come in a nice mini-gym bag, really to “hit the road/gym” with you whenever you need a pump.

Optimo grips, source: own picture.

Optimo Fitness Ergonomics – Where’s the difference?

At last, now the question arises what the “fuzz” is all about these particular grips. Well, from my point of view, they’re not intended to be “fat grip” implements. That means, that they’re not designed to thicken the diameter of a bar, but to make the grip more ergonomic!

Ha ha ha, you will probably laugh. Isn’t that obvious? As their name is “Optimo”?! Well, hold your breath as we now dig into the meaning of ergo/nomic and the question WHAT “optimal” is supposed to be!

Let’s start with the etymology (word origin) of the word ergo/nomic. Everybody probably “knows” what the term ergonomic describes but could you give an actual definition?

If not, hang in there. I’ll help you out! The term ergo/nomic derives from Greek ergon = Work, act(ion), activity; and the Greek suffix nomos = custom/rite, law, act, statute (Becher et al., 1995).

Having decrypted this term, we now know that ergonomic, literally translated”, means something like “work that is done according to statutes”.

In the sense of gripping it means that a handle (Optimo Grips) is designed to properly work in “alignment” of the shape of your hands.

To put it in other words: the Optimo Grips are not only cylindrically shaped, but instead have little “wings” in order to enhance your gripping. A proper way of gripping, so to speak.

Optimo Grips on a dumbbell, source: Optimo Fitness Ergonomics.

Optimo Fitness Ergonomics – Let’s do some functional anatomy

To understand the benefit the Optimo Grips might bring to you and your training, we have to do a brief bound in anatomy.

Actually the muscles of the hand are quite numerous. Not a wonder as they have to perform a myriad of functions, especially when it comes to fine-motor skills!

Anyhow, I’d like to stick to the K.I.S.S.-Principle, Keep It Short and Simple. I also work in Germany as a “Heilpraktiker” (Complementary and alternative medicine practitioner).

Quite a unique thing that allows me (with restrictions) to diagnose and treat diseases, do invasive stuff like injections, infusions etc.

I’m writing that to show you that I have extensive knowledge in human anatomy and that this article is not written by a 15 year old “keyboard-hero” who just invested 5 minutes into some internet “copy and paste clickbait” crap.

According to my expertise – and practical implementation of them “out of the trenches”, the Optimo grips give you a cutting edge advantage when it comes to a more…let’s say “stable” grip.

How to use toe Optimo Grips, source: Optimo Fitness Ergonomics.

How does that work, you ask? Well it works by the little “wings” the grips have. These “wings” broaden the grips which results in proper support, especially of these structures, at least according to my point of view:

  • M. palmaris brevis
  • M. adductor digiti minimi
  • M. flexor digiti minimi
  • Aponeurosis palmaris (not sure)

So, according to my expertise that’s the “fuzz” of the Optimo grips and what distinguishes them from other grip implements out there!

To be honest, at first I was really sceptical and my impression was: “wow, they’re really flexible!” (compared to other grip implements, like Cone- and/or Fat Gripz).

After having tested them for quite some extensive time and with several barbells, dumbbells, and different other cable attachments I come to the resume that they do really work great!

Even on a cambered “Buffalo Bar” they perform very well.

Conclusion Optimo Fitness Ergonomics

Of course all my articles  have a conclusion in which I answer the most important question of all: “Are they worth the investment?”, and: “Should you buy a pair?” As you probably know there’s a difference between value and a price so I skip an explanation here.

Due to the fact that I am a huge grip training fan I’d say that these grips were an absolute investment. Moreover, they are very pricy. A pair of Optimos is sold for $39,95.

I highly recommend you to get a pair and enhance your “gym-toolbox” for more variety and to prevent you from stagnation.

In addition to that, as mentioned before, you probably will also experience a better support of your hand muscles, especially during pressing movements.

The muscles that are better supported, in comparison to cylindrical grips, are: M. palmaris brevis, M. adductor digiti minimi and the M. flexor digiti minimi.

If you like to book an online consulting with me to learn more about strength and conditioning, nutrition etc. please feel free to send me an E-Mail to:

 info@bernd-stoesslein.de

© HP Bernd Stößlein, Master of Business Administration in Sportmanagement.

If you liked this article please share it with your friends, subscribe to the newsletter and the blog.

If you like to book a professional online/offline consultation please feel free to contact me:

 info@bernd-stoesslein.de


Literature

Lateinisch-griechischer Wortschatz in der Medizin, S. 76.

Lateinisch-griechischer Wortschatz in der Medizin, S. 147.

YBELL is a 4-in 1 piece of fitness equipment with endless workout possibilities, especially when it comes to functional training/movements. The special design/shape of these dumbbells allows you to perform kettlebell-training, regular dumbbell-work, double grip “med ball”-bouts, push-up stands and much more. The YBell was carefully designed by experts in fitness and industrial design to make it easy and accessible for every Body 😉 No matter if you’re “just” a “weekend-warrior” or a professional athlete, integrating these “cool tools” will add variation to your workouts, which inevitably will lead to more progression!
Learn more about these helpful “tools” for you “training-toolbox”…

This article will also be available in German, soon!

YBELL – Why would you choose’em?

YBEll, why would/should you choose them? (what a pun 😉 ) Well, as always, this question has to be answered with: “it depends”! It depends on what’s your goal right now.

For example: It depends whether you’re new to the world of fitness, respectively a novice lifter or, i.e. if you’re a world class elite athlete.

In both cases you might take benefit out of integrating YBELLs into your workout, but in different ways!

This results to the weights of the YBELLs which, in comparison to ordinary dumbbells, are rather light in weight (up to about 15kg).

So if you are e.g. looking for a “most bang for your buck” approach to equip you own house with a little “home gym”, but lack the space to stuff it with space consuming racks and/or machines, you should definitely consider investing in a set of YBELLs!

Especially in times like we experienced in 2020 where lots of people, due to special circumstances, did not have the chance to visit their regular gym! With a full set of YBELLs at home there is no time for excuses but a lot of access for results!

Having a set of these will give you literally a myriad of training possibilities, especially for metabolic-, respectively anaerobic conditioning work, plus functional movements.

Due to the shape of the YBELLs you can use them as regular dumbbells, as kettlebells and (with some restrictions) as “medicine balls”. The restriction results in the fact that, obviously, you should by all means  not throw them around like a true medicine ball.

Keeping that in mind you can still use them for functional medicine ball-movements, as they can be gripped two-handed and that in a much more convenient way than regular dumbbells!

From my professional perspective/expertise I’d say the YBELL plays its true strength in its versatility for functional movements.

Let me explain…

YBELL and the sagittal plane

Most of power, strength, speed and other weight-training is more or less performed in the sagittal plane. That means, you either move a weight up or lower it down. Rotational exercises are found surprisingly rare, even in top athletes’ training protocols.

Of course you should keep in mind that even if someone is considered to be a world class athlete this doesn’t necessarily mean that he or she is also always performing a structured and sport specific training!

So, the big benefit of YBELLs is for sure the functional training aspect. Movements in which you rather train movement than (isolated) muscles.

If you’re not yet familiar with this training-nomenclature here’s a brief example:

Example 1:

An isolated exercise would be a seated dumbbell biceps curl. An exercise where you are sitting on a bench (with a dumbbell in each hand) and then curling the weight up (concentric phase) and afterwards lowering the weight (eccentric phase).

This would be considered to be an “open kinetic chain” and “open circuit” exercise, but we will leave this apart not to make things too complicated. As you can see, this exercise is intended to (depending on the way of gripping and rotating your wrist)  work different parts of your biceps muscles.

According to that it is, more or less, not training something else.

Seating YBELL-curls as example for an open kinetic chain excercise with open circuit, source: own picture.

Example 2:

In this example we think of an exercise named: “Medicine Ball (MB) Pull-over to stand”. A rather complex exercise, that focuses on movement, rather than isolated muscle work!

Performing this exercise requires you to stand upright (with a YBELL) in front of your belly (arms bent approximately 90° in the elbows), after that you squat down to a full squat (“ass to grass” or deep enough to leave a stain on the floor 😉 ).

Having reached this position you will move your upper body backwards until it is lying on the floor, while simultaneously extending your arms over your head (keep arms straight).

Then you’re going to do the same movement as described above but just in reverse, performed in an explosive manner.

This is an exercise in which you train a complete movement, with extensions and flexions of almost all joints and by activating all primary movers in your body.

Too see the described excercise, “Medicine Ball (MB) Pull-over to stand”, please watch the video below.

As you can see, the YBELLs are designed not to be used for super heavy hypertrophy work, like traditional bodybuilding work as they eventually will become too light, nor for something like powerlifting.

YBELL – Form follows function

So, what’s so special about the YBELL? Of course, it’s the design, but it also resembles a function. When it comes to designing products there is a rule: “form follows function”.

That means that, first of all, the product must be usable to solve a certain “problem”. Afterwards you can give it a nice appearance (design).

The YBELL does both. It looks really nice and has a very good workmanship + offers a vast versatility for exercises (as you can use it as dumbbell, kettlebell and “medicine ball”) while simultaneously saving a lot of space.

YBELL describes the evolution of the YBELL’s product development as followes:

The development of the YBell has been a labor of love for inventor and personal trainer Aaron Laurence. Over the last 15 years Aaron has trained thousands of people on Australia’s famous Bondi Beach.He was using traditional training tools, dumbbells, kettlebells and medicine balls, to create his own brand of High Intensity Resistance training. With his member numbers growing it became impossible to keep incorporating multiple pieces of equipment into his sessions. The solution to the problem was the YBell. One piece of equipment that did everything he was already doing and more!” (YBELL, 2020).

The YBELL’s name perfectly describes its appearance. It looks roughly like the letter Y with a triangle “around” it.

The YBELL-Family is available from XS up to XL and are sold individually.

YBELLs, from XS to XL, source: YBELL.

They star with 9,5 lb which is approximately 4,3 kg and move up to 26,4 lb, which is about 12kg.

Of course the YBELLs increase in size and weight from extra small to extra large.

YBELL – Get a Grip

The cool thing about the YBELLs are the grips. You have four on each YBELL and it gives you quite a lot of grip options. Either for a double handed grip or a single handed one.

Moreover, you can grip “inside” the bar. That differs the YBELLs from traditional dumbbells where the weight equals the center of mass. Meaning, that while gripping an ordinary dumbbell you find the weights aligned with the grip.

When you use the inner grip of the YBELL, the weight distribution differs from those of normal dumbbells. Using a YBELL the weight is not aligned with the grip but “molded” around your hand!

This will result in a different weight distribution and a total different feeling while moving the weights around.

Is this “better”? This would consider a definition of the term “better” in our case here but I would say: Not better, but different!

Keep in mind that constant training variation is one of the keys to continuing progression. Therefore it’s not as important of HOW much progression you do but to ensure ongoing progression.

You should also keep in mind that it’s about proficiency and not perfection. If you try to do something perfect it will never be done.

To give you a better understanding of how you can use the grips of the YBELL please take a look at the images below:

YBELL Inner Grip:

Choosing where to grip is essential! By changing the grip positions you can change the center of mass. Meaning, it’s a difference for your joints/muscles e.g. if you perform a YBELL bench press movement with your hand IN the YBELL or ON the YBELL!

YBELL inner grip, source: own picture.

Having your hand ON the YBELL, the weight will drag your hand more to the outside, whereas keeping your grip IN the YBELL will keep the weight in a line with your arms, respectively your elbow and shoulder-line (depending on which part of the movement you’re looking at).

Inner vs outer grip position, source: own picture.

YBELLS outer grips (“medicine ball”)

When gripping two-handed you can use the YBELLs to simulate a kind of “medicine ball-training”, at least to point where you don’t have to throw the ball. Therefore it’s not a true ballistic movement, e.g. like pushing a MB away from you with maximal force output!

But, as I mentioned earlier in the text, you can use any other exercises that you could perform with a regular MB! This will give you a vast possibility of exercise performances in all three planes (sagittal, frontal, transversal).

Especially useful for metabolic conditioning (where you don’t need super heavy weights) and other functional oriented movements.

YBELL “medicine ball” grip, source: own picture

YBELL Kettlebell-stile grip

The triumvirate of usage will also give you the opportunity to use the YBELLs like a conventional kettlebell.

YBELL kettlebell-stile grip, source: own picture.

This will expand your exercise repertoire to exercises like kettlebell swings or even Olympic Weightlifting inspired ones, like i.e. single-arm YBELL snatches, from different positions (hang/from the ground).  

Again the outcome of the exercise will differ from your grip position (e.g. kettlebell style = on the top grip of the YBELL)!

In this video I give you a brief example of exercises that can be performed using different grip variation on the YBELLs. Some exercises are performed with a closed kinetic chain and closed circuit, or an open kinetic chain with open circuit.

YBELL – price vs. investment

Well, when it comes to fitness equipment it’s inevitable to talk about the costs, the price and if something is considered to be a true investment.

So, what does a full set (10 YBELLS) cost? A 10-piece kit will cost you 599,90$ exclusively packing & shipping. This is an approximate price of 60$ per YBELL.

If you’d like to have them stored in a SUPER COOL vertical rack (see photo)  for an extra of 315,99$.

YBELL Combo 10-Piece Kit + Rack, source: YBELL.

You can either pick a YBELL Combo 10 Piece Kit + Rack or the Vertical Rack alone or each YBELL solely (not sold as pair).

Therefore you have plenty of options available suiting your demands, space and budget. I’ve being using the YBELLs quite some time now, very extensively with my own training and with clients and patients.

I consider the YBELLs as a very useful equipment. No matter if you have a professional facility in which you work with clients or if you want to equip your own home-gym.

Whether you’re working 1:1, alone or in groups, the YBELLs will give you a time and equipment-saving solution, the famous “most bang for your buck”!

I’m happy to have them in my gym!

YBELL Review Conclusion

So, what else can I say about the YBELLS that I haven’t said before? To be honest, quite a lot and one single article is surely not enough to show every possible usage, any kind of exercise or movement that can be applied with a set of YBELLs.

That’s not at all my intension nor my desire. This article is written to introduce you to this “cool tool”. To address you that there is more out there than the regular stuff.

Of course the fitness industry has the burden that almost every day something new “pops up”, but it is not necessarily useful! As my mentor Charles R. Poliquin, aka “Strength Sensei” (R.I.P.) once used to say:

I could wear my underpants above my jeans, that would be new. But it would be useless” (Poliquin 2018).

You get the point. Just because it’s new does not mean it’ll apply any real benefit. In the case of the YBELLs that’s the opposite. They are new AND useful!

I like the approach YBELL uses, it’s according to the “pareto principle” or 80:20 rule. You search for the minimum effective dosage to achieve maximum output. In the case of the YBELLS that’s the same.

They offer you the possibility to have different equipment all “molded” together in one piece. According to that it’s economic in terms of budget and equipment!

YBELLs have a non-slippery surface, a non-rust neoprene coating, are ideal for training almost everywhere and will expand your “training tool-box”. As you know: if you only have a hammer, everything looks like a nail!

Bonus Option:

YBELL offers quite extensive options of workout and education! You can, e.g. book an online introduction workshop, use the YBELL Workout-APP and/or apply either to their Coaching- and Master Trainer Courses.

Additionally there are lots of YBELL-Events available, to be found all here: https://ybellfitness.com/workouts-education/training-calendar-events/

My Final Conclusion:

I strongly recommend you to invest in these special barbells!

© HP Bernd Stößlein, Master of Business Administration in Sportmanagement.

If you liked this article please share it with your friends, subscribe to the newsletter and the blog.

If you like to book a professional online/offline consultation please feel free to contact me:

 info@bernd-stoesslein.de


Literature

YBELL about us, source: https://ybellfitness.com/about-us/, access: 5.8.20.

Wrist Max Finger and Wrist Trainer is a specially designed grip strength handle, made by a company called “Arm Sport”. Its origin comes from the world of professional arm wrestling. If you’re old enough, you will remember Sylvester Stallone’s 1987 highly underrated movie “Over the Top”, in which he played a character named Lincoln Hawk and the fabulous Movie’s music by Sammy Hagar, “Winner Takes it All”. But even if you’re not into the world of arm wrestling but e.g. into tennis, having a Wrist Max in you gym-bag/arsenal might be a beneficial thing! In this article you will learn about the specialties of this grip-tool and how you might use it to treat  a “Tennis Elbow”.

If you want to read more about Arm Sport’s special grip tools you can do so in my review about their “Cone Grips”.

Wrist Max  – Finger and Wrist Trainer

ARMSPORT does it again, with the Wrist Max handle. This “cool tool” is one of the most effective handles for wrist & finger training. It’s perfectly designed to fit an athlete’s grip and stays comfortable during the training.

You have two size-options between you can choose, (L & XL), according to the size of your hand (see picture). So, if you have HULK-size like hand, you’re good to go, too.

Wrist Max Size Chart, source:
© Wrist Max.

The grip itself is made from super durable plastic with adjustable straps which prevent your hand from slipping off the device.

The form of the Wrist Max is C-shaped, to resemble an arm wrestling opponent’s back of the hand. It really fits within your own hand and is never uncomfortable!

Depending on how you grab it (see pictures) you can either place your whole palm on the grip tool or you emphasize the pressure by sparing the mid-part of the fingers and using the tips of the fingers instead.

Insert pictures of different grip positions

You can find a short but really good review by arm wrestling champion Davon Larrat from Canada.

If you want to get more in depth knowledge what the Wrist Max actually was designed for (to become a stronger arm wrestler) I highly recommend following Davon Larrat!

I’m not an arm wrestler but a Strength and Conditioning Coach! Therefore I’ll give you my point of view how anybody could structurally integrate this “cool tool” and use it, e.g. in a rehabilitation phase aside from pure sport specific training.

Wrist Max for Lateral Epicondylitis?

Wrist Max: I like to think outside the box. In addition, I’m a “Heilpraktiker” (Complementary and Alternative Medicine Practitioner). Therefore I also want to illuminate the Wrist Max from a therapeutic and possible rehabilitate view.

But before I tell how I use the Wrist Max to treat something that’s called “Medial Epicondylitis”, I will explain you what it is.

The term “Lateral Epicondylitis” derives from Latin latus = side, rim (Becher et al., 1995) and the constructed word Epi/condyl/itis, which is a composite of:

  • Greek prefix epi = above (Becher et al., 1995)
  • Greek condyl, respectively kondylos = bone joint, ankle (Becher et al, 1995)
  • Suffix -itis = acute inflammation

Combining those three you get Epi/condyl/itis which is an “acute inflammation of the outmost part of a joint”. Add the word “lateral” and you get an “acute inflammation of the outmost part of a lateral joint”.

Another, colloquial, expression for this issue is “Tennis Arm”. To be more accurate a tennis arm is actually not an acute inflammation but rather a chronic ongoing (potentially) degenerative issue.

According to that, a more appropriate term would rather be “Lateral Epi/condyl/OSIS”.

With the suffix -osis describing a “chronic (degenerative) issue (in the tissue)”.

But how do you get a lateral epicondylosis? Well, due to my observation (also being a Strength and Conditioning Coach) I would say due to repetitive and forceful wrist extension and/or excessive supination, like e.g. playing a “back hand” in tennis.

What else might cause a Lateral Epicondylosis (“Tennis Arm”) in Tennis?

  • An improper and/or new racquet (size)
  • A new /faulty grip position
  • Repetitive hitting into the wind

Wrist Max Rehab for Tennis Arm – An approach

So, how do I structurally integrate the Wrist Max in a rehab program for tennis arm?

First it is important to take care of your overused elbow joint. If it is acute, ice might help to reduce an inflammation but in the long run heat will do a better job (if it is a degenerative issue and not a “silent inflammation”!).

If a patient suffers from a restriction of range of motion (ROM) I’d recommend to get rid of possible adhesions and after that I’d (re)build up strength and coordination.

The Wrist Max can be used to strengthen the agonist muscles in the elbow and ensure, what my Mentor Charles R. Poliquin aka “Strength Sensei” (R.I.P.) would have described, a proper structural balance.

As the Wrist Max is designed for wrist flexion, this will be the choice first, to prevent the extensor muscles of the forearm from further stress. Later, the extensors will be integrated in a structural-balanced rehab program.

I would also highly recommend to strengthen the scapula stabilizers as they are often underdeveloped and play an important role for proper elbow, respectively wrist kinetics.

An acute rehab phase may last around 8 weeks, but you might speed up recovery by integrating useful tools and techniques like i.e. Frequency Specific Microcurrent (FSM), platelet-rich plasma, dry needling and/or soft tissue tools (like the Heskiers-Tool).

When a tennis player is ready to hit the court again I’d recommend making further adjustments, like thinking about an appropriate racquet (consider size and string tension), footwear for proper alignment etc.

You can find more about the importance of proper alignment in my articles:

Wrist Max  – More Grip strength for a prolonged life?

Ok, but wait a second…a prolonged life due to a stronger grip?!

Yes, this seems to be true!

Wrist Max Finger & Wrist-Trainer, source: © Wrist Max

Besides the fact, that even in professional sport, training grip and neck training are probably the two most neglected pillars of strength training, studies found out, that a stronger grip is actually a better vital parameter for overall health than the blood pressure (at least in middle aged and older people)!

According to a nationwide population-based Taiwanese study the relative hand grip strength seems to be a simple indicator of cardiometabolic risk among the aforementioned middle-aged and older people.

Another study form 2016 states, that:

„(…) handgrip strength, may be a better tool to capture conceptual concomitant health, which may be a simple, inexpensive, and easy-to-use tool when targeting cardiovascular health in public health level” (Lee et al., 2016).

Furthermore, a study with the title: “Grip Strength is Associated with Longitudinal Health Maintenance and Improvement in Adolescents” came to the conclusion that:

Greater NGS is associated with longitudinal health maintenance and health improvements in adolescents. Low NGS could be used as a prognostic indicator of cardiometabolic risk and to identify adolescents who would benefit most from lifestyle interventions to improve muscular fitness.“ (Peterson et al., 2018).

The abbreviation NGS is used in this study for “Normal Grip Strength”. In addition, a 2017 study claims that:

„(…) higher baseline GS and 5-year increase in GS were protective of mortality, whilst GS decline was associated with an increased risk of mortality in the very old over 9.6 years, especially in women. These results add to the biological and clinical importance of GS as a powerful predictor of long-term survival in late life.“ (Granic et al., 2017).

In this study they used “GS” for abbreviating the term “Grip Strength”.

Another study from 2018 investigated the relation of grip strength (GS), cardiorespiratory fitness (CRF) and overall mortality risk found out that:

“CRF and GS are both independent predictors of mortality. Improving CRF and muscle strength together, as opposed to single optimization alone, can be the most effective behavioral strategy to reduce overall mortality and cardiovascular risk.” (Youngwon, 2018).

It can be seen that there are numerous studies on the meaningfulness of grip force measurement, respectively grip strength training.

Of course, this article does not claim to have listed every study on the benefits of grip strength! If you want to read more studies, you should simply go online and search for example for the key words: grip force measurement, hand force measurement, grip strength measurement etc.

Wrist Max – Review Conclusion

Wrist Max – So, what’s the deal of the big deal? First of all, it is very pricy! Depending on the size (L, XL) the models range between 39,90$ to 44,90$, which is – to be honest – more than fair!

Wrist Max in action, in my Gym, source: own picture.

Furthermore, it is a very versatile tool that can also be used for strength/hypertrophy phases and/or rehabilitation in strength and conditioning, not only in arm wrestling!

Considering that and it’s great portability makes the Wrist Max a real “cool tool” for every “gym rat”, professional athlete, “weekend warrior” or strength facility.

I would highly recommend you to also invest in the Arm Sports’ “ConeGrips” to further stack your “arm-arsenal”.

Having a strong grip clearly shows benefits of a prolonged life. According to that, investing in a useful tool like the Wrist Max makes total sense for me.

It seems to be a pretty useful tool while being in a reha phase and dealing with lateral epicondylitis/-osis (“Tennis Elbow”).

Conclusion: go and get one !

© HP Bernd Stößlein, Master of Business Administration in Sportmanagement.

If you liked this article please share it with your friends, subscribe to the newsletter and the blog.

If you like to book a professional online/offline consultation please feel free to contact me: info@bernd-stoesslein.de


Literature

Lateinisch-griechischer Wortschatz in der Medizin, S. 75. 

Lateinisch-griechischer Wortschatz in der Medizin, S. 114. 

Lateinisch-griechischer Wortschatz in der Medizin, S. 121.

Lee WJ; Peng LN; Chiou ST; Chen LK. Relative Handgrip Strength Is a Simple Indicator of Cardiometabolic Risk among Middle-Aged and Older People: A Nationwide Population-Based Study in Taiwan. Plos One 201611 (8), 0160876 DOI: 10.1371/journal.pone.0160876.

Peterson MD; Gordon PM; Smeding S; Visich P. Grip Strength Is Associated with Longitudinal Health Maintenance and Improvement in Adolescents. The Journal of Pediatrics 2018202, 226–230 DOI: 10.1016/j.jpeds.2018.07.020.

Granic A; Davies K; Jagger C; M Dodds R; Kirkwood TBL; Sayer AA. Initial Level and Rate of Change in Grip Strength Predict All-Cause Mortality in Very Old Adults. Age and Ageing 201746 (6), 970–976 DOI: 10.1093/ageing/afx087.

National Councilof Strengthand Fitness (NCSF) is a USA based institution that offers different certification, i.e. “Personal-Trainer”, in “Sport Nutrition” and in “Strength Training”. NCSF Certified Strength Coach: I took the last mentioned course (Certified Strength Coach), which is approved by the National Commission for Certifying Agencies (NCCA).

NCSF Certified Strength CoachThis course is packed with the highest standards in the industry. It will boost your knowledge not only in strength training but also in performance assessment and evaluation, biomechanics, sport metabolism, nutrition and ergogenic aids, training techniques for athletic performance, advanced programming for sport, injury prevention and return to competition, an exercise (online) library and much more.

Stay tuned and read my review about this investment!

NCSF Certified Strength Coach – What’s on the schedule?

So, you’re planning to become a certified Strength and Conditioning Coach? Great! Congratulations to your decision as this is a very interesting, varied and exciting profession.

If you want to know where to start your journey search no more. You have found your tribe!

I’ve been doing the Certified Strength Coach by NCSF and I will tell you exactly what you can expect and give you my honest feedback.

To make a long story short I’ll start right away and will answer your most desirable question:

“Is this course worth the investment?”

To be honest: YES, IT IS! You will get the “most bang for your buck”. But hold on, I’ll tell you more about that in a minute. First, let’s try with what this elaborate course is made of.

At first you can choose your options. There are numerous “package prices” available. Ranging from as low as 299$ up to fair 599$ for the “Workshop Plus Package”. 

The 299$ is for the “Exam Only” (499$). Besides that, you’re given the option to choose between the  “Home Study Course & Exam” (549$), the “Home Study Plus Package”(549$), The “Workshop Course & Exam”(599$) and the “Workshop Plus Package”.

Where’s the difference? Good question. It mostly differs if you wish to receive a hard copy of the “Advanced Concepts of Strength & Conditioning Textbook” and whether you’d like to take the physical 2-day workshop instruction (16 hours) or prefer studying (online) at home.

Due to the fact that I’m from Germany, the most convenient thing for me was to take the “Home Study Course & Exam” and enjoy the digital edition of the “Advanced Concepts of Strength & Conditioning Textbook”.

NCSF Certified Strength Coach – Course Breakdown

In this part of the article I’ll give you a sneak peek of the separate units of the Certified Strength Coach (CSC) Program. Of course, due to the sheer amount of material and Copyright, I cannot provide you with every little detail of this marvelous course!

But, I’ll try to give you a delightful input as possible to wipe out all your doubts whether to take/invest in this course or not.

Unit 1 Performance Assessment and Evaluation

NCSF Certified Strength Coach: All the Units are structured the same. They are divided in sub-categories and  always start with an overview of the Unit’s learning goals.

These are followed by lesson notes, a “Questions & Answers” section, a Quiz, the recommended textbook review and  the Unit’s little Practice Exam.

Unit 1 logically commences with an introduction to strength and conditioning. In addition, you will make your first steps in sports analysis for program development as well as in performance assessment for elite athletes.

Unit 2 Biomechanics

NCSF Certified Strength Coach: Trying to be a good strength and conditioning coach you will also have the need of fundamental understanding of which muscle does what…and, if that might be the case, why it does not what it is  supposed to do.

According to that, you will learn about the body’s biomechanics, respectively sport biomechanics in Unit 2 as well as how to integrate corrective exercises.

You will learn for example about concepts related to a functional skeletal system, principles of stability and balance, anatomy and function of the sling systems, concepts related to common upper and lower body postural distortions, postural assessments and much more.

Unit 3 Sport Metabolism

NCSF Certified Strength Coach: This unit will turn your view to the inside. Your inner world creates your outer! Not only in a spiritual sense but also in a biological.

Unit 3 acknowledges you in bioenergetics (the role of free energy in the body), energy sources used to meet immediate, intermediate and prolonged metabolic needs, how the metabolic systems complement each other during sport performance and training etc.

Furthermore will gain knowledge on how to “tailor” programs for specific motor unit adaptations including improved firing rates, increased recruitment and enhanced firing synchronicity.

Other examples are the primary physical/metabolic factors that result in muscle strain or damage as well as rhabdomyolysis, the ventilatory and lactate thresholds and applications for metabolic conditioning or the concepts of central and peripheral fatigue as well as factors related to fatigue prevention.

Unit 4 Nutrition and Ergogenic Aids

NCSF Certified Strength Coach:The term ergo/genic derives from Greek ergon = work, act, action, occupation; and Latin genus, respectively old Greek genos = root, gender, species (Becher et al., 1995). Therefore ergo/genic or “ergogenic aids” describes: “that what supports the action of human action”, respectively supplements.

You will learn how to maintain energy balance while competing as an elite athlete, about the various functions and types of dietary macronutrients and micronutrients, as well as guidelines for carbohydrate, protein, lipid, water, and micronutrient intake among elite athletes.

Other examples of this courses content are e.g.: nutrient timing for maximizing performance, protein synthesis, weight loss and/or recovery, effects of carbohydrate intake on sport performance or how to identify heat-related illnesses, body composition assessment and weight management among athletes.

Besides sport nutrition unit 4 will “nurture” (great pun, isn’t it? J ) you with ergogenic aids for sport performance.

You’ll be able to feed your brain for example with the potential risks associated with taking dietary supplements, the potential usefulness and dangers associated with the various ergogenic aids purported to be effective for improving performance and supplementation options for athletes with special needs (e.g., vegetarians).

Unit 5 Training Techniques for Athletic Performance

NCSF Certified Strength Coach: In Unit 5 you will really learn a lot about a solid foundation in:

  • Performance Preparation
  • Foundations and Technique for Olympic Weightlifting
  • Theories and Concepts for Speed, Agility and Quickness Training
  • Technique and Instruction for Speed, Agility and Quickness Training

Sounds a lot? Well, it is. But the cool thing is you don’t have to rely on pictures alone, when it comes to exercise explanations.

The old saying goes: “A picture is more worth than thousand words”. But I tell you what, a video might be worth a billion words! With pictures you can see a starting and a finishing point but you do not see what happens in between!

The Certified Strength Coach Course will provide you with an extensive and surplus excursive library with lots of explanatory videos, filmed from different angles.

But we’ll save that one for later (Unit 8). 

In the first chapter of unit 5 you will learn e.g. the performance-related benefits of a warm-up, how to select warm-up activities that match the specific goals of participating athletes or  how to properly apply self-myofascial release techniques to reduce movement restriction.

The learning goals of chapter 2 ( Foundation of Techniques for Olympic Weightlifting) of unit 5 will enhance your knowledge about proper form technique, spotting, teaching cues and common errors for the back squat, front squat, split squat and overhead squat.

Furthermore, you will learn about other proper techniques including exercises like the power snatch, and other Olympic lifts.

Theories and concepts  for Speed, Agility and Quickness Training (Chapter 3) of Unit 5 deals for example with the biomechanical, neuromuscular and metabolic factors associated with speed and agility performance or concepts related to proper sprinting mechanics/form and common sprinting technique errors etc.

In “Technique and Instruction for Speed, Agility and Quickness Training” (chapter 4) of Unit 5 you will further learn i.e.:

  • The primary categorical drills that can be used for speed, agility and quickness training
  • How to differentiate between ballistic and plyometric drills for SAQ improvements
  • How to differentiate between change of direction (COD) and agility drills

Unit 6 Advanced Programming for Sport

NCSF Certified Strength Coach: Like the chapter before, Unit 6 is “armed” with a myriad of “knowledge bombs”, ready to “blockbuster-bomb your brain”…with strength and conditioning knowledge.

Your gun cabinet is loaded with the following:

  • Considerations for Programming
  • Programming for Sport Performance
  • Periodization Methods for Sport
  • Conditioning for Intermittent Sports
  • Training Methods for endurance Sports

Remember: “power is nothing without control”, that’s why you need to learn the basics first. And nothing ever beats the basics!

Unit 7 Injury prevention and Return to Competition

NCSF Certified Strength Coach: The most important task of a Strength and Conditioning Coach is to guarantee that an athlete stays injury free!

Therefore, Unit 7 deals with the primary focus during each phase of rehab (acute, intermediate, transition back to sport).

In addition, you will learn different types of exercises employed during physical therapy and sport rehab programs.

For each common sport injury you will be given examples of treatment options, sports associated with the highest prevalence, the mechanism of injury, risk factors and necessary training modifications and much more.

There will be suggestions of how to return-to-sport parameters (positive prognostic indicators) following rehab for each injury, which symptoms indicate a need for surgery or withdrawal from sport participation and a bunch of other useful stuff “out of the trenches”.

Unit 8 the Exercise Library

NCSF Certified Strength Coach: As already mentioned, Unit 8 is, as we say in German,: “das Herzstück” which means “the heart-piece” of the NCSF’s Strength and Conditioning Certification. At least from my point of view.

In this Unit you will be granted access to all the exercises that are mentioned throughout the course. These are well structured and really well shot.

You can see every exercise from different angles and Olympic weightlifting exercises are filled with “see through plates”, to give you the most information of proper execution as possible.

All these exercises say the most, by using the least amount of time. They are simply efficient!

The exercise library is listed in alphabetical order, starting with numbers. Here you will learn about drills, like:

  • 30 Yard T-Drill
  • 40 Yard Square Drill
  • 5-Cone Star Drill
  • 6-Cone Z-Drill
  • others

If you’re from a country (like me) that uses the metric system you can easily convert the US system into meters instead of yards, so don’t worry J

In sum you will be able to watch over 300 videos!

Unit 9 Final Practice Exam

NCSF Certified Strength Coach: Unit 9 will give you the option to practice for your final exam. In this unit you can answer 100 multiple choice questions, all mixed together from all the other units.

In the real exam, though, you will have to answer 150 randomly selected multiple choice questions and your time limit is 3 hours.

How to study for Strength and Conditioning Certification

After having received my review about NCSF’s course material I’d like to give you my best technique of how to study for this certification.

There might be an uncountable number of learning techniques but here is the one I’ve been using over the years now, for all sorts of certifications.

It’s called “The Pomodoro- Technique” and I got to know it from my mentor, the most successful Strength Coach in history, Charles R. Poliquin (R.I.P.), also known as “Strength Sensei”.

What is this technique about? Let’s have a look at Wikipedia, aka “Mr. Know it all”.

The Pomodoro Technique is a time management method developed by Francesco Cirillo in the late 1980s. The technique uses a timer to break down work into intervals, traditionally 25 minutes in length, separated by short breaks. Each interval is known as a pomodoro, from the Italian word for ‘tomato’, after the tomato-shaped kitchen timer that Cirillo used as a university student.”

Between each blocks, respectively “pomodoro” I’ll stand up and do some mobility exercises, like deep squatting etc. for a break of 5 minutes before returning to concentration.

Recently I merged to incorporate a standing desk while working in my office and while learning. This is a very cool tool to prevent e.g. upper- and lower crossed syndrome!

How to master learning for Strength and Conditioning Certification?

If you have to learn lots of stuff in a relatively short amount of time you can’t simply learn everything by heart. Due to the overwhelming amount of information it is simply impossible to recall everything and anytime.

Anyway, I’d never recommend only learning things by heart! I propose you to start thinking in principles! Try to understand HOW things work instead of simply trying to memorize them!

Another great tip is learning how to decrypt Latin and (old) Greek vocabulary. No, of course you do not have to learn both of these languages to take a Strength and Conditioning Certificate.

However, once you have gained proper knowledge in related nomenclature you will find everything more easy to learn and understand. Plus you will strongly benefit from it while working in the field of medical professionals!

I speak out of experience as I’m also a “Heilpraktiker” (“heal practitioner”). A profession that is – in this form – only available in Germany and (with restrictions) in Switzerland. A proper translation would be something like “Complementary and alternative medicine practitioner”.

We are allowed to diagnose and treat diseases (with restrictions) and do invasive treatments, e.g. infusions or injections, without being a medical doctor. For this profession I studied for years and I found it extremely beneficial to learn Latin and Greek terms!

NCSF Certified Strength Coach – Conclusion

I don’t want to sound like a broken record but I’ll say it again: The NCSF Certified Strength Coach is a total investment!

You’ll probably have noticed that I wrote “investment” instead of “cost”. That’s not just to sound fancy but to tell you the difference between investment and expenses.

Sure, at first you will have to spend money but in the long run you will learn more, to earn more! Therefore the NCSF Certified Strength Coach is something that will be a return on investment for you.

So, to sum it all up, if you’re looking for a profound start to your career in the field of Strength and Conditioning you definitely should take this course.

On top of the online learning material you’ll either receive the digital version of the “Advanced Concepts of Strength & Conditioning Textbook “ and/or the print version. Keep in mind that that’s an additional 650+ page “knowledge bomb”!

Take a look for yourself, under: http://www.ncsf.org/

© HP Bernd Stößlein, Master of Business Administration in Sportmanagement.

If you liked this article please share it with your friends, subscribe to the newsletter and the blog.

If you like to book a professional online/offline consultation please feel free to contact me:

 info@bernd-stoesslein.de


Literature

Griechisch-lateinischer Wortschatz in der Medizin, S. 76.

Griechisch-lateinischer Wortschatz in der Medizin, S. 88.

Pomodoro Technique, source: https://en.wikipedia.org/wiki/Pomodoro_Technique, acces from 24.7.2020.

Rehabilitation of the Spine is an almost 1300 pages thick masterpiece book of resource by Dr. Craig Liebenson D.C., the founder of the “First Principles of Movement”. This stronghold book can be considered as the gold standard resource in the field. It provides a very practical overview of all aspects of spinal rehabilitation from a patient-centered approach. As a “Heilpraktiker” (Complementary and Alternative Medicine-Practitioner), Strength-Coach and Personal-Trainer I strongly recommend Dr. Liebensons’s book to anyone working in this field! Furthermore, I believe it to be an investment to all other professionals in familiar fields, like i.e. chiropractors and physical therapists, even spine surgeons, physician assistants, etc. Simply everyone who is more or less involved in the care of patients with spine problems!

Rehabilitation of the Spine Review?

Can you review an almost 1300 pages strong book in one single blog article? Sure, you can but I’d like to emphasize that it will only suit you to sneak a peak of a glimpse of an overview!

According to that this article should be considered being a nudge to you. To see the benefit of investing in it!

What can you expect? Well, nothing less than 43 chapters, packed with “spine twisting” knowledge for you to digest!

This article deals with the 3rd edition of Liebenson’s book. If you purchase it you’ll also gain access to an enhanced eBook version, for iOS, Android, PC and MAC!

Here’s just a little summary of the contents:

  • Part I Overview
  • Part II Basic Science
  • Part III Patient Assessment
  • Part IV Sustainable Recovery
  • Part V High-Value Recovery Options for Return to Participation
  • Part VI Building Robustness for Return to Sport and Activity
  • Part VII Multimodal Options for Recovery
  • Part VIII First Principles of Movement: A Systematic Approach
  • Part IX Interdisciplinary Management

The Kabuki Strength Connection

If you are from the field of strength and conditioning you might wonder which connection Liebenson has to the more “hardcore lifting crowd”. Well, let me tell you that he’s on the advisory board of World Elite Strength Coaches, gathered around Kabuki Strength founder Chris Duffin!

Find out about my Kabuki Strengh Scholderök-review –> here.

Part I – An overview

Chapter one of this almost 1300 “manifesto” will give you a basic overview of the modern activity crisis. Like all of the chapters in the book you will get an introduction and an extra field of so called “learning objectives”.

These will answer you in advance what you should have understood after reading a certain chapter. At the end of each chapter you will find a corresponding “self-check”. An audit process that questions/challenges you to rethink what you might have learned.

A great target-performance comparison/variance analysis. You will see which information you receive…and in which new formation it will bring you…from a physical as well as an educational point of view!

Part I is divided into 3 Chapters. Your biggest takeaway will probably be the so called “Bio-Psycho-Social Factors” in disabling back pain.

But, there’s a lot more to explore!

Part II Basic Science

As this chapter’s headline says it’ll provide you with “basic science”. Of course in regards of rehabilitation of the spine! Otherwise “basic science” could mean everything.

Part II is divided into two separate chapters.

Part III- Patient Assessment

What is the most important thing in treating patients? Correct treatment you’d say? No, it’s the patient! It’s all about finding a cure for the “root of the evil” and not just about treating symptoms! Therefore an adequate patient assessment is the foundation for real help!

In Part III of Liebenson’s book you will learn a lot about a patient centered approach.

What’s a “diagnose triage”, assessment of psychosocial risk factors (so called “yellow flags”) quantification of physical performance ability, evaluation of muscular imbalances and proper movement assessment (screening, performance and injury prevention).

Part IV Sustainable Recovery

This part of the book commences with educating the reader about a new understanding of the term “pain”. According to that it will give you ideas how to approach patients and give them reassurance plus reactivation advice (after having been injured).

The chapter emphasizes the treatment of sensitivity in rehabilitation, provides you with a cognitive behavioral therapy program for spinal pain and on top of that will discuss a method of mechanical diagnosis and therapy. 

Part V High-Value Recovery Options for Return to Participation

Disaggregated into 5 chapters, part IV will start with programming from rehabilitation to performance. You will gain knowledge of dynamic variable resistance training, rotational sports and the spine, sparing the spine in barbell training as well as in High Intensity Training (HIT).

Besides Dr. Liebenson you will find a myriad of other contributors in each chapter. Alike in Part IV. Among them i.e. David Joye, Josh Henkin, Max Prokopy, Michael A. Rintala, Joshua Wideman, Brett Wnchester, Michael Hartle and David Whitty.

Part VII Multimodal Options for Recovery

This Part of the book is the most comprehensive one. It offers 9 subitems. Here’s what you will learn about:

  • How to manipulate key joints of the body
  • Manual resistance techniques
  • An approach to postural function
  • Dynamic neuromuscular stabilization
  • Pilates therapy: Exercise for spinal stability
  • Pelvic floor, respectively the integration vs. isolation
  • Treatment of spinal pain in the context of clinical hypnosis and mindfulness-based interventions
  • Yoga exercise respecting dynamic neuromuscular stability principles in senior populations
  • Nutritional considerations for inflammation, pain, and rehabilitation

Part VIII First Principles of Movement: A Systematic Approach

In Part VIII you will learn from Dr. Liebenson and others about an integrated approach to regional disorders, the “Resilience Model” and a clinical framework utilizing a precision approach.

Part IX Interdisciplinary Management

Last but not least the final part will teach you the role of the interventionist, a nonsurgical management of the spine pain patient. Furthermore, you’ll read about lumbopelvic pain in pregnancy, the role and safety of activity in the elderly and  more.

“Rehabilitation of the spine” can be found on amazon for about 100€ (or about 126$). This doesn’t sound cheap at the first glance but if you want to be one of the best, you should definitely invest!

Furthermore, if you narrow it down that’s about 0,077€ (0,097$) per page! Just think of that!

I highly recommend you buying this book and better start studying and applying it. The sooner the better 🙂

Functional Training Handbook Review

Stunning 1300 pages of mind blowing information is not enough for you? Well, then hang in there! I’ll give you a blast of another 450 pages review, of Liebenson’s “Functional Training Handbook”!

If you’re working in the field of strength and conditioning and/or personal-training this book won’t get dusty on your shelf as it’s a practical handbook for everyday use. It comes packed with 450 pages, divided into 5 parts, with 35 separate chapters.

You’ll find Sport-Specific Training Considerations for Basketball, Cycling, Dance, Football, Golf, Hockey, Mixed Martial Arts (MMA), Olympic Weight Lifting, Skiing, Soccer, Swimming, Surfing and Tennis.

Here’s just a little summary of the contents:

  • Fundamentals
  • Sport-Specific Training Considerations
  • Strength and Conditioning Considerations
  • Region-Specific Considerations
  • Motor Control and Athletic Development

Just like “Rehabilitation of the Spine” the “Functional Training Handbook” comes with a code to unlock your free e-book version. Think of the following:

The broader the base, the higher the pyramid”.

The more you know, the more you can apply. So try to be a “learn-it-all” instead of a “know-it-all”.

With Dr. Liebenson’s book you could reach a whole new level of physical training. His practical guide delivers clear, how-to-information, an array of sport-specific guidelines, and key principles that will keep your clients at peak performance.


Join the revolution to improve sports performance, treat injury, and re-train patterns with this comprehensive guide to the body and its movement. I strongly recommend you buying this book as a bundle with “Rehabilitation of the Spine”.

You invest once and profit for a lifetime! But let’s have a closer look to the book:

Part I – Fundamentals

This Handbook commences with “The functional approach”. It continues with “The role of musculoskeletal fitness in injury prevention in sport. Furthermore, you’ll learn how to bridge the gap between from rehabilitation to performance.

In addition to that the book provides you with input about dynamic neuromuscular stabilization, exercise based on developmental kinesiology models.

Moreover, the book stresses the clinical audit process and determines the key link, gives ideas about functional evaluation of faulty movement patterns and closes with fundamentals of training the locomotor system.

And that’s just Part I 😉

Part II Sport-Specific Training

Part II is the centerpiece of this book. It’ll provide you with a “big picture” of sport-specific training considerations. What is there to be found?

Anything, from individual sports like i.e. Golf, Olympic Weight Lifting, Skiing to team sports like e.g. Baseball, Basketball, Football, Hockey etc.

Even Dancing is covered, as well as Surfing, MMA and Tennis.

Part III Strength and Conditioning Considerations

The third part of the “Functional Training Handbook” starts by establishing functional baselines and appropriate training recommendations for off-season conditioning and injury prevention.

It continues with the topic “Running in Sports” and “the Dead Lift”. Off-season considerations are proceeded in terms of Baseball, Basketball, Hockey as well as Soccer.

Surplus you’ll get training strategies for developing explosive power in MMA and other sports!

Part IV Regions-Specific Considerations

The penultimate part deals with region-specific considerations, respectively injury prevention in certain body parts.

Four chapters in part 4 will give you ideas about how to prevent clients from injuries in running sports, knee injuries (in women), rehabilitate shoulder joints in a nonoperative way and how you might treat and prevent injury in the “Overhead Athlete”.

Part V Motor Control and Athletic Development

Last but again not least, the final part will provide you with two trivia chapters, about the principles of athletic development and coaching fundamentals, a skill acquisition perspective!

You can find the latest edition of the Functional Training Handbook i.e. on amazon for just 47€ (49$).

Conclusion

To be honest, it’s an insurmountable task to summarize two books with a total amount of almost 1750 pages in just one blog article. But that wasn’t my intent. I cannot save you from investing time into these books.

If you want to be better in your profession you simply must read AND apply the knowledge from these books on your own!

What I want to emphasize with this little article is what you might learn from these great books and that they are, from my perspective as a “Heilpraktiker” (complementary and alternative medicine practitioner) and Strength Coach/Personal-Trainer, a great investment!

Of course you also have the chance to get only the e-book version of both of Dr. Liebenson’s books. I, for myself, am more “old-school” and prefer the printed version, though.

Plus, as aforementioned, you’ll get the completed contents as e-book on top if you purchase the printed versions.

If you’d like to know why a proper alignment is so crucial you can read my articles:

ALIGNMENT FROM 🗣️ HEAD TO TOES 👣

POSTUREPRO BRAIN COACH PERFORMANCE CERTIFICATION REVIEW

© HP Bernd Stößlein, Master of Business Administration in Sportmanagement.

If you liked this article please share it with your friends, subscribe to the newsletter and/or send me an E-Mail to:

info@bernd-stoesslein.de

Brain Coach Performance Certification is an (online) certification by Annette Verpillot, respectively her Canada-based company named Posturepro. This course is co-hosted by Director of Strength and Conditioning for Basketball, Golf & Tennis, Preston Greene (Florida Gators) and Assistant Athletic Performance Coach, Blake Bender (California Golden Bears).

This knowledgeable triumvirate will tell you how to “rewire” you brain and how to bring a simple and practical understanding of neurology to fitness providers of all levels. An online certification that will equip you with the health and fitness-tools to immediately improve your practice and change the way you work with clients/patients by working with a brain-based approach. 

In this article I’ll give you a glimpse of what I’ve learned and why you also should invest in this education…

Brain Coach Performance Certification – A brain- based approach

What makes this course unique you might ask? Well, it’s definitely the brain- based approach!

The Brain Coach Performance Certification(BCPC) is divided into 6 modules. It includes more than 30 lessons and over five hours of video content! On top you will also have access to all of the updates that will be added by Posturepro while improving the model content based on the users’ feedback!

There is also a private Facebook-Group where you can exchange problems and discuss solutions with other trainers/practitioners.

The BCPC is a brain-based approach on how to better train your clients and athletes. Addressing the brain to build a better foundation is key; if you are not addressing the postural foundation, you are adding more symptoms to what the root cause is. 

Brain Coach Performance Certification – The inner world creates the outer world

If you want to train your clients better you will have to gain insight! That doesn’t mean that you have to be a mysterious esoteric troglodyte wizard with a crystal ball!

It simply has to do with basic human anatomy and how your brain is wired. How you observe and process the world you live in, particularly visually.

What you see, in terms of sensory impulses, and HOW this information is perceived and processed in the correspondent part of your brain (visual cortex) determines your motoric actions!

According to that, postural problems are not always and only limited to misalignments of your musculoskeletal system, but most likely due to neuromuscular problems, especially problems with sensory perception through the eyes.

But before we dig deeper into basic anatomy we’ll start with some word definitions.

If you follow my blog you will have noticed that I’m a huge fan of defining all the used terms. Just to make sure that there are no questions left.

So, let’s start with the company’s name: Posture(pro).

What actually IS a posture? Posture – unlike most of medical terms (who derive from Latin, respectively old Greek) “posture” etymologically most likely derives from Italian postura = posture (Wikipedia, 2020). The suffix -pro is an abbreviation for professional.

Due to that, Posturepro claim to be  professionals in postural issues. Is that true? To make a long story short, I think it is! Just my opinion, but I could be right 😉

Furthermore, my mentor Charles R. Poliquin (R.I.P.) was a big advocate of Posturepro and anyone who knew Charles (aka “Strength Sensei”) also knew, that he didn’t endorse anything he didn’t like! According to that, consider Posturepro to be Strength Sensei approved!

Posturepro Brain Coach Performance Certification – What you will learn

As mentioned in the summary the BCPC is divided into six modules.

  • Module 1: Welcome
  • Module 2: Brain Coach
  • Module 3: Your Feet and Posture
  • Module 4: Your Eyes and Posture
  • Module 5: The Postural Assessment
  • Module 6: Quiz & Certification

A single blog article is sheer too short to address all the modules with their extensive lessons. Lesson 3 & 4, for example, each have 9 sub-lessons you can dig through.

But I’d like to give you a short summary of each modules just to show you a little teaser what you can expect by enrolling/investing in this course.

Module 2: Brain Coach

In Module 2, Lesson one, you will learn about the „missing link”.

According to the BCPC the missing link in most therapy treatments is “(…) the lack of knowledge in the comprehension of how primitive movement patterns are the foundation of all human movement.” (Posturepro, 2020).

The rest of Module 2 will take you step by step through the structural built of your brain. You will learn about the most important brain areas and their functions. These are:

  • The Sensory Cortex
  • How to use sensory input
  • The Motor Cortex
  • The Vestibulospinal Tract
  • The Reticulospinal Tract
  • The Pontomedullary Reticular Formation (PMRF) 

I want to emphasize that the Brain Coach Performance Certification by all means is not an accumulation of foreign words to suggest pseudo competency!

In case you’re not (yet) familiar with the mentioned above here’s a brief etymological explanation:

Cortex derives from Latin and means cortex of the brain (Becher et al., 1995).

Vestibulo/spinal is a composition of Latin vestibular = belonging to the vestibule and Latin spina = thorn, spike, spine/backbone (Becher et al., 1995).

Reticulo/spinal is another compound. Made out of the Latin prefix rete = net, and the aforementioned suffix spina (Becher et al., 1995).

Ponto/medullary Reticular Formation is a construction of Latin pons = bridge, Latin medulla = bone marrow and the already decrypted rete = net (Becher et al., 1995).

In Module 2 of the Brain Coach Performance Certification you will learn more in detail about the built up and function of these terms.

Module 3: Your Feet and Posture

The alignment of the feet is of uttermost importance! You can also read about that in my article: “Alignment from head to toes” and in the “Freo Foot Care System Review”.

Module 3 is divided in 9 sub-categories, respectively 9 lessons. In these you will learn about:

  • The neurophysiology of the feet
  • How to find out if you suffer from an foot imbalance
  • The pathology of flat feet
  • The movement efficiency of the ankle
  • How to fix feet imbalances
  • About ankle force production
  • Movement efficiency of the knee
  • Force production for the knee

Module 3 will also back up the recommendations with studies. Therefore you can dig even deeper into a particular topic.

Module 4: Your Eyes and Posture

The role of the eyes, respectively the conscious processing of visual stimuli plays an extreme important, yet all too often neglected role in postural problems, respectively sports performance!

In the Brain Coach Performance Certification you will learn about how divergent sensory input might negatively affect the visual information processed in your occiput, which is Latin occiput = back of the head (Becher et al., 1995).

Module 4 is divided in 9 sub-categories, respectively 9 lessons. In these you will learn about:

  • Neurophysiology of the eyes
  • How to test for an eye imbalance
  • Eye Exercises  à check spelling error in module 4 exCercises
  • Movement efficiency of the back
  • The lox back fixing imbalances
  • Low back force production
  • Movement efficiency of the shoulder
  • Fixing shoulder imbalances
  • Shoulder force production

Module 4 is the most practical oriented module. By the way I’m aware of the irony of saying “practical” in an online seminar 😉 But let’s put it this way. It’s the module with the most exercises in the program.

Preston Greene and Blake Bender will guide you through efficient exercises that are (not only) useful if you work in the strength and conditioning profession.

Module 5: The Postural Assessment

The Brain Coach Performance Certification is more of an advanced course as it challenges you with a lot of (new) input. In chapter 5 you will find the longest videos of the course, up to about 30 minutes for a single lesson.

Module 5 is divided in 4 sub-categories, respectively 4 lessons. In these you will learn about:

  • Recap of the Brain Coach
  • The sensory receptors
  • The postural assessment
  • More about Brain Coach Posturepro

Module 6: Certification

In order to accomplish the Brain Coach Performance Certification this course finishes with a quiz. To successfully pass, you’ll have to answer the questions correctly to demonstrate what you have learned.

The course closes with a “Thank You” by Annette Verpillot.

What will you get as a bonus?

As if the course wouldn’t be enough you also get a cornucopia of extras, including:

  • BONUS 1: 30 mins One-on-One Business Development Call with Annette Verpillot (value: $500)
  • BONUS 2: FREE Access to our Facebook Practitioner Group (value: $500)
  • BONUS 3: Get listed on the Posturepro Website as a Provider (value: $850)
  • BONUS 4: Gain Access to Peer-Reviewed Studies (value: $250)

Posturepro Proprioceptive Insoles

A proprioceptive insole? What’s that I can hear you ask… Well it’s a “cool tool” you will learn more in depth in the Brain Coach Performance Certification. I’ll give you a short summery though.

The guys from Posturepro describe it this way:

The Proprioceptive Insoles excite the hundreds of thousands of nerve cells loaded in the soles of your feet. Studies show that a textured insole is optimal to arouse postural muscles and elicit benefits ranging from improved balance to improved gait patterns.” (Posturepro, 2020).

Different kinds of Posturepro Proprioceptive Insoles.

As you will learn in the course, numerous  studies have confirmed that the feet are part of how your brain manages movement.

According to this, your body utilizes information from your feet to create the proper postural strategy to stand upright, which is quite an energy-consuming task if you suffer from (structural) imbalances!

The postural insoles are designed and supposed for the purpose to correct foot misalignments.

They work by activating your skin’s mechanoreceptors, by changing the way that the motor cortex is projecting onto your muscles, allowing each foot to send the same (and propper) information to the brain.

Mechano/receptor derives from Greek mechan(o) = “with the help of tools”, “caused by mechanic action” (Becher et al., 1995); and Latin recipere = “to take back” (Frag Cäsar).

So, literally translated, mechanoreceptor means: “with the help of tools (something is) taken back”.

With the help of these insoles you’re supposed to have an enhanced coordination of movement and furthermore improved via several motor tracts (reticulospinal and vestibulospinal).

Posturepro states that:

Because the insoles work with the movement center of the brain, we can see changes in alignment, stability, and pain reduction in a very short amount of time.” (Posturepro, 2020).

Brain Coach Performance Certification Conclusion

In the end of each blog article I like to draw a conclusion. Likewise with the BCPC-course. To make a long story short, you probably just want to hear my answer to one simple question:

Would I recommend taking this course?

And the answer is: yes! From my point of view it was definitely an investment. Sure, it will take you time, not only to work through the extensive video material but also to have all the information settle and digested.

Having absorbed all the new information you are, as the word says, in a new formation. This will give you new tools for your “health tool box” while treating patients and/or clients.

Remember, if you only have a hammer, everything looks like a nail!

Let’s have a brief talk about the investment. In EUR it’s 390 € (429 US $). You’ll probably have noticed that I wrote “investment” instead of “cost”.

If you invest, you will get a so called “return on investment”. Which means at first you “spend” some money, but in the long run you will profit from the knowledge you have gained.

Therefore I address you to learn more, to earn more! And please rather be a “learn it all” than a “know it all”. The only thing I know for sure, is that I don’t know anything for sure!

© HP Bernd Stößlein, Master of Business Administration in Sportmanagement.

If you liked this article please share it with your friends, subscribe to the newsletter and the blog.

If you like to book a professional online/offline consultation please feel free to contact me:

 info@bernd-stoesslein.de


Literature

Posture, source: https://fr.wiktionary.org/wiki/posture, access from 13.7.20.

Posturepro, Module 2, Lesson 1, The missing link, 2020.

Lateinisch-griechischer Wortschatz in der Medizin, p. 53.

Lateinisch-griechischer Wortschatz in der Medizin, p. 62.

Lateinisch-griechischer Wortschatz in der Medizin, p. 131.

Lateinisch-griechischer Wortschatz in der Medizin, p. 132.

Lateinisch-griechischer Wortschatz in der Medizin, p. 176.

Lateinisch-griechischer Wortschatz in der Medizin, p. 207.

Lateinisch-griechischer Wortschatz in der Medizin, p. 207.

Lateinisch-griechischer Wortschatz in der Medizin, p. 246.

Recipare, Quelle: https://www.frag-caesar.de/lateinwoerterbuch/recipere-uebersetzung-1.html, acces from 13.7.2020.

Conegrip Forearm and Finger Trainer (affilate link) are – as the name suggests – cone-shaped grip strengthening tools. Nothing new under the sun you might think, but it is! As most tools designed for enhancing grip strength are cylinder- shaped! Well, Bernd, “no big deal” I can hear you say. But think again! In this article I’ll tell you more about the importance of gripping power in strength training, how you might benefit from it (in Team-Sports i.e. like Basketball, Football, Soccer, etc.) and what distinguishes the Conegrips (affiliate link) from cylinder-shaped grip tools.

How to recruit more muscle fibers in your hand, like the abductor digiti minimi and much more.

Get a grip…

How to become a Conehead

Ok I cannot resist to make this joke about the Coneheads…come on, it’s too good not to make it! For those of you who are old enough to remember, “Coneheads” is a 1993 movie, starring Dan Aykroyd, about cone-headed aliens who try to live a normal people’s life on earth 🙂  

But, what I’d like to stress with the sentence “how to become a Conehead” is actually that you should start to think about the benefits of a cone-shaped grip strength tool!

Cone Grips, sourcet © 2016–2020 ConeGrip.

Let’s start with the basics. What actually is a cone? Well, according to Wikipedia a cone is:

“(…) a three-dimensional geometric shape that tapers smoothly from a flat base (frequently, though not necessarily, circular) to a point called the apex or vertex.

A cone is formed by a set of line segments, half-lines, or lines connecting a common point, the apex, to all of the points on a base that is in a plane that does not contain the apex. Depending on the author, the base may be restricted to be a circle, any one-dimensional quadratic form in the plane, any closed one-dimensional figure, or any of the above plus all the enclosed points. If the enclosed points are included in the base, the cone is a solid object; otherwise it is a two-dimensional object in three-dimensional space. In the case of a solid object, the boundary formed by these lines or partial lines is called the lateral surface; if the lateral surface is unbounded, it is a conical surface.” (Wikipedia, 2020).

Why are you telling me that, you might wonder? Well, it will make sense within a second when we switch from basic geometry to basic human anatomy.

The Art of Grapping and punching

In martial arts, self-defense techniques (like Krav Maga and others) or law enforcement you have to grab i.e. forearms, which are more like cone- shaped instead of a cylinder….

That’s where a strong grip comes into play and how you can transfer your efforts in the gym to “the real deal”. You apply what you have strengthened “in the trenches”.

The more you train with thicker grip implements, like the cone grip, the more motor units you might recruit. This will inevitably lead to improved overall upper body strength and useful skills, both in you specific sport and profession.

It’s not like simple “show off” muscles, but something you can really use!

If you want to know more about grip training you can read my article about the “Gripedo”.

So, what does all that have to do with cone-shaped grip devices? Well, if you have ever been engaged in any kind of martial arts and/or self-defense technique you might have realized that if you clench a fist and strike an object, the toughest knuckles are the first two ones.

The  third finger and the pinky (see image below) are commonly the lesser reliable “strike-buddies”.

The third (ring finger) and the pinky are commonly week(er) fingers for gripping and/or striking with a clenched fist. Source, own picture.

Why is that so? We will see in a minute.

First, think of another similar phenomenon…if you have ever trained with Barbells/Dumbbells or any kind of grips that are above 30 mm of diameter (50mm and above) you probably will have realized, that you most likely develop the most gripping power (fist clenched) with the thumb, the index- and the middle-finger.

The ring finger and the pinky can be closed too, but are normally not that involved in gripping (a cylinder-shaped) object, like the rest of the hand!

According to my anecdotal experience with myself and lots of patients and clients that might be due to our “cone-shaped” hand.

Cylinder-shaped grip-tools in different sizes, source: own picture.

If you take a look at the comparison of the cylinder-shaped gripping tools and the cone grips the difference is obvious. Whereas it’s troublesome to create a “gripping-equilibrium” in all five fingers using cylindric tools,  it is much easier using the cone-shaped ones.

The extra load, respectively the stress you put on the hand muscles should also create a greater training effect, especially on the abductor digiti minimi. “

It is  “(…) a skeletal muscle situated on the ulnar border of the palm of the hand. It forms the ulnar border of the palm and its spindle-like shape defines the hypothenar eminence of the palm together with the skin, connective tissue, and fat surrounding it. Its main function is to pull the little finger away from the other fingers (i.e. abduction).” (Wikipedia, 2020).

Well, aductor digiti minimi? Sounds funny…but I have never heard of that one, you might think. Is it important? Well…if you ask me, when it comes to gripping strength, it definitely is. That’s just simply the fact as in gripping strength the more equals the better!

Ad/ductor derives from Latin ad = after, to; and Latin ducere = to draw/pull sth. (Becher et al., 1995).

Digiti derives from Latin digitus = Finger (Becher et al., 1995).

Minimi comes from Latin minor = smaller (Becher et al., 1995).

To set the record straight: gripping strength is an absolute necessity when it comes to professional strength training/coaching, no matter which sport or profession you’re into!

It clearly isn’t limited to arm wrestling or gripping competitions!

Unfortunately the development of proper grip strength is still one of the most overlooked and neglected issues -not only- in sports performance. At least to my experience.

How to usefully implement Cone Grips?

The next question is how you can usefully integrate these cone-shaped training devices in your workout.

Well, as always, the answer to that question is: “it depends”. It clearly depends on your training age and the experience you have gained in the gym.

Let’s say you’re a novice lifter with training age of zero years. Would it be useful to jump start training with thick implements? I’d say: no.

You wouldn’t lend a novice driver your new Porsche GT 2 RS, would you?  The answer to this rhetorical question is obvious: “hell no!”.

Same with special thick gripping implements like the Cone Grips (affiliate link)! But, if you have a training age of, let’s says, two continuous years with regular strength training (4 times a week) you should absolutely consider using them.

By the way, your training age has nothing to do with your biological age! You can be comparatively young (i.e. 18 years of biological age) and have a higher training age as someone being (biological) age 50.

Training age depends on how many consecutive years you have spent with PROPER training!

According to this, an 18- year- old with 3 years of consecutive, structured and regular strength training can have a higher training age as the 50 year old who just started working out!

The variation in grip diameter will bring more progression and stimuli to your workout and your body! This will result in new neuromuscular adaptations, increased strength and hypertrophy!

Just switch from your regular 30mm diameter grips to the cone grips. They can be implemented on almost any regular Barbell and/or Dumbbell, gripping devices, machines etc.

In this picture i.e. you can see me in my Personal-Training Gym, using the Cone Grips while performing bench press, using other special tools, like my BambooBench®, weight releasers and a monolift.

Me useing the Cone Grips while performing bench press, source: own picture.

By the way, look at the time of the screenshot (22:22) that’s synchronicity! If you’d like to know more about this interesting phenomenon I highly recommend you reading the works of Carl Gustav Jung (affiliate link)!

Back to the thick implements, respectively the Cone Grips. If you start using them don’t be surprised that you might experience a slight drop off in your weights. As you cannot close your hands as much as you were used to, gripping starts get harder.

That’s clearly not a disadvantage but you should be aware of that obvious fact.

Which exercises are predestinated for using Cone Grips (affiliate link)? Well, essentially all exercises!

I’d highly recommend using these special grip tools on all kinds of arm exercises, for different variations of pull ups, bench press and other back exercises.

You just have to ask yourself whether it’s an exercise you want to improve your grip strength on or if you don’t want your grip to be the “limiting factor”. That might be the case on deadlifts for example.

If you want to challenge yourself by deadlifting with a thicker grip you’re good to go. But if you want to emphasize other muscles more, skip the Cone Grips for that workout. Just start playing with the use of them.

Cone Grips are a useful variation in a structured periodical and goal oriented training regime.

If you’re unsure how to usefully integrate such devices in your workout, please feel free to contact me for a professional Strength-Coach/Personal-Training (Online)-Consultation :

info@bernd-stoesslein.de

Conclusion ConeGrip

Let’s draw the mandatory conclusion of the implementation of Cone Grips (affiliate link). To make a long story short: should you use them? From my point of view that’s a “Hell yes!”. But you should take in consideration when and how!

Being a novice lifter you should start with basic stuff to gain lifting experience. After having gained a proper lifting age of two years or above, I think you’re good to go using the Cone Grips!

There are lots of thick grip implement tools which have a cylindrical shape. The Cone Grips are superior in design, as the cone-shape structure has a higher transfer effect to sports and professions (i.e. law enforcement, first responders etc.).

In addition to that, a cylinder will give you the chance to further recruit muscle fibers in your fingers and hand, like the aductor digiti minimi.

Something with the surname “minor” doesn’t seem to be something being of consideration when it comes to strength training but in terms of grip strength every muscle fiber counts!

But of course Cone Grips are not the “magic pill”. If you fail to proper plan your workouts you plan to fail, as the saying goes!

Or, if you put it this way, if you don’t know how to design your training program for your specific needs the Cone Grips won’t do the “magic” for you either!

Cone Grips are an investment in your strength training, they are affordable, portable, versatile and easy to use and clean.

Conclusion: go and get a pair!

© HP Bernd Stößlein, Master of Business Administration in Sportmanagement.

If you liked this article please share it with your friends, subscribe to the newsletter and the blog.

If you like to book a professional online/offline consultation please feel free to contact me: info@bernd-stoesslein.de


Literature

Cone, source: https://en.wikipedia.org/wiki/Cone, date of access: 6.7.20.

Abductor digiti minimi muscle of hand, source: https://en.wikipedia.org/wiki/Abductor_digiti_minimi_muscle_of_hand, date of access: 6.7.20.

Lateinisch-griechischer Wortschatz in der Medizin, S. 3

Lateinisch-griechischer Wortschatz in der Medizin, S. 31.

Lateinisch-griechischer Wortschatz in der Medizin, S. 69.

Lateinisch-griechischer Wortschatz in der Medizin, S. 137.